I’m focusing in this post on how to easily brine a turkey. Brining is the easiest, best way to ensure moist, flavorful meat in your perfectly cooked turkey. Once you’ve brined it, you are ready to roast, fry, or smoke your moist turkey to perfection.
Ah the majestic wild turkey. A formidable opponent in the field, a culinary delight on the table. But let’s be honest sometimes that wild turkey meat can be a bit on the dry side. That’s where the magic of brining comes in.
Brining is the process of soaking your turkey in a salty solution, which helps to break down muscle fibers and retain moisture. The result? A juicy, flavorful bird that will have your taste buds singing. And what better way to brine your turkey than in a trusty Grizzly Cooler?
Why Brine a Turkey in a Cooler?
There are several reasons why using a cooler for brining is a great idea:
- Space: Coolers offer ample space for your turkey to soak comfortably, unlike your fridge which might be cramped.
- Temperature control: A cooler helps maintain a consistent, cool temperature, essential for safe brining.
- Portability: Need to transport your brined turkey? No problem! Just grab your cooler and go.
- Versatility: You can use a cooler for both wet and dry brining methods.
How to Brine a Turkey in a Cooler: A Step-by-Step Guide
1. Prepare the Brine
Wet Brine:
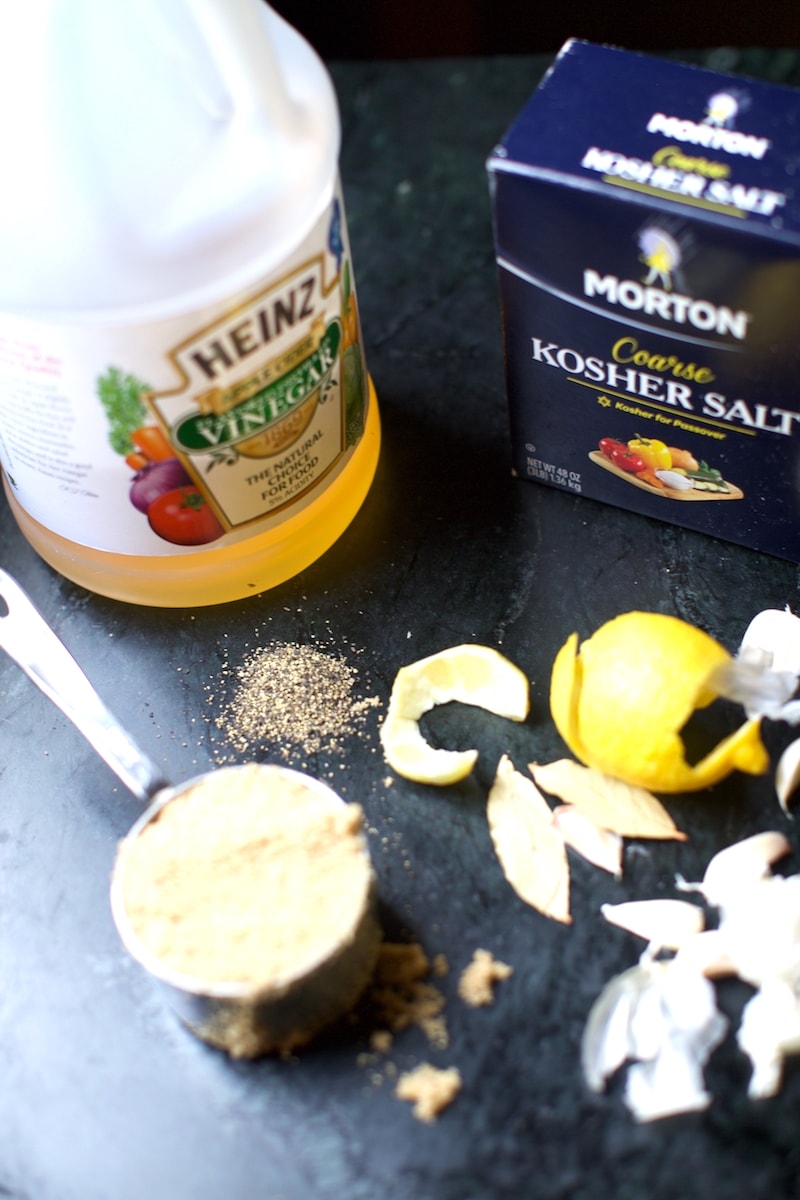
- In a large pot, combine 1 gallon of water, 1 cup of apple cider vinegar, 1 cup of brown sugar, and 1 cup of salt.
- Bring to a boil, stirring until the sugar and salt dissolve.
- Allow the mixture to cool completely.
- Add 4 cups of ice to the mixture.
Dry Brine:
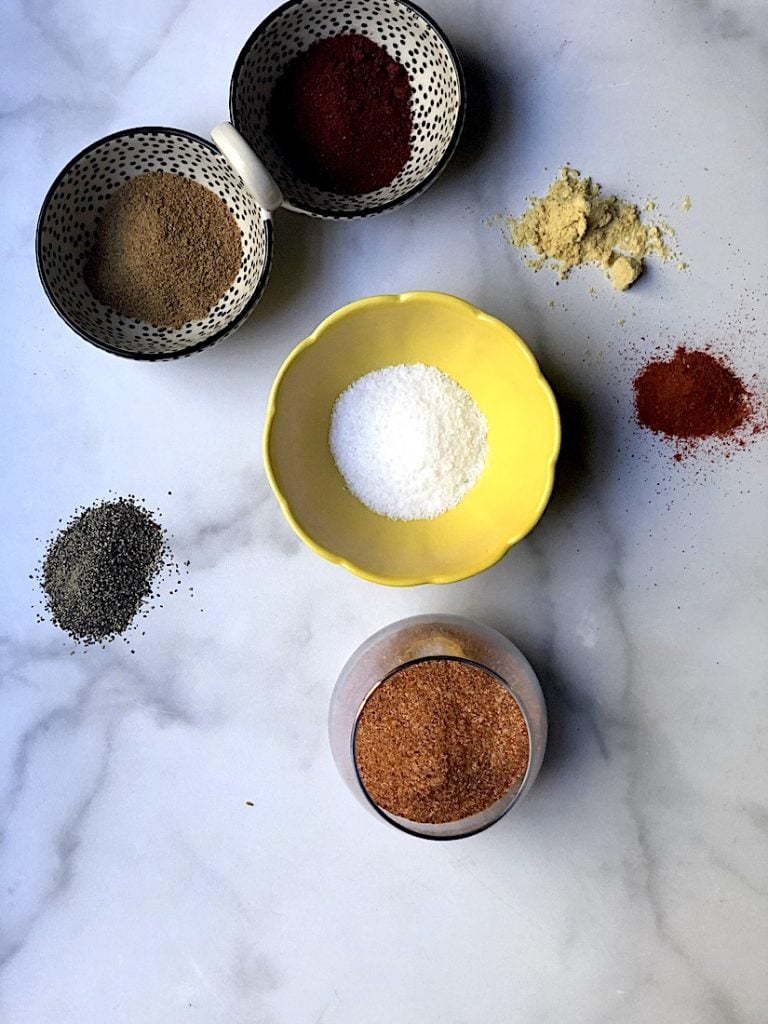
- In a medium-sized bowl, mix 1/2 cup Kosher salt, 1/4 cup brown sugar, 2 sprigs of fresh rosemary (minced), and 3 tablespoons garlic powder.
2. Prepare the Turkey
- For wet brining: Submerge the thawed, cold turkey completely in the brine solution.
- For dry brining: Pat the turkey dry and coat it evenly with the dry brine mixture.
3. Brine the Turkey
- Wet Brining: Place the cooler in a cool location (ideally between 35 and 40 degrees F). Submerge the turkey in the brine solution, ensuring it’s completely covered. Add ice as needed to maintain the temperature. Brine for 24 to 48 hours.
- Dry Brining: Place the turkey uncovered in the refrigerator. Brine for 24 to 48 hours.
4. Rinse and Cook
- Wet Brining: Remove the turkey from the brine and rinse thoroughly with cold water. Pat dry before cooking.
- Dry Brining: Rinse the turkey thoroughly with cold water and pat dry before cooking.
5. Cooking Methods
- Roast, fry, or smoke your brined turkey to perfection!
Tips for Brining a Turkey in a Cooler
- Use a food-grade cooler to avoid any contamination.
- Ensure the cooler is large enough to accommodate your turkey comfortably.
- Check the temperature of the cooler regularly, especially for wet brining, and add ice as needed.
- Don’t brine your turkey for too long, as it can become overly salty.
- Experiment with different flavors and spices in your brine to create unique taste profiles.
Brining your turkey in a Grizzly Cooler is an easy but reliable method to guarantee a flavorful, juicy bird. You can have a delicious Thanksgiving feast that will have your guests begging for seconds with just a little planning and preparation. So gather your ingredients, start brining, and get ready to enjoy the wonders of a flawlessly cooked turkey!
How Do You Brine a Turkey? the Basics
There are two types of brine: a wet brine, and a dry brine. I use both, depending on the method I intend to use to cook the turkey.
Salt is a key component in both brines. The salt breaks down the muscle and enables water to be absorbed into the meat.
Wet Brine vs. Dry Brine
Both wet brines and dry brines have their advantages and disadvantages. Both will take up refrigerator space, but the wet brine will take up the most since the bird has to be completely submerged. Below, I’ll cover the solution to that problem.
In essence, a wet brine plumps up the bird with moisture. The turkey absorbs up to 40% more water in a wet brine. Because the salt breaks down the muscle, water can enter the meat and remain there while it cooks.
A wet brine ensures moist meat, to be sure. However, unfortunately, the flavor of the turkey may suffer. With a wet brine, you may be left with an overly moist but bland-tasting bird. One solution is to add more aromatics like bay leaves, garlic, peppercorns, whole spices, rosemary, and thyme.
In a dry brine, the salt draws moisture out of the meat, mixes with it, and then re-enters the meat. The moisture in the bird is preserved during cooking by dissolving the protein and muscle fiber in a dry brine. You will still need to set aside space in the refrigerator for the bird to brine, though usually not as much as if you were using a wet brine.
Though a dry brine may not be quite as moist, it really packs in the flavor.
How to brine a turkey in a cooler
FAQ
What kind of container can I brine a turkey in?
What happens if you don’t have room in the fridge to brine a turkey?
Can you brine a turkey outside the fridge?