Most countries have some dishes that will remind most of their people of moms home cooking. In Japan, Salmon Onigiri (鮭おにぎり) comes near the top of that list. This self-contained meal has soft flakes of salt-cured salmon wrapped in a layer of rice. It’s the perfect combination of tasty and portable, so busy families on the go love it. Although onigiri is often translated as “rice ball,” its based on the verb “nigiru,” which means “to clasp. Even though it’s very easy to make, the best Salmon Onigiri can be made with the right techniques and ingredients. Here are all the tips I’ve learned. [feast_advanced_jump_to].
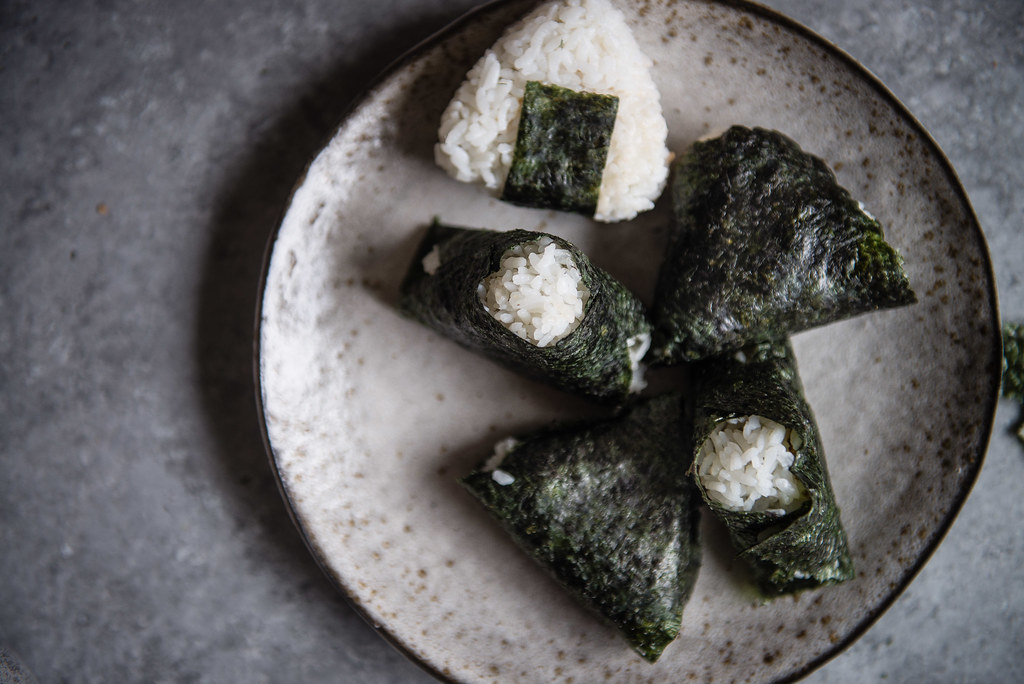
Onigiri, also known as Japanese rice balls, are a popular snack and light meal in Japan. They are made from cooked rice formed into triangle or oval shapes and often wrapped with nori seaweed. Onigiri are highly customizable, and one of the most beloved fillings is salmon. The savory, salty salmon flakes pair perfectly with the sweet Japanese short-grain rice.
In this article, I’ll walk you through everything you need to know to make incredible salmon onigiri at home, just like they serve in Japan.
A Quick Overview of Onigiri
Before jumping into the salmon onigiri recipe let’s do a quick overview of what exactly onigiri are and what makes them special.
Here are some key facts about onigiri:
-
Onigiri are made from Japanese short-grain rice which gets sticky when cooked This allows the rice to hold its shape
-
They are formed into triangle, ball, or oval shapes by pressing the rice gently in the palms of your hands.
-
Traditionally they are wrapped with a strip of nori seaweed, which adds flavor, texture, and helps keep the shape intact.
-
Common fillings are salty/savory foods like salmon, tuna, pork, chicken, fish roe, pickled plums etc. This provides a nice contrast to the sweetness of the rice.
-
Onigiri make an ideal quick snack or portable meal similar to a sandwich.
-
They are widely available in convenience stores across Japan, but homemade is best!
So let’s get down to the specifics of how to make onigiri with salmon inside!
Ingredients for Salmon Onigiri
Salmon onigiri only require a few simple ingredients:
- Japanese short-grain rice
- Salmon fillet or cured salmon flakes
- Nori seaweed sheets
- Salt and water
For the best results, use authentic Japanese short-grain rice like Koshihikari. The high starch content gives the rice its signature sticky, chewy texture that allows the onigiri to hold its shape.
For the salmon, you can use a fresh raw salmon fillet which you bake or grill until cooked through and flaky. Alternatively, you can use store-bought cured salmon flakes which are pre-cooked and often come in convenient pouches.
Nori seaweed sheets are what’s used to wrap the onigiri. Look for the ones labeled for sushi-making which come toasted. The crisp texture and ocean-y flavor of the nori complements the rice and salmon perfectly.
And just a pinch of salt dissolved in water is used when shaping the onigiri to season the surface and help it stick together.
That’s really all you need! Now let’s get to the fun part – shaping and filling the onigiri.
How to Make Salmon Onigiri Step-By-Step
Here is a step-by-step overview of how to make picture-perfect salmon onigiri:
Cook the Salmon
If using fresh salmon fillet: Preheat your oven or toaster oven to 400°F. Place the salmon fillet on a baking sheet skin-side down. Bake for 10-12 minutes until opaque and flakes easily with a fork. Allow to cool before handling.
If using cured salmon flakes: No cooking required – just open the pouch.
Once cooled, remove any bones or skin from the salmon and gently break into bite-sized flakes using your fingers.
Cook the Rice
Cook your Japanese short-grain rice according to package instructions. For stovetop, use a rice cooker, or try my foolproof stovetop rice cooking method.
After cooking, allow the rice to steam for 10-15 minutes before using for onigiri. This helps maximize the stickiness.
Shape the Onigiri
1. Wet your hands: Pour some water into a small bowl and dissolve a pinch of salt in it. Wet your hands in this salty water – this seasons the rice and helps shaping.
2. Add the rice: Grab a handful-sized mound of rice and lightly pack it into a ball shape in your palms.
3. Make an indentation: Use your finger or the handle of a spoon to make an indentation in the top of the rice ball.
4. Fill with salmon: Place a tablespoon or so of the salmon flakes into the cavity, gently pressing them in.
**5. Cover and mold: **Add another layer of rice over the salmon to enclose it, then gently mold and press the onigiri into a triangle, oval or ball shape, rotating it in your palms.
6. Lightly compress: Finally, gently squeeze and compress the onigiri just enough so it holds it shape. Be careful not to over-handle the rice or it will get dense.
7. Wrap with nori: Cut your nori sheets into 2-3 inch strips. Wrap a strip around the base of the shaped onigiri and overlapping the edges. The nori will stick to itself.
That’s it – enjoy your homemade salmon onigiri! They are best eaten right after shaping but will keep in the fridge for up to 2 days.
Tips for Making Perfect Salmon Onigiri
Follow these tips for salmon onigiri that look and taste just like you’d find in your favorite sushi shops:
-
Use freshly cooked rice straight from the steamer for maximum stickiness. Rice that’s been chilled will not bind as well.
-
Don’t overfill the onigiri center with salmon. A tablespoon is plenty – too much can cause the onigiri to fall apart.
-
When shaping, use gentle but firm pressure. You want to compress the rice just enough to stick together, but not so much that it becomes dense and hard.
-
Brush any rice grains off the nori before wrapping so it adheres cleanly to the seaweed.
-
Wrap each onigiri right before eating for crispiest nori texture.
-
Customize your onigiri with additional fillings like Japanese mayo, soy sauce, sesame seeds etc.
-
Don’t skip the salty water step! This lightly seasons the surface of the rice.
-
Experiment with making triangles, rectangles, balls or ovals – all are common onigiri shapes.
With a little practice your salmon onigiri will look like a pro made them!
Storing and Serving Salmon Onigiri
Onigiri are best enjoyed fresh. But if you need to make them in advance, here are some storage tips:
-
Store wrapped onigiri in an airtight container and refrigerate for up to 2 days.
-
For longer storage, individually wrap each onigiri tightly in plastic wrap and freeze for 1-2 months. Thaw before eating.
-
Let frozen onigiri sit at room temperature for 15 minutes before microwaving to prevent the nori from toughening.
-
If microwaving, add a damp paper towel to trap steam and prevent dryness.
Onigiri make an ideal quick lunch or snack any time of day. They are also commonly taken along for lunches and picnics throughout Japan.
Some tasty items to serve alongside salmon onigiri include:
- Miso soup
- Fresh salad
- Pickled vegetables
- Green tea
And that covers everything you need to know to make mouthwatering salmon onigiri at home! I highly recommend giving this classic Japanese snack a try. The combination of savory salmon, sweet rice, and crispy nori is simple but so satisfying.
How to Make Salmon Onigiri
Place the salmon on a baking sheet lined with paper towels the day before you want to make the onigiri to cure. The paper towels will help drain off any liquid the salmon releases. Sprinkle about a teaspoon of salt evenly over the surface of the fish. The salted salmon can be kept in the fridge for up to 3 days.
When youre ready to cook the salmon, place it skin-side down in a non-stick frying pan. Add two tablespoons of sake, cover the pan with a lid, and turn the heat on to medium-high. Once the sake reaches a rolling boil, lower the heat to sustain a gentle simmer. Set a timer for three minutes. Steaming the salmon ensures a uniformly tender and fluffy texture while the sake infuses the fish with umami.
When the timer is up, transfer the salmon to a clean surface. When its cool enough to handle, peel off the skin and remove any pin bones. Now, use your fingers to gently flake the salmon apart. You can make the flakes even smaller by rubbing them between your fingers.
Cut out a piece of plastic wrap and sprinkle a pinch of salt on it. This will be your salmon onigiri. This will lightly salt the exterior of the onigiri. Put a big pile of cooked rice in the middle of the wrap and make a small hole in the middle. Put a lot of salmon flakes in the hole and then add another layer of rice on top of them.
To form the onigiri, lift the bottom edge of the plastic wrap and fold it over the rice. Bring the top corners down over the rice to make a triangular bundle. Shape one hand like a “U” and place the bundle of rice in it. Shape the other hand like a “V” and press your hands together to lightly compress the rice. To make a great onigiri, the pressure must be just right—enough to keep the shape, but not so much that it becomes dense and heavy. Another option is to use a plastic onigiri mold which will make these easier to shape.
As for the nori strips, Id recommend wrapping your salmon rice balls when you plan to eat it. This ensures the seaweed remains crisp, creating a delightful textural contrast with the soft rice and moist salmon. The nori strip should be wrapped around the back of the onigiri like a blanket, with the shiny side facing out. Then, fold the edges over and press them gently into the rice.

Why This Recipe Works?
- The salted salmon flakes stay moist and tender when you use salmon that has been marbled a lot.
- The salmon cooks evenly when steamed, so it has a tender, fluffy texture with no tough or dry spots.
- By lightly salting the outside of the onigiri and moderately salting the salmon, you can make sure that each rice ball is evenly seasoned.
- To make a salmon onigiri that is light and fluffy, you need to squeeze it together just enough to keep its shape without packing the rice down too much and making it dense.

- Salmon: To get moist and tender flakes, I like to use salmon fillet that has fat mired into it. Most people have the most fat around their bellies. I also like to use salmon that is bright orange or pink because it makes the filling look good. Other types of salmon, like Atlantic, King, or Sockeye, will also work. I used Coho Salmon because it was in season.
- Salt—The salt cures the salmon by osmosis, which takes away the fish’s extra water. This not only keeps the salmon fresh, but it also adds seasoning and brings out its flavors. I like to use mojio (or moshio), a traditional Japanese sea salt, because it has seaweed in it, which gives the salt umami. I don’t think soy sauce is a good way to cure salmon because it will turn it brown.
- I like to steam salmon with sake because it adds a light, fragrant flavor and brings out the umami in the fish. Water will work if you can’t find sake, but it won’t taste as good.
- Japanese Short-Grain Rice—This type of rice, which is sometimes called “sushi rice,” has a lot of amylopectin compared to amylose. This makes it sticky, which helps your onigiri stay in shape. Long-grain rice won’t work because it’s not sticky enough to keep everything together. Discover more about this and learn how to cook it in my guide on how to make Japanese rice.
- Nori: Sheets of nori seaweed give the salmon onigiri a crisp texture and a salty flavor that balances out the rich salmon and sweet white rice. They also keep the onigiri from sticking to your hands. I’m not getting paid to say this, but Numata Nori is my current favorite brand.
Salmon Onigiri Filling (Rice Balls)
How do you make a salmon onigiri?
Swap it out or mix & match your fillings. Here are a few ideas: Step 1: In a medium-sized bowl, make the onigiri filling by combining flaked salmon, Japanese mayo, soy sauce, sesame oil, rice vinegar, & sriracha (if using). Set aside. Step 2: Dip your onigiri mold in cold water (this makes it easier to remove the salmon rice ball later).
Can you use salmon flakes to make onigiri?
In addition to using the salted salmon flakes to stuff onigiri, they can be folded into cooked rice to make salmon mazégohan (mixed rice). This can then be used to make onigiri. It’s a more colorful alternative to filling these Japanese rice balls because you can see the pink flakes of salmon mixed into the rice.
How do you make salmon onigiri in a rice cooker?
To make the salmon onigiri you’ll need 2 rice cooker cups cooked Japanese short-grain rice. Place a sheet of plastic wrap in front of you and sprinkle it with a pinch of salt. Add a mound of rice to the center of the wrap and make a well in the center using a spoon. Fill the well with a generous amount of salmon.
Which rice should I use for salmon onigiri?
Cooked Rice: For this Salmon Onigiri recipe, we’re going with sushi rice – a short grain rice that has a nice chew & much stickier than long grain rice. If you use long-grain rice (such as jasmine rice) or brown rice, you’ll find your onigiri easily falling apart because it doesn’t have that same stick consistency.