In Absolute Best Tests, our writer Ella Quittner breaks the rules in her own kitchen to find the truth. She’s grilled more porterhouse steaks than she can remember, tried so many kinds of bacon that it would scare a cardiologist, and rated potatoes from “most forgettable” to “potatoes we’d like to marry.” ” Today, she tackles shrimp.
Humankind’s first known shellfish feast occurred sometime around 163,000 B. C. , in a cave on the southern coast of South Africa. A bowl with about twenty edible animals was found many thousands of years later. It contained mussels and at least one barnacle that had lived on the belly of a whale.
Humankind’s most bizarre known shellfish feast occurred sometime around 7 a. m. last Tuesday in my apartment. I was the only one there with a pound of butter and more shrimp than would fit in my crisper drawer. I emerged several hours later, grease-battered, weary, and surprised by several of my findings. It was, in other words, an average Absolute Best Tests trial day.
There were a lot of extras and spices in the recipes that I took out. What I did leave were basic things like oil, butter, lemon, salt, red pepper flakes, cayenne, and garlic. I used shrimp of different sizes, sometimes with the shell or head still on and sometimes peeled, depending on what worked best for the recipe. My salt of choice is Diamond Crystal.
A quick note on the difference between shrimp and prawns: Brette Warshaw says in her book Whats the Difference? that “anyone who tries to tell you that shrimp and prawns taste different is wrong.” As for the differences between the two shellfish, Warshaw says, “Both shrimp and prawns are decapods, which means they have ten legs and an external skeleton.” Prawns live in fresh water, while shrimp can come from either fresh water or salt water. Generally speaking, prawns are larger than shrimp—though this depends on the species. ” All of the methods below can be used with either prawns or shrimp.
I tested this method with both shell-on and peeled shrimp. The latter was fine, with shrimp that were less tender than some of the slower-cook methods like roast. But the shrimp that passed the shell-on test were buttery and juicy, and they stole the show (while I ate shrimp in the morning barefoot). I think the extra layer kept the shrimp from drying out as fast when they were cooked over high heat. Along with the lemon, fat, and seasoning, the shell kept the meat more hearty and flavorful than the peeled batch.
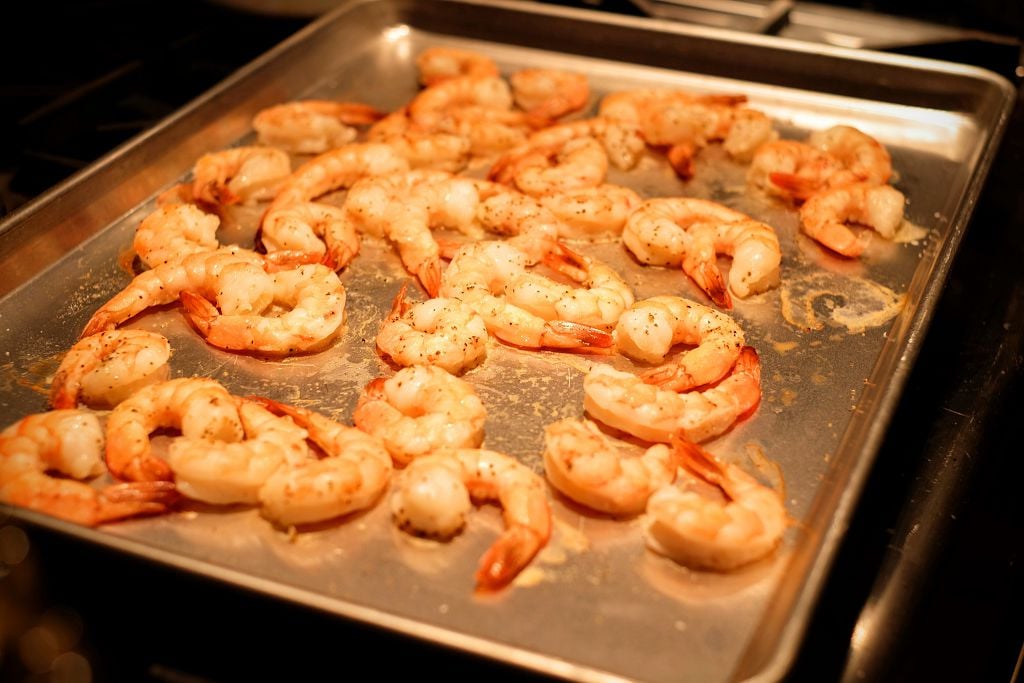
Instead of searing the shrimp over high heat for about 8 minutes, roasting them at a steady temperature made the meat sweeter and softer than the sear batch. The garlic, which started to caramelize into sweet and sticky bits on each shrimp, was what really made it stand out. I ate a whole half-batch myself before 8 a. m. Over rice, with a drizzle of soy and tart vinegar, they could overthrow any other entrée.
Pros: So, so, so good. Cons: Took twice as long as the sear and broil methods.
The breaded and fried shrimp were an unqualified success. The breading was crispy and gently sweet, and provided a spicy swaddle for super-succulent meat. I have to tell you that this method works for all sizes of shrimp in case you want to have me over and feed me a vat of popcorn bay shrimp!
Pros: Flavorful, crispy, ideal. Cons: More steps than some of the simpler methods, but what else do you have to do???.
Everything about this braise method was delightful. When I screamed “holy hell!” into my empty apartment, I drank some of the sauce right out of the blender. The resulting shrimp was deeply flavored. The original recipe calls for peeled shrimp with the head still on, but I found that the shrimp with the shell on and the head on kept a lot more of the flavor and moisture.
Pros: An entire dish as is, and a killer one at that. Are people still saying killer? My only friends are shrimp. Cons: If you cook in a New York City kitchen like mine, you have to do the awful dance to get your blender or food processor out.
Except for the braise, the scampi shrimp were the softest of the shrimp cooked on the stove (sear, boil). With each bite, the buttery, sour broth got stronger and stronger until I forgot what I was tasting and started frantically searching my kitchen for a piece of crusty bread. Eventually, I found a hot kettle and had to stop. Is that a good thing, or a bad thing? It’s scampi!.
The broil method produced somewhat clenched shrimp. Even though they were still tasty when they were hot from the oven, they didn’t look as good as the roast and sear batches that had been left out to cool. The broil shrimp didn’t have as much flavor because they were cooked for less time and didn’t have the marinade step of the roast method. The garlic paste was tasty and crunchy, so I might use this method again if I’m short on time (i.e. e. If I had to eat shrimp right away before leaving, I would boil them, but if I had an extra 15 minutes, I would roast them instead.
The boil method made shrimp that were very soft, almost plush. At first glance, they looked overcooked because they were curled into little Os instead of loose Cs, but they had great texture. They didn’t have a lot of flavor because I only added salt to the water, but I think cooking them with other shellfish, corn, and seasonings would have made something delicious. The trial with shell-on shrimp made for much juicier meat than the peeled.
The steam method produced extremely moist, surprisingly flavorful shrimp. The vinegar in the water wasn’t very noticeable, but it, along with the lemon, made the meat taste very fresh. You could chop these shrimp up and mix them with mayonnaise and fresh herbs. Then you could put them on buttered bread.
I love acid-cured seafood more than most. Still, it wasn’t my favorite way to cook shrimp because they take longer than soft-fleshed white fish to “cook” all the way through and already have a lot of flavor, so citrus doesn’t give them as much of a boost as a milder fish might.
Pros: Delicious on a saltine or tortilla chip; a method that requires no heat source. Cons: Takes hours!
Grilling lends any protein a smoky flavor, and shrimp is no exception. I tested with both shell-on and peeled, and the former produced much juicier, tender shrimp. I found that grilling peeled shrimp led to drier specimens, with less consistent interior texture.
Pros: A smokier flavor that would suit “surf and turf” better than the other methods. Cons: Unless you use a grill basket, it’s pretty easy to lose the little guys between the grates!.
Shrimp is one of the most popular and versatile types of seafood. When cooked properly, shrimp can be succulent, flavorful and delicious. However, overcooked shrimp quickly becomes rubbery and unappetizing.
Learning how to cook shrimp to juicy, tender perfection takes some knowledge and technique. In this comprehensive guide, we will cover everything you need to know to cook shrimp like a pro, regardless of the recipe or cooking method
Choosing High Quality Shrimp
The first step to cooking great shrimp is selecting high quality fresh shrimp. Here’s what to look for
-
Color – The shrimp should have a natural pinkish-beige color. Avoid shrimp that looks very yellowish or white, as that indicates fading freshness.
-
Odor – Raw shrimp should have a mild, sweet, briny seafood smell. If it smells like ammonia, this means the shrimp is past its prime.
-
Texture – Whole, raw shrimp should feel firm. The flesh should be tight and spring back when pressed gently.
-
Size – Shrimp are sold by size or “count”, which is how many shrimp make up one pound. Common sizes are colossal (10 shrimp per pound), jumbo (16-20 per pound) and large (26-30 per pound). Choose the size appropriate for your recipe.
-
Shells – Make sure the shells are clean, firm and translucent with no black spots. Avoid cloudy or cracked shells.
When possible, purchase shrimp in the shell as it protects the delicate meat during shipping and storage. Peel the shrimp just before cooking.
Thawing Shrimp Properly
If using frozen shrimp, it must be thawed properly to retain moisture and texture. There are a few good methods:
-
Place frozen shrimp in a colander and run cold water over the shrimp until thawed. This thawing method only takes about 10 minutes.
-
Put the frozen shrimp in a covered bowl and place in the refrigerator overnight. This slower thaw helps minimize moisture loss.
-
For a quick thaw, place frozen shrimp in a colander and submerge in a large bowl of cold water. Change the water every 30 minutes so it stays cold. The shrimp should be thawed in 1-2 hours.
Avoid thawing shrimp at room temperature or in hot water, as this encourages bacterial growth and causes the shrimp to become mushy.
Peeling and Deveining Shrimp
For peeled, deveined shrimp, simply rinse under cold water and pat dry with paper towels before cooking.
To peel and devein shrimp yourself:
-
Start by pulling off the legs. They should release easily with a slight tug.
-
Using your fingers or a paring knife, peel off the shell starting at the legs and working up towards the head. Reserve the shells for making stock if desired.
-
Use a paring knife to cut along the back of the shrimp. Remove and discard the vein running along the back.
-
Rinse the peeled shrimp under cold water and pat dry with paper towels.
Seasoning Shrimp for Maximum Flavor
To make shrimp flavorful, it is key to season them properly before cooking. Here are some top seasoning options:
-
Salt and pepper – At a minimum, always season shrimp with salt and freshly ground black pepper. Let sit 5-10 minutes for seasoning to penetrate.
-
Garlic powder – A sprinkle of garlic powder adds a tasty punch of flavor to shrimp.
-
Old Bay seasoning – This classic shrimp seasoning contains celery salt, mustard, bay leaves, ginger and paprika for robust flavor.
-
Cajun seasoning – The bold blend of spicy and savory in Cajun seasoning is perfect for kicking up shrimp.
-
Lemon pepper – Lemon zest and black pepper combine beautifully on shrimp. Squeeze lemon juice over cooked shrimp.
-
Chili powder and lime – For Mexican-style shrimp, rub with chili powder, garlic powder, cumin and finish with lime juice.
-
Herbs – Fresh herbs like parsley, cilantro, dill, basil or thyme all taste fantastic with shrimp.
How to Cook Shrimp on the Stovetop
Pan frying is one of the most common and easiest methods for cooking shrimp. Here is a simple stovetop shrimp recipe:
Ingredients:
- 1 lb medium shrimp, peeled and deveined
- 2 Tbsp olive oil
- 2 cloves garlic, minced
- 1 Tbsp butter
- Salt and pepper to taste
- Lemon wedges for serving
-
Rinse shrimp under cold water and pat dry with paper towels. Season all over with salt and pepper.
-
Heat olive oil in a large skillet over medium heat. Add garlic and cook 1 minute until fragrant.
-
Raise heat to medium high. When oil is shimmering, add shrimp in a single layer. Cook undisturbed 3 minutes on one side until browned.
-
Flip and cook 2 minutes on the other side until shrimp are pink and cooked through.
-
Remove shrimp from pan. Add butter and swirl to melt. Pour butter sauce over shrimp.
-
Serve shrimp warm with lemon wedges. Squeeze lemon juice over shrimp.
This easy stovetop method works for all kinds of shrimp recipes. Swap out the garlic for other aromatics like shallots, onions or chili peppers. Use different fat like coconut oil, chili oil or ghee. Marinate the shrimp first or add more flavor like herbs, spices or citrus zest.
The key is to get the pan and oil very hot before adding the shrimp so they sear and brown properly. Resist the urge to stir constantly. Let them cook undisturbed on each side so they caramelize instead of steaming.
How to Cook Shrimp on the Grill
The high dry heat of the grill imparts delicious charred flavor to shrimp. Follow these tips for grilled shrimp success:
-
Use peeled, deveined jumbo shrimp. Leave tail shells on for presentation.
-
Marinate shrimp for 30 minutes in olive oil, herbs, chili flakes, garlic, citrus, etc.
-
Heat grill to high. Oil grates to prevent sticking.
-
Grill shrimp in a grilling basket or skewers for 2-3 minutes per side until opaque.
-
Brush with glaze or dipping sauce in last minute if using.
-
Take shrimp off grill when just slightly underdone as they will continue cooking.
Grilled shrimp cooks very fast so watch carefully to avoid overcooking. Serve shrimp off the grill with charred lemon halves, grilled veggie skewers, grilled bread and sauces.
Baking Shrimp in the Oven
For easy oven-baked shrimp:
-
Toss peeled shrimp with olive oil, salt, pepper and seasoning of choice.
-
Spread in a single layer on a rimmed baking sheet.
-
Roast at 400°F for 5-7 minutes until shrimp are pink and cooked through.
-
For added flavor, sprinkle with grated parmesan, lemon zest or panko breadcrumbs halfway through baking.
-
Serve roasted shrimp warm or chilled over salad, pasta, rice, tacos and more.
Roasting concentrates the shrimp flavor for delicious results every time. Other tasty oven-baked shrimp recipes include garlic butter shrimp, coconut shrimp and shrimp scampi.
How to Know When Shrimp is Cooked Properly
It is vital to not overcook shrimp or it will become rubbery. Follow these visual cues to know when shrimp is perfectly cooked:
-
The flesh should be opaque and white throughout with no translucent parts.
-
Shrimp tails will curl and start to detach when fully cooked.
-
Cooked shrimp will be hot and firm but still tender when pressed.
-
A quick way to check doneness is to cut into a thicker part of a shrimp. It should be opaque all the way through. Discard that shrimp.
Immediately remove shrimp from the heat when they are just cooked. They will continue to cook off the heat as their temperature rises. It’s always better to slightly undercook vs. overcook shrimp.
Common Mistakes to Avoid
Follow these tips to prevent the most common shrimp cooking mistakes:
-
Don’t crowd the pan or baking sheet.cooking shrimp in too close proximity steams instead of sears.
-
Don’t rush the cooking process. Give shrimp time to properly sear and develop flavor.
-
Don’t cook shrimp from frozen. Always thaw first for even cooking.
-
Don’t over-marinate shrimp as acids start “cooking” the proteins. 10-20 minutes is plenty.
-
Don’t neglect shrimp. Their small size means they overcook quickly if unattended.
-
Don’t disregard carryover cooking. Shrimp continues cooking after removed from heat source.
Cooking Times for Different Shrimp Sizes
Use these general guidelines for how long to cook shrimp based on their size:
- Colossal shrimp (10 per pound) – 4-5 minutes
The Absolute Best Ways to Cook Shrimp
- For speedy shrimp with the best texture and flavor, roast
- For buttery, tender shrimp that beckon a baguette, simmer
- For near-silky, gently flavored shrimp, steam
- Boil a lot of shrimp to go with a fun side dish and/or sauce.
- For saucy, spicy shrimp that won’t dry out, braise
- For the crispiest, juiciest boys, fry
What should Ella test in a future column? Share requests in the comments!