Turkey is always available when you need a quick meal because it’s simple to can and keeps for months on the shelf. Learn how to pressure can turkey with this tutorial.
Around the holidays, turkeys can be purchased at reduced prices from stores and butcher shops. I like to grab an extra bird or two with the purpose of preserving it for later meals. This time of year, freezer space is limited, so I can make it so it can be kept on the shelf.
Home canned turkey is a convenient option for those days when you need quick meal option. You can use it in chili and soups, tacos, enchiladas, sandwiches, and casseroles.
Embarking on the culinary adventure of pressure canning turkey can be both exhilarating and rewarding. This method, while requiring specific equipment and techniques, offers a unique and efficient way to preserve this delicious poultry for future enjoyment. Whether you’re a seasoned canner or a curious novice, this comprehensive guide will equip you with the knowledge and confidence to tackle this culinary challenge with ease.
Unveiling the Magic of Pressure Canning:
Pressure canning is a safe and effective method for preserving low-acid foods, such as turkey, by using high heat and pressure to eliminate harmful bacteria. This process ensures the long-term storage of your canned goods while preserving their flavor and nutritional value.
Gearing Up for Culinary Success:
To embark on your pressure canning journey you’ll need the following essential equipment:
- Pressure Canner: Invest in a high-quality pressure canner that meets current safety standards. Choose a size that accommodates the number of jars you plan to can.
- Jars and Lids: Opt for canning jars specifically designed for pressure canning, along with new, unused lids and rings.
- Jar Lifter and Tongs: These tools will help you safely handle hot jars during the canning process.
- Rack or Trivet: A rack or trivet elevates the jars off the bottom of the canner, ensuring proper heat distribution.
- Headspace Tool: This handy tool helps you measure the correct headspace in your jars.
Preparing Your Culinary Canvas:
Before embarking on the canning process, it’s essential to properly prepare your turkey and canning supplies. Here’s a step-by-step guide to ensure a seamless and successful experience:
- Prepping the Turkey: Cook the turkey according to your preferred method, such as roasting, poaching, or simmering. Remove the skin and bones, and shred the meat into bite-sized pieces.
- Preparing the Jars and Lids: Wash the jars, lids, and rings thoroughly with hot, soapy water. Rinse them well and keep them warm until ready to use.
- Packing the Jars: Pack the shredded turkey loosely into the jars, leaving 1 inch of headspace at the top. Add a teaspoon of salt to each jar for flavor and preservation.
- Removing Air Bubbles: Use a non-metallic utensil to remove any air bubbles trapped within the jars.
- Wiping the Rims: Wipe the rims of the jars with a clean, damp cloth to remove any food residue.
- Securing the Lids: Place the lids on the jars and tighten the rings snugly, but not too tightly.
Unlocking the Secrets of Pressure Canning Turkey:
Follow these steps to safely and effectively pressure can your turkey:
- Filling the Canner: Place the filled and sealed jars on the rack or trivet in the pressure canner. Add enough water to the canner to cover the jars by 1-2 inches.
- Locking the Lid: Secure the lid on the pressure canner according to the manufacturer’s instructions.
- Venting the Steam: Heat the canner over high heat and vent the steam for 10 minutes. This allows the air to escape and ensures proper pressure buildup.
- Building Pressure: Close the vent and allow the pressure to build according to the recipe or canner instructions. The processing time will begin once the desired pressure is reached.
- Processing Time: Process the turkey jars for the recommended time, which typically ranges from 75 to 90 minutes, depending on the jar size and recipe.
- Releasing Pressure: Once the processing time is complete, turn off the heat and allow the pressure to release naturally. This can take up to 30 minutes.
- Checking the Seals: After the pressure has fully released, carefully remove the lid and check that all the jars have sealed properly. The lids should be slightly concave and not flexible when pressed.
Cooling and Storing Your Culinary Creations:
Once the jars have been removed from the canner, place them on a clean towel or cooling rack and allow them to cool completely. Label the jars with the contents and date of canning, and store them in a cool, dark place for up to a year.
Embracing the Versatility of Pressure-Canned Turkey:
Pressure-canned turkey is a versatile ingredient that can be used in countless dishes. Here are a few ideas to inspire your culinary creativity:
- Turkey Pot Pie: Combine pressure-canned turkey with vegetables, gravy, and a flaky crust for a comforting and hearty meal.
- Turkey Salad Sandwiches: Mix pressure-canned turkey with mayonnaise, celery, onion, and herbs for a flavorful and satisfying sandwich filling.
- Turkey Noodle Soup: Add pressure-canned turkey to a rich chicken or vegetable broth with noodles and your favorite vegetables for a warming and nutritious soup.
- Turkey Chili: Combine pressure-canned turkey with beans, tomatoes, spices, and chili powder for a flavorful and hearty chili.
Frequently Asked Questions:
Can I use any pressure canner for canning turkey?
While most pressure canners are suitable for canning turkey, it’s essential to choose a canner that meets current safety standards and is large enough to accommodate the number of jars you plan to can. Always refer to the manufacturer’s instructions for proper usage and safety guidelines.
How long can I store pressure-canned turkey?
Pressure-canned turkey can be safely stored for up to a year in a cool, dark place. However, it’s always recommended to check the jars for any signs of spoilage before consuming the contents.
What are some common mistakes to avoid when pressure canning turkey?
Some common mistakes to avoid when pressure canning turkey include:
- Overpacking the jars, which can prevent proper heat penetration and lead to spoilage.
- Using old or damaged lids or rings, which can compromise the seal and lead to spoilage.
- Not processing the jars for the recommended time, which can result in undercooked food and potential safety hazards.
Pressure canning turkey is a safe and effective method for preserving this delicious poultry, allowing you to enjoy it long after the initial cooking. By following these tips and tricks, you can master the art of pressure canning turkey with confidence and create a pantry full of flavorful and versatile culinary creations. So, gather your ingredients, grab your pressure canner, and embark on a journey of culinary preservation!
Step 4: Can the Turkey Meat
Lay a kitchen towel on the counter. Use the jar lifter to remove a jar from the canner. Pour out the water (save it for washing dishes), and place the jar on the towel. Keep the remaining jars in the canner, so they stay hot.
Hot pack the jar with loosely with hot meat. Don’t pack tightly, but do use the bubble popper to push down the pieces to eliminate large pockets.
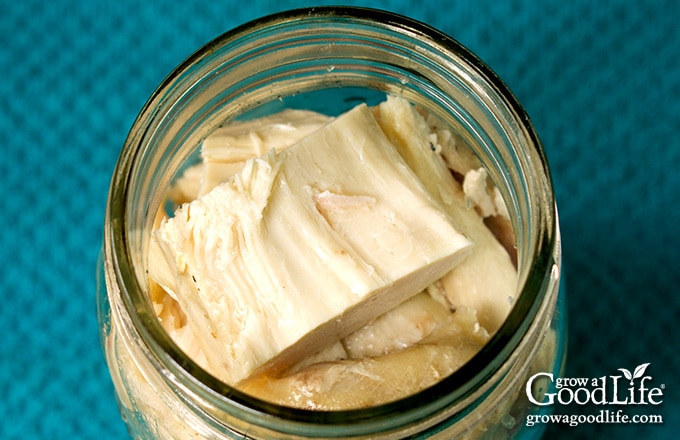
Using the ladle, cover the meat with stock, leaving a 1-inch headspace, and place the canning funnel on top of the jar. Run the bubble popper through the jar to release trapped air bubbles.
Wipe the rim of the jar with a damp towel to remove any residue. After centering the lid on the jar, cover it with the band and tighten the screw until it is fingertip tight. Immediately place the jar back into the canner, and repeat with the rest of the jars.
Bring the canner to a boil over medium-high heat. Process the jars according to the recipe below, following the pressure canner’s instructions.
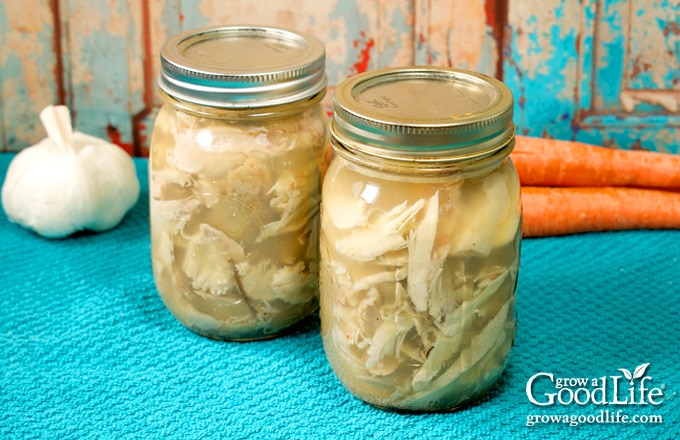
After the processing period is over, remove the jars and allow them to cool fully before turning off the heat and allowing the canner to cool naturally. Date, label, and store in a cool location for 12 to 18 months.
Step 3: Heat the Stock
Add the stock to a large stockpot. Place a lid on the pot, increase the heat to medium-high, and then lower the temperature to a simmer (180˚F). If you made fresh stock, remove and discard excess fat before heating.
If you refrigerated the meat, you will need to heat it up before placing it in your jars. Simply add it to your pot of stock and heat everything together. To fill the jars, remove the meat with tongs or a slotted spoon and top with stock.