Canning salmon at home is a great way to preserve fresh fish to enjoy year-round. Salmon is packed with nutrients like omega-3 fatty acids, vitamin B12, and selenium. Having jars of canned salmon on hand means you can quickly make dishes like salmon patties, salmon salad, pasta with salmon sauce, and salmon tacos whenever you want.
Canning salmon yourself is also less expensive than buying commercially canned salmon. You can control the quality and freshness of the fish. Plus you don’t have to worry about unwanted ingredients like preservatives, colors or flavors.
Canning salmon using a pressure canner gives safe, high-quality results. Here is a complete step-by-step guide to canning salmon at home
What You Need to Get Started
Canning salmon requires some special equipment and supplies Here’s what you’ll need
- Glass canning jars with lids and rings (wide-mouth pint or half-pint jars work best)
- A pressure canner
- Canning rack to fit inside the canner
- Jar lifter
- Bubble remover or plastic knife
- Clean kitchen towels
- Fish filleting knife
- Cutting board
- Kitchen scale
- Fine mesh strainer
- Labels and permanent marker (for dating jars)
Ingredients
- Fresh salmon filets or steaks
- Canning or pickling salt (non-iodized)
- White vinegar or lemon juice
Step 1: Prepare the Salmon
Rinse the salmon under cold running water and pat dry with paper towels. Remove any bones or skin using a sharp filleting knife.
Cut the salmon into pieces that will fit into the jars, leaving an inch of space at the top. Put the thickest pieces on the outside of the jars and the thinnest pieces in the middle.
Step 2: Fill the Jars
Place the salmon pieces into the sterilized canning jars. Pack the fish tightly into the jars, pressing down with a bubble remover or plastic knife to release any air pockets.
Leave 1 inch of headspace at the top of each jar. The fish will shrink slightly during processing.
Step 3: Add Salt and Acid
To each pint jar, add:
- 1⁄2 teaspoon canning salt
- 1 teaspoon white vinegar or lemon juice
For half-pint jars, use:
- 1⁄4 teaspoon canning salt
- 1⁄2 teaspoon white vinegar or lemon juice
The salt helps preserve the salmon and adds flavor. The vinegar or lemon juice provides acidity to balance the pH, creating the right conditions for safe canning.
Step 4: Remove Air Bubbles
Slide a bubble remover or plastic knife down the sides of the jar to release any trapped air bubbles. Add more salmon pieces if needed to achieve the proper 1-inch headspace.
Step 5: Wipe Jar Rims
Use a clean, damp paper towel to carefully wipe off any salmon bits or liquids from the rims of the jars. This allows the lids to seal properly.
Step 6: Apply Lids and Rings
Place the lids on each jar and screw on the rings just fingertip tight. Do not overtighten.
Step 7: Load the Pressure Canner
Place the rack in the bottom of the pressure canner and add 2 to 3 inches of hot water. Load the filled jars onto the rack using a jar lifter, spacing them evenly so the jars are not touching.
Lock the lid in place but do not pressurize the canner yet.
Step 8: Vent and Pressurize the Canner
Turn the heat to high and allow a steady stream of steam to vent from the canner for 10 minutes. This removes air from inside the canner.
After venting, place the weighted gauge on the vent pipe to pressurize the canner. Let the canner heat up until the gauge begins to rock steadily, indicating it has reached the target pressure (10 to 11 PSI).
Step 9: Process the Jars
Once the canner is properly pressurized, set a timer for 100 minutes. Adjust the stove heat as needed to maintain steady pressure throughout the processing time.
Step 10: Turn Off Heat and Allow Pressure to Drop
When the processing time is complete, turn off the burner and let the canner depressurize naturally. Allow the pressure to fully drop before removing the weighted gauge.
Step 11: Remove and Cool Jars
Use jar lifters to carefully lift the jars from the canner and place them on a towel or rack. Leave space between the jars for air circulation.
Let the jars cool undisturbed for 12 to 24 hours. Do not retighten the bands.
Step 12: Check Seals and Store
After cooling completely, press on the center of each lid to check for a concave seal. It should not pop up and down when pressed.
Remove the rings and clean the jar rims with a damp cloth. Label and date the jars. Store in a cool, dark place for up to 2 years.
Once opened, store in the refrigerator and use within 4 days. Enjoy your homemade canned salmon!
Tips for Delicious Canned Salmon
- Use very fresh salmon within 2 days of catching or purchasing.
- Chill the fish well before canning for easiest handling.
- Cut fillets into uniform pieces to ensure even heating.
- Make sure jars are packed super tightly to prevent floaters.
- Refrigerate sealed jars for 2-3 weeks before using to allow the bones to soften.
- Add herbs, spices or citrus to the jars for extra flavor.
- Use juices within 2-3 days or freeze for longer storage.
Canning your own salmon enables you to enjoy the taste, nutrition and convenience of salmon all year long. Follow these simple steps for safe homemade canned salmon.

Step 8: Cleaning the Rims of Jars

Take a paper towel thats been dipped in vinegar and wipe the rims of all the jars. Fish like salmon is high in fat, so this will help the seal by getting rid of the oil and any bits of food stuck to the rim. It is very important to clean the rims! I only had one jar that wasn’t sealed, which isn’t bad for how many I used:)
Step 3: Top Fin
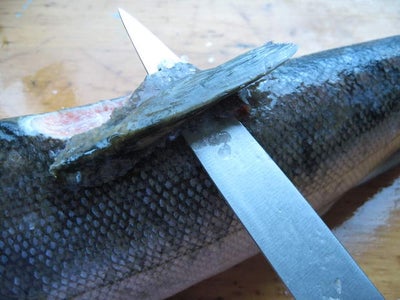
Use a good sharp knife.
Home Canning Salmon With Linda’s Pantry
FAQ
Can you can salmon without a pressure cooker?
How long is home canned salmon good for?
Do you add vinegar when canning salmon?
How to can salmon at home?
Use a filet knife to skin salmon before canning. Meanwhile, I got all the canning equipment organized that we would need. I washed 24 half pint jars. If you are pressure canning, you don’t need to sterilize the jars, like you do when you water bath can. It will surprise you how simple it is to can salmon at home!
What are the benefits of smoked salmon over raw salmon?
It actually has the same characteristics as raw salmon, being relatively low in calories, it is an excellent source of protein, good fat and several vitamins and minerals. The smoking process just adds an aroma.
How do you cook salmon in a canner?
Canning salmon is a great way to enjoy it as good as fresh through the entire year! Close the canner and turn up the heat on the stove. Once it starts steaming, we time it to vent for 10 minutes. After the venting time is over, we add the weight (15 lbs, because of our elevation) and then wait for the canner to again start steaming.
How do you eat canned salmon?
Dip in tartar sauce or remoulade for a tasty appetizer or main. Drain the canned salmon. Place it in a bowl and flake it with a fork. To the bowl, add the egg, green onion, mayonnaise, Worcestershire sauce, chopped parsley, Old Bay, garlic powder, salt, pepper, and ¼ cup breadcrumbs. Mix until a dough forms.