Proper acclimation is quite literally life or death for freshwater shrimp. People who have never kept shrimp before often think that the process is the same as acclimating fish: you just pour a few cups of water into the bag and let the fish swim around for 30 to 60 minutes. If you did this, your new shrimp friends would either die or be under a lot of stress, which I doubt you want. It’s not hard to get shrimp used to their new home, but it does take a little more time to make sure they do it safely. The rest of this guide takes you through the Shrimply Approved™ method of shrimp acclimation. That starts by preparing your tank.
Adding new shrimp to your aquarium can be an exciting time. However, improperly acclimating the shrimp to the new environment can cause serious harm or even death. While a drip acclimation system is the gold standard, it may not always be readily available. Fortunately, there are effective alternative methods to safely acclimate shrimp without specialized equipment. In this comprehensive guide, we’ll walk through the key steps for a stress-free shrimp acclimation using basic supplies.
Why Acclimation is Crucial
Acclimating shrimp is not merely an optional step, but rather a vital process for their health and survival. Shrimp are sensitive to even subtle changes in water conditions like pH, temperature, salinity, and minerals. Exposing them suddenly to the new aquarium environment creates osmotic stress as they strive to balance internal chemistry. This can weaken their immune systems and cause deteriorating health.
By slowly allowing shrimp to adjust to new water parameters, the acclimation process gives them time to reach equilibrium gently without trauma. Taking the time upfront prevents disaster later. Shrimp that have been properly acclimated before introduction have the best chances of thriving in their new home.
Supplies You’ll Need
Acclimating without a drip system requires just a few basic supplies:
- Source of dechlorinated water (such as declorinator treated tap water)
- Thermometer
- Net or small container for transferring shrimp
- Timer or clock
- Optional: bucket, air tubing, air pump
The key is having access to aquarium water or water that closely matches the parameters of the tank they are joining. With just these minimal tools, we can mimic an effective drip acclimation.
Step-by-Step Acclimation Process
Follow these steps closely for optimal results
Step 1 – Float Sealed Bag
Start by floating the sealed bag containing the new shrimp in the aquarium for 10-15 minutes. This equalizes the temperature between the shipping bag and tank water to avoid shocking the shrimp once opened.
Step 2 – Add Small Amounts of Water
After floating, open the bag and add roughly 1⁄4 cup of aquarium water every 5 minutes directly to the bag water. The small amounts gradually transition shrimp to the new mineral levels, pH, etc.
Step 3 – Increase Water Addition
After several additions of water, you can begin adding 1⁄2 cup of aquarium water every 5 minutes. The larger quantity speeds acclimation while still keeping changes gradual.
Step 4 – Net Shrimp into Aquarium
Once 30-60 minutes have elapsed, use a small net to transfer shrimp from the bag to the aquarium. Discard bag water – do not add it to the tank. The acclimation period has prepped the shrimp for their new home.
Tips for an Ideal Acclimation
- Go slowly – for sensitive species, extend the acclimation over 60-90 minutes.
- Aim for no more than a 2-3 °F change in temperature.
- Watch shrimp behavior closely throughout the process.
- Match pH as closely as possible between waters. Use pH adjusting chemicals if needed.
- Turn off aquarium lights and reduce activity during acclimation to minimize stress.
- Acclimate shrimp to any new water, even from same source, to be safe.
With some basic supplies and a little patience, you can easily acclimate new shrimp without chaos. Follow the steps above to give your shrimp the best chance of thriving in their new home. Gradually transitioning to the aquarium environment will relieve stress and promote healthy, active shrimp.
Frequently Asked Questions
How long does acclimation normally take?
30-60 minutes is typical, but sensitive species may require 60-90 minutes for an ideal slow transition. Rushing the process risks shocking the shrimp.
What are signs of successful acclimation?
Shrimp that have been properly acclimated will show normal active behavior like swimming and grazing on surfaces shortly after introduction. Good colors and responsiveness indicate the acclimation was effective.
Can I acclimate multiple shrimp together?
Yes, you can follow the same acclimation process for a group of shrimp in one bag. Just be sure not to overcrowd them during the process. Leave plenty of space for each shrimp.
Is a drip system really better than bag acclimation?
Drips provide very gradual changes in water chemistry which is ideal. But the bag method closely mimics this when done correctly. So while drips are considered the gold standard, bag acclimating can also be very effective.
What temperature should I aim for when acclimating shrimp?
Match the aquarium temperature as closely as possible, aiming for no more than 2-3 degrees difference at most. Going from cold to warm water is more stressful on shrimp than warm to cold.
Can I use treated tap water instead of aquarium water?
Yes, as long as chlorine and chloramines have been fully removed with a dechlorinating chemical. The tap water parameters should match the tank water as closely as possible for easy acclimation.
Do I need to acclimate shrimp shipped from the same source?
It’s still advisable to acclimate, even when shrimp come from the same hatchery. The bag water conditions can differ from your aquarium, so an acclimation period minimizes stress.
How do I acclimate sensitive shrimp species?
Take it very slow – extend the duration to 60-90 minutes. Minimize temperature and pH difference between waters. Consider purchasing an acclimation box that isolates shrimp if they show signs of major stress during the process.
What happens if I don’t acclimate properly?
At best, the shrimp may show signs of stress like reduced activity. At worst, sudden changes in water chemistry can send shrimp into shock potentially leading to death shortly after introduction. Always take the time to properly acclimate.
Acclimating shrimp without a high-tech drip setup is simple with some basic supplies and a little time. Follow this guide closely for a low-stress transition into their new home. Gradually adapting to the aquarium environment prepares shrimp for optimal health and activity once they are added.

Plan your day
The acclimation process takes a few hours so it is important to be prepared. That means having all the tools you need for proper drip acclimation and 3–4 hours to pick up the shrimp and let them get used to their new environment without being rushed. You can still do other things during that time, but you should check your acclimation setup every 30 to 60 minutes to make sure the water doesn’t get too high.
Depending on how you are buying your shrimp, the process may vary slightly:
When you buy shrimp in stores, you should figure out how to make the trip as stress-free as possible to your tank. The key is to avoid:
- Big difference in temperature: If you buy them on a very hot or cold day, the small amount of water in their bag may change temperature quickly on the way home. To avoid this, put the bag in a cooler, a Styrofoam box, or some other package that keeps things cool. It might seem like a good idea to add ice or a heating pad, but they could also make the temperature change too much, so it is best not to use them.
- Moving around too much: Just like we don’t like earthquakes, your shrimp don’t like being sloshed around in the bag as you bring them home from the store. Don’t be Darla! To keep the shrimp from moving around too much, bring a clean piece of cloth (something that won’t release chemicals into the water) or moss with you. This gives them something to hold on to and makes them feel less stressed. Also, avoid having too much air in the bag. There is more room for the water to move when there is more air. If the trip home is less than an hour, they only need about an inch of space at the top to make sure they get enough oxygen. Finally, make sure the bag doesn’t roll or shift while you’re driving home. If you’re not driving, put it in your lap or in a container that won’t move.
Ordering online: This is the simplest option that doesn’t require much planning, since most online sellers already take the above steps to make sure your shrimp aren’t stressed. Being there for the delivery is all it takes. If you’re not there, the package could get too hot or too cold depending on where you live. This concern can be avoided if the seller uses insulated packaging for shipping, which most do.
Once your shrimp arrive safely, it is time to acclimate!
Step Ensure your tank is ready
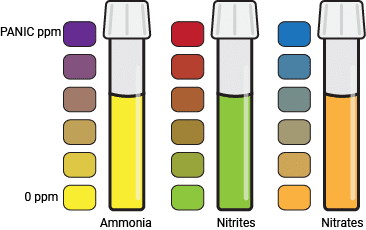
If you are putting your new shrimp into a tank that has just been cycled, make sure it is really cycled. This means that the levels of ammonia, nitrites, and nitrates must stay below 20 ppm for at least a few days. This usually doesn’t happen until 3 to 8 weeks after the system is first set up. If cycling is not done properly, then ammonia levels may shoot up and kill your shrimp. No one wants that.