Crispy golden coconut shrimp is one of life’s simple pleasures. The sweet coconut coating pairs deliciously with the tender juicy shrimp inside. While you can always deep fry coconut shrimp for that signature crunch baking frozen coconut shrimp in the oven is a healthier and easier option that’s just as tasty!
As a busy home cook I love having a bag of frozen coconut shrimp on hand for whipping up quick appetizers or main dishes. Here is my complete guide to mastering oven-baked frozen coconut shrimp with pro tips for maximizing flavor and texture every time.
Benefits of Cooking Frozen vs. Raw Shrimp
Cooking frozen coconut shrimp has some clear advantages:
-
Major time saver – Skip long prep of breading raw shrimp. Frozen comes pre-breaded and ready to bake.
-
Less messy – No dealing with dipping raw shrimp in egg wash and coconut. Frozen shrimp have a uniform coating
-
Convenience – Keep frozen shrimp stocked versus having to purchase and prep fresh shrimp.
-
Consistency – Size and thickness is uniform with frozen for even cooking.
While you certainly can bread your own raw shrimp, starting with frozen pre-breaded shrimp makes enjoying this dish much easier!
Choosing Frozen Coconut Shrimp
When selecting frozen coconut shrimp, you’ll find several national brands at your grocery store, like Sea Best, Aqua Star, Trader Joe’s, SeaPak, and Margaritaville. Let your preference and budget guide you. Some things to look for:
-
Generous, uniform coconut coating – Go for thick coating versus skimpy breading.
-
Raw, not pre-cooked – Raw shrimp will cook more evenly versus pre-cooked.
-
Individually frozen – Individual shrimp mean less sticking together.
-
Wild-caught shrimp – For best flavor and texture.
-
Tail-on – Gives a nice presentation.
-
Similar sizing – To ensure even cooking.
Avoid any shrimp with signs of freezer burn or ice crystals, which indicates improper freezing.
Equipment Needed
Having the right gear makes cooking frozen coconut shrimp a breeze:
-
Rimmed baking sheet – Provides ample airflow for even cooking and catches any drips.
-
Parchment paper – Prevents sticking and eases transfer to serving platter.
-
Oven mitts – Protects hands from hot pan.
-
Metal tongs – Helps easily flip and rotate shrimp during baking.
-
Instant-read thermometer – Tests doneness; shrimp are cooked at 145°F.
-
Cooling rack – Allows airflow around cooked shrimp to maintain crispness.
Pro Tips for Oven-Baking Frozen Coconut Shrimp
Follow my pro tips for baking up the perfect batch:
-
Take shrimp straight from freezer – No thawing needed!
-
Preheat oven fully – Oven should be at desired temp before baking.
-
Line pan – Parchment prevents sticking for easy transfer.
-
Brush with oil (optional) – For extra crispy coconut coating.
-
Bake in single layer – Avoid overcrowding for even cooking.
-
Flip shrimp over halfway – Ensures both sides brown evenly.
-
Bake until deep golden brown – Takes 12-18 minutes; watch closely.
-
Check internal temp – Shrimp are done at 145°F.
-
Let rest briefly – Allows coating to set up crispy.
Step-By-Step Baking Instructions
Follow my simple step-by-step method for perfect oven-baked coconut shrimp:
-
Preheat oven to 400°F. Line a rimmed baking sheet with parchment paper.
-
Arrange frozen shrimp in a single layer on prepared pan.
-
Lightly brush shrimp with oil, if desired, for extra crispiness.
-
Bake shrimp for 6 minutes at 400°F.
-
Remove pan from oven. Use tongs to carefully flip shrimp.
-
Return pan to oven. Bake 6-8 more minutes until deep golden brown.
-
Check internal temp by cutting into thickest shrimp. Cook until 145°F.
-
Let shrimp rest 5 minutes before serving to set coating. Enjoy!
Easy enough, right? Now let’s go over optimal baking times and temperatures.
Recommended Baking Times and Temps
The baking time will vary based on factors like shrimp size and oven differences. Here are general guidelines:
- Small shrimp (16-20 per pound) – Bake at 400°F for 8-10 minutes
- Medium shrimp (26-30 per pound) – Bake at 375°F for 10-12 minutes
- Jumbo shrimp (10-15 per pound) – Bake at 375°F for 12-15 minutes
Track doneness closely as oven times are estimates. Shrimp overcooks quickly.
Testing Doneness of Coconut Shrimp
The key is removing shrimp from the oven at the peak of doneness to avoid overcooking. Here are 3 ways to test when shrimp are perfectly cooked:
-
Use an instant-read thermometer to check for 145°F internal temperature.
-
Cut into thickest portion of a shrimp and check interior is opaque, not translucent.
-
Coconut coating should be deep golden brown and feel crispy when tapped.
Undercooked shrimp will be mushy and gummy inside. Overcooked shrimp will be rubbery and dry.
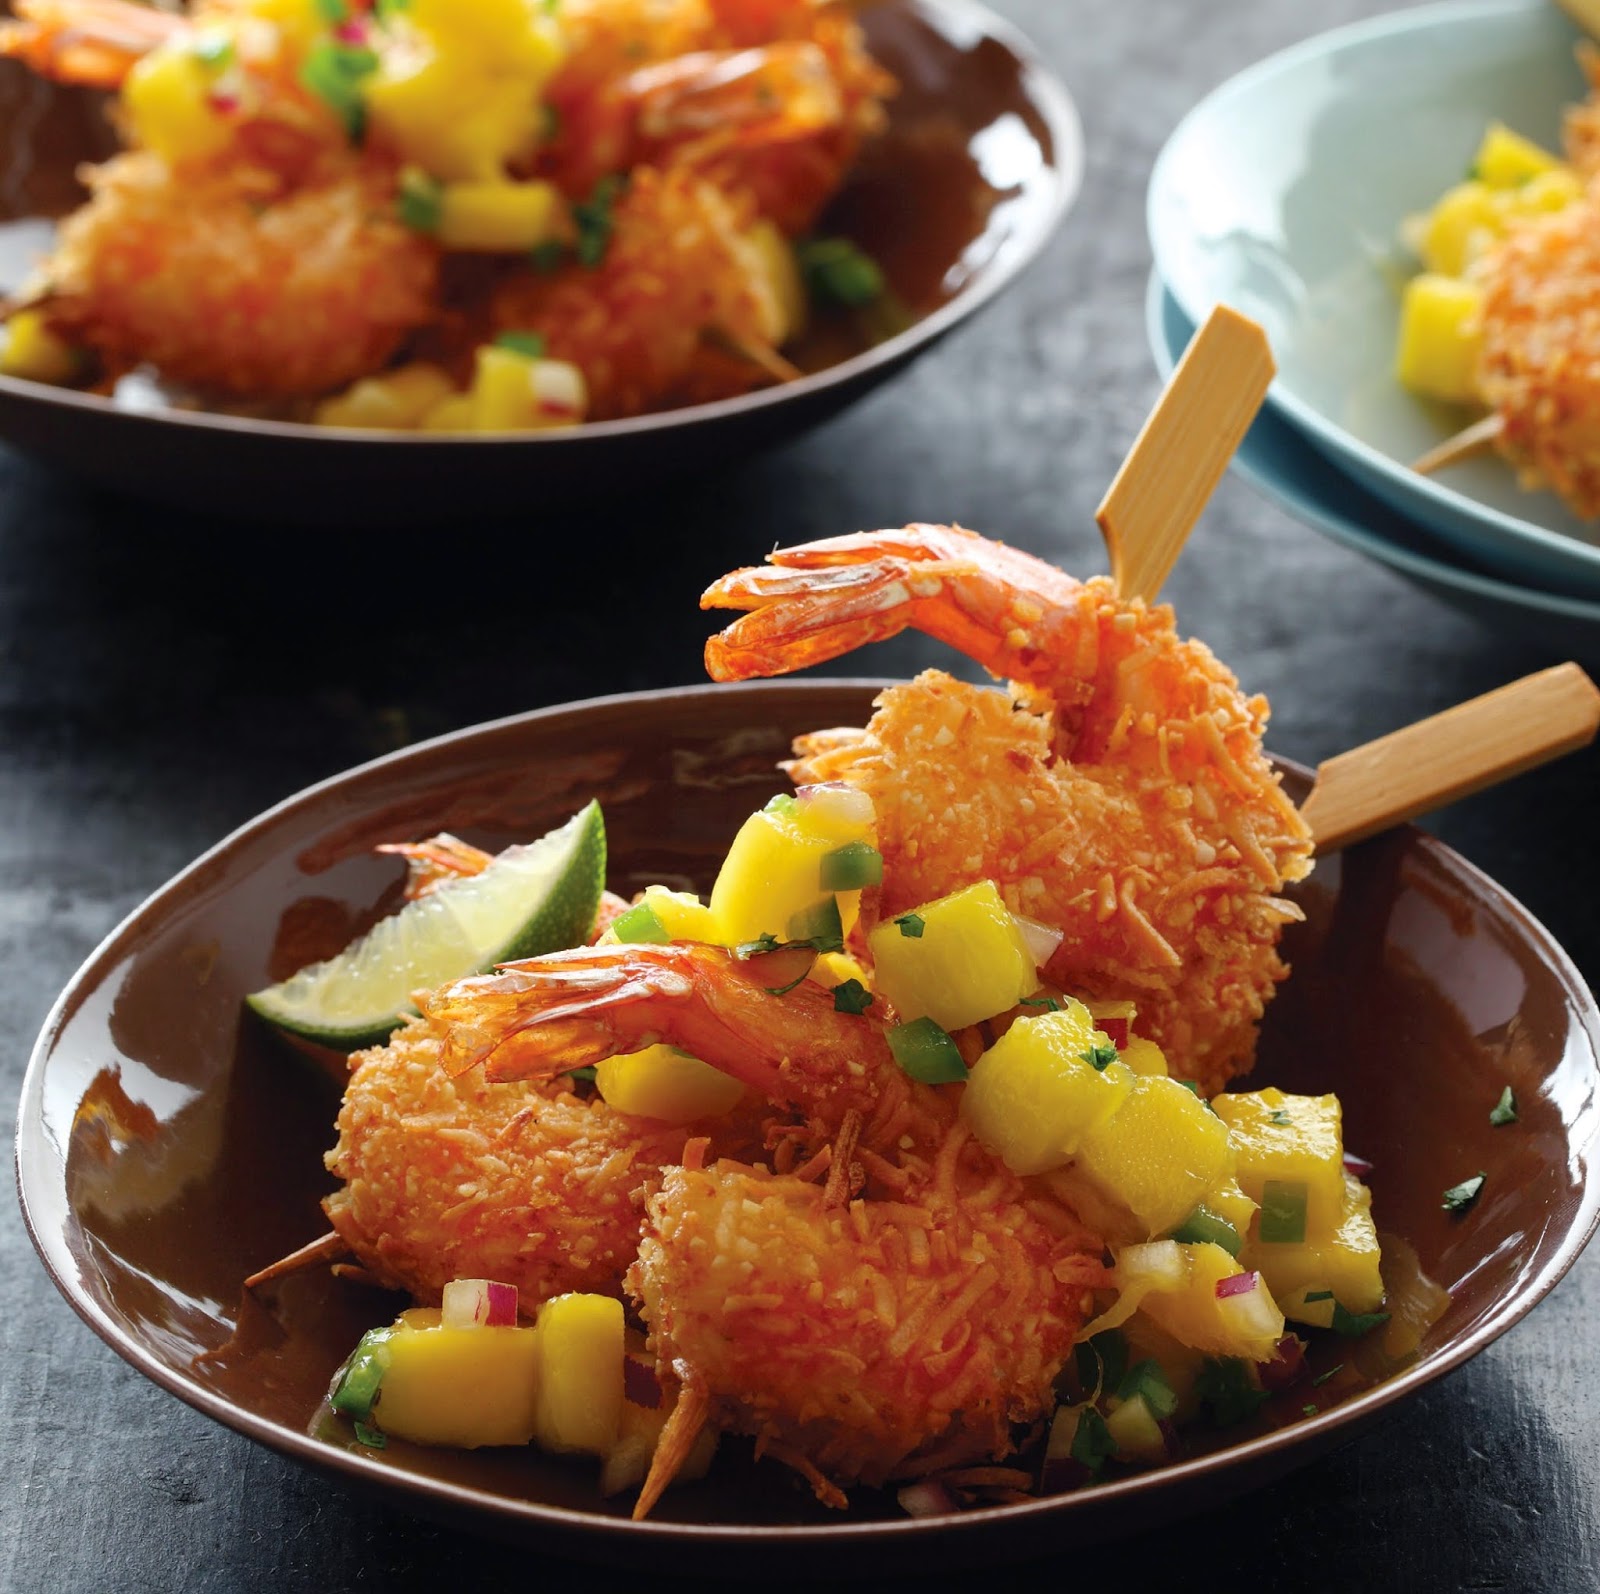
Serving Suggestions and Pairings
A crispy batch of oven-baked coconut shrimp deserves an amazing dipping sauce, like:
- Sweet chili sauce
- Duck sauce
- Honey mustard
- Plum sauce
- Pineapple salsa
- Guacamole
- Peanut sauce
- Ranch dressing
For a complete meal, try serving coconut shrimp atop a green salad or nestled in mini buns for tasty shrimp po’ boys. You can also skewer them with pineapple chunks for a tropical kebab.
However you choose to enjoy them, oven-baked coconut shrimp satisfies every time!
Storing and Reheating Leftover Shrimp
You can safely store leftover coconut shrimp in an airtight container for 2-3 days in the fridge. To reheat, simply place shrimp in a single layer on a parchment-lined baking sheet and bake at 350°F for 4-5 minutes until warmed through. The oven will restore the crispy texture better than the microwave.
Handy Oven-Baked Coconut Shrimp FAQs
Got questions about making freezer-to-oven coconut shrimp at home? Here are answers to some common queries:
How can I get the coconut extra crispy in the oven?
Brushing shrimp with a thin coating of oil before baking helps amplify crispiness. Broiling for 1-2 minutes at the end also boosts crunch.
Do I really need to flip the shrimp halfway through baking?
Yes, flipping ensures even browning and cooking on both sides. Use tongs to carefully flip.
Can I overcrowd shrimp on the baking sheet to cook more at once?
No, overcrowding prevents proper airflow and can cause steaming versus crisping. Work in batches for best results.
How do I know if my oven runs hot or cold?
Ovens can vary. Use an oven thermometer placed inside to check actual temperature versus setting. Adjust baking time accordingly.
Can I microwave leftover shrimp to reheat?
Microwaving makes shrimp mushy. Reheating in oven at 350°F preserves that satisfying crunch best.
The Satisfaction of Homemade Oven-Baked Coconut Shrimp
Cooking frozen coconut shrimp in the oven makes this dish accessible any night of the week. In less than 30 minutes, you can be biting into tender shrimp enveloped in a crispy, coconutty coating – no deep fryer required! With a few easy tricks and optimal baking guidance, you’ll gain confidence turning out perfectly cooked batches every time. So grab a bag of your favorite frozen coconut shrimp, preheat the oven, and treat yourself to this tempting taste of the tropics. Your tastebuds will thank you.
How To Cook Frozen Coconut Shrimp
If you want to serve an easy and tasty appetizer at your next dinner party, look no further than frozen coconut shrimp! Your guests will love these crispy and tasty treats. The best part is that you can cook them right from the freezer, which makes them a great choice for any event.
- 1 package of frozen coconut shrimp
- Oil for frying (vegetable or canola oil works well)
- Preheat your oil.
- Arrange your workstation.
- Place the frozen coconut shrimp in the oil.
- Fry until golden brown.
- Remove and drain.
- Serve and enjoy!
Start by preheating a deep fryer or a large skillet with enough oil to fully submerge the frozen coconut shrimp. The oil should be heated to around 350°F (175°C) for optimal results.
Lay out a plate or baking sheet lined with paper towels. This will be used to drain the excess oil from the cooked shrimp.
Gently place the frozen coconut shrimp into the preheated oil. Be careful not to overcrowd the pan or the shrimp may not cook evenly. Cook in batches if necessary.
Allow the shrimp to fry for about 3-4 minutes, or until they turn a beautiful golden brown color. Flip them over halfway through cooking to ensure even browning and crispiness.
Using a slotted spoon or tongs, carefully remove the cooked shrimp from the oil and transfer them to the prepared plate or baking sheet. Allow them to drain for a few seconds to remove any excess oil.
Your frozen coconut shrimp is now ready to be served! These crispy delights can be enjoyed on their own or paired with a tangy dipping sauce like sweet chili or mango salsa.
It’s really easy to cook frozen coconut shrimp. With just a few simple steps, you can make an appetizer that everyone will love and want the recipe for. So the next time you want a quick and tasty appetizer, grab a package of frozen coconut shrimp and follow these easy steps. Happy cooking!.
There are many tasty recipes to choose from if you want to get the most out of the guide on how to cook frozen coconut shrimp. Start with Coconut Shrimp Curry for a rich and flavorful dish that pairs perfectly with steamed rice. Coconut Shrimp and Pineapple Skewers are a tasty and fresh dish that are great for a summer barbecue. Coconut Shrimp Tacos offer a fun twist on traditional tacos, combining crispy shrimp with fresh toppings. Coconut Shrimp Salad is a great choice if you’re looking for something light. It has greens and the sweet crunch of coconut shrimp. Last but not least, you have to try Coconut Shrimp with Mango Salsa. Its tropical flavors will take your taste buds to a beachside paradise. Want to share your tips and tricks for cooking frozen coconut shrimp? Join the discussion in the.
Was this page helpful?
Read Next: How To Cook Frozen Brisket