In this post I show you how you can make baked ham yourself. With a moderate effort you achieve a super tasty result.
You can be sure of what’s in your baked ham because you know where the meat comes from when you make it yourself. These are exactly the things I love about homemade products.
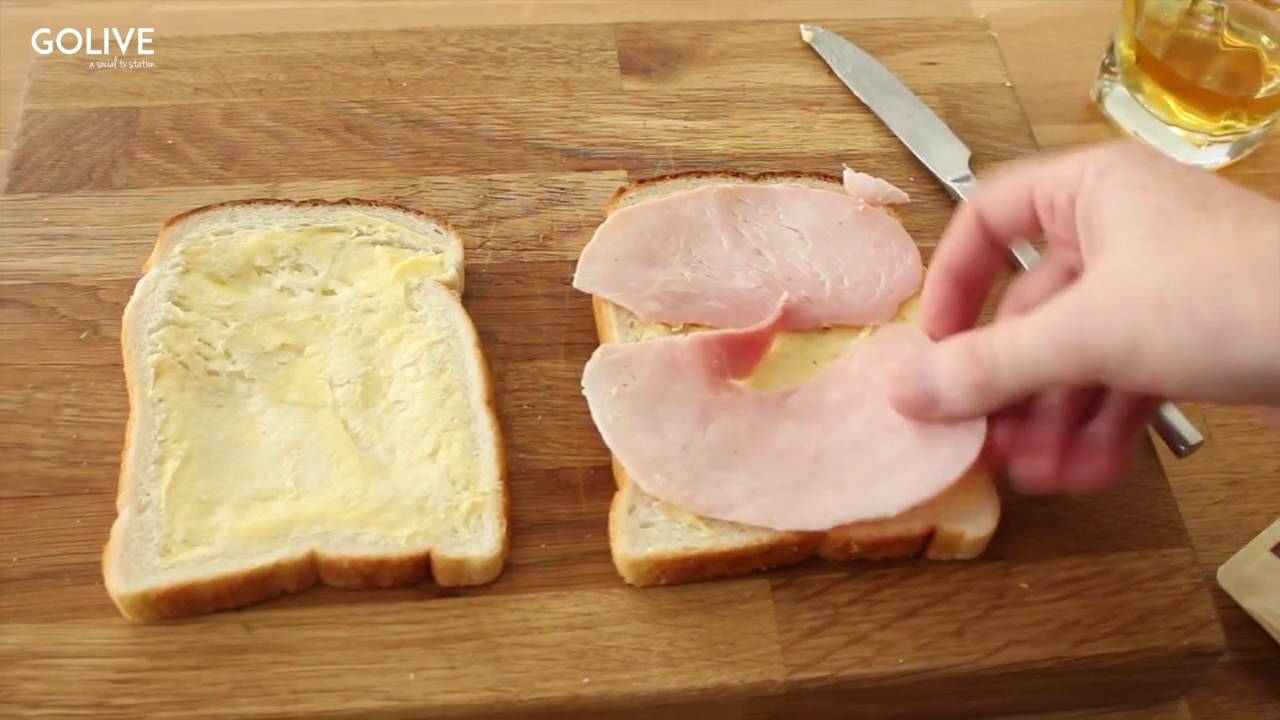
A baked ham on a fresh loaf of bread tastes great and is a nice change from the usual ham. You can eat it cold or warm. Both variations are super good.
If you want to learn more about ham, I have written everything you need to know in my book about ham.
Here you can find the complete baked ham recipe as a video or to read through.
As a busy mom, having easy sandwich ingredients like cooked ham on hand is a lifesaver for quick lunches and dinners. But while buying pre-cooked deli ham is convenient, I’ve found cooking your own ham at home yields even better flavor at a fraction of the cost!
Over the years, I’ve perfected my technique for cooking moist, juicy ham to slice up for sandwiches. In this post, I’ll share my simple, foolproof process for how to cook a ham that’s delicious in sandwiches. With just a few basic steps, you’ll have high-quality cooked ham ready for easy sandwiches all week long.
Why Cook Your Own Ham for Sandwiches?
Here are some of the biggest benefits of cooking ham yourself rather than buying deli ham
-
Better flavor – You control the seasoning and smoking process to get just the flavor you want.
-
No preservatives – Deli ham contains preservatives to keep it shelf-stable, Home cooked is just natural pork and seasoning
-
More economical – Buying a whole ham is cheaper per pound than packaged deli ham
-
Custom slicing – Cut your ham as thick or thin as you like for sandwiches.
-
Versatility – Use bone-in hams for flavor, boneless for easier carving.
-
Prep ahead – Cooked ham keeps for weeks in the fridge for grab-and-go sandwiches.
Ingredients for Cooked Ham
Cooking your own deli-style ham at home only requires a few ingredients:
-
Boneless or bone-in ham – Choose whatever size works for your needs, from a petite 3 lb ham to a massive 20 pounder.
-
Dry cure – A mixture of salt, sugar, nitrites, and sometimes spices that flavors and preserves the meat.
-
Brine cure – A saltwater solution that also imparts flavor.
-
Smoking (optional) – Adds delicious smoky flavor if you have a smoker.
That’s it! With just pork and a few cure ingredients, you can make amazing cooked ham ready for sandwiches. Now let’s go over the easy process.
How to Cook a Ham for Sandwiches
Follow these simple steps for foolproof cooked ham every time:
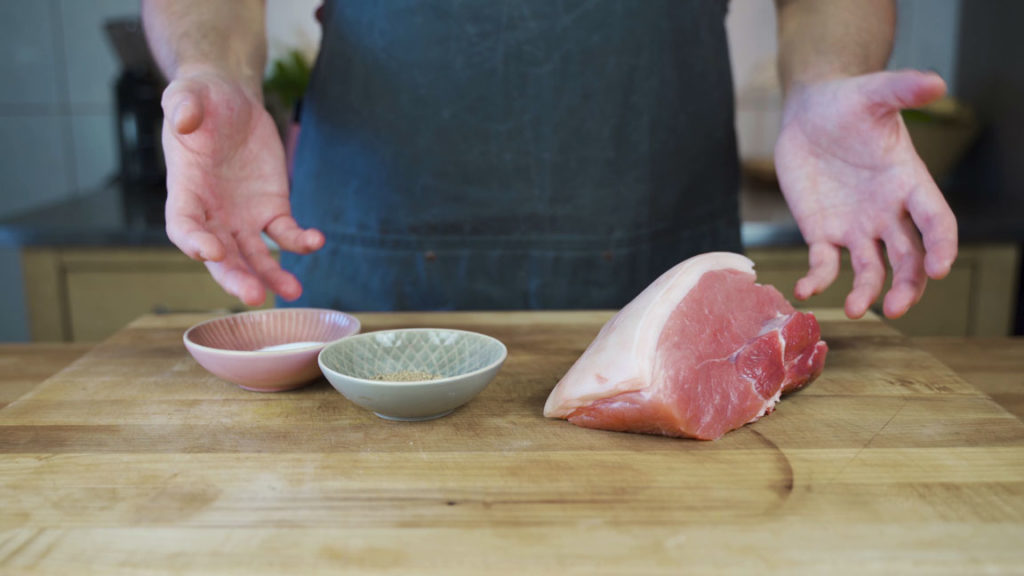
1. Select and Prepare the Raw Ham
-
Choose bone-in for more flavor or boneless for easier carving.
-
Remove skin and excess fat. Score the fat in a diamond pattern.
-
Rinse ham and pat thoroughly dry.
2. Cure the Ham
-
Combine dry cure ingredients and thoroughly coat ham.
-
Or submerge in brine cure for days to weeks.
-
Curing time depends on ham size. Follow recipe precisely.
3. Cook the Ham
-
Roast in the oven at 325°F until internal temperature reaches 155°F.
-
Or boil in simmering water for 20-25 minutes per pound.
-
Bone-in and larger hams take more time.
4. Rest and Carve the Ham
-
Allow to rest for at least 30 minutes before slicing.
-
Carve in whichever size pieces you prefer for sandwiches.
-
Store leftover cooked ham wrapped in fridge for 5-7 days.
5. Enjoy Delicious Sandwiches!
-
Pile thick, juicy ham slices onto your favorite bread or rolls.
-
Add cheese, lettuce, tomato, mustard – whatever you love!
Now that you know the basic process, let’s get into more detail on each step.
Step 1: Select and Prepare the Raw Ham
Choosing the right ham and proper prep are crucial first steps:
Pick a Bone-In or Boneless Ham
-
Bone-in has more flavor but bone makes carving tricky. Go for boneless if easy slicing is priority.
-
For boneless, choose a cured, skinless “deli-style” ham sold fully cooked.
-
Opt for 7-10 lbs to start. Size up as you get more comfortable.
Remove Skin and Trim Fat
-
Skin provides no flavor benefits when cooking. Use a knife to slice it off.
-
Trim excess hard fat, leaving about 1⁄4 inch.
-
Optional: Score remaining fat in a diamond pattern for appearance.
Rinse and Dry the Raw Ham
-
Rinse under cool water to remove any bone dust, blood, etc.
-
Pat extremely thoroughly dry with paper towels. Any moisture can ruin curing.
With your ham selected and prepped, it’s ready for the all-important curing process.
Step 2: Cure the Ham
Curing is what gives the ham its signature flavor, color, and preservation. There are two main methods:
Dry Curing
-
Combine curing salts, sugar, and spices. Thoroughly coat and pack ham.
-
Cure in the refrigerator anywhere from 7-28 days depending on size, flipping periodically.
-
Discard dry cure mixture after curing.
Wet Brining
-
Submerge ham in a saltwater solution with other flavorings for days or weeks.
-
Brine must fully cover ham. Weigh it down if needed.
-
Discard brine solution after finished curing.
Either method infuses the ham with flavor and curing salts for great taste. Follow recipes precisely for best results.
Step 3: Cook the Ham
With the curing complete, it’s time to cook the ham:
Oven Roasting
-
Place cured ham in a roasting pan, fat side up.
-
Cook at 325°F until internal temp reaches 155°F.
-
Bone-in and bigger hams take longer – about 18-20 minutes per pound.
-
Baste periodically with pan juices or glaze.
Simmering/Boiling
-
Submerge cured ham fully in a large pot of water.
-
Bring to a boil then reduce to a gentle simmer.
-
Cook 20-25 minutes per pound until internal temp of 155°F.
-
Makes a nice broth for soup!
The oven and stovetop methods both yield delicious, juicy ham ready for sandwiches.
Step 4: Rest and Carve the Ham
After roasting or boiling, a rest is essential:
-
Allow the cooked ham to rest for at least 30 minutes, tented with foil.
-
This allows juices to redistribute for moist, tender meat.
-
Once rested, use a sharp knife to carve and slice pieces for sandwiches.
-
Store leftovers wrapped in plastic wrap or butcher paper in the fridge for 5-7 days.
Step 5: Make Delicious Sandwiches!
Now the fun part – turn that beautiful home cooked ham into crave-worthy sandwiches:
-
Pile thick slices on your favorite bread, rolls, biscuits, etc.
-
Get creative with toppings! Some delicous combos are:
-
Ham, Swiss, lettuce, tomato, and honey mustard
-
Ham, cheddar, pickle, onion, and chipotle mayo
-
Ham, peppers, spinach, red onion, provolone, and Italian dressing
-
-
Grilled ham and cheese is always a winner too!
Frequently Asked Questions
What’s the best ham for sandwiches?
Look for a cured, pre-cooked boneless ham sold as “deli-style” for easy slicing. Avoid spiral cut hams, as the slices won’t hold together as well.
How long does cooked ham last refrigerated?
An uncut cooked ham keeps 5-7 days refrigerated. Once sliced, it lasts 3-5 days. Freeze slices up to 2 months.
Can I speed up curing time?
It’s not recommended, as the salts and seasonings need sufficient time to properly penetrate the meat. Follow your recipe’s times.
Enjoy Your Own Delicious Deli-Style Ham
With these simple steps, you can skip the deli counter and enjoy affordable, flavorful ham sandwiches anytime. Cooking your own ham gives you control over the ingredients, flavors, and slicing. While it does require some planning and prep work, the effort pays off in homemade taste and nutrition.
Equipment for making baked ham
Roasting pan
For the baking you ideally have a roasting pan. Alternatively, you can use only aluminum foil.
Making your own baked ham- What do you need?
Ingredients per kg
- 1 kg ham from the bottom shell ideally with rind
Spices for the curing mixture:
You can also cure the ham with other herbs or spices. I, personally, prefer it more “puristic”.