Salmon roe, also known as fish eggs or caviar is a delicious and luxurious ingredient used in many cuisines around the world. When freshly harvested, salmon roe has a delicate flavor and pops pleasantly when eaten. However fresh salmon roe only lasts for a day or two before spoiling. Luckily, there is an easy way to extend the shelf life of salmon roe – curing it!
Curing salmon roe is a simple process that anyone can do at home with minimal ingredients and equipment The curing process allows the salmon roe to last for up to two weeks when properly stored Cured salmon roe delivers that same bursting, salty-sea flavor that fresh roe provides. Read on to learn everything you need to know about curing salmon roe at home.
What You Need to Cure Salmon Roe
Curing salmon roe requires just a few basic ingredients:
-
Salmon roe: You’ll need about a pound of fresh, raw salmon roe that still has its membranes on it. This is sometimes called a salmon skein.
-
Salt – Use kosher or sea salt, not regular iodized table salt.
-
Water – Use distilled or boiled and cooled water.
-
Curing vessel – A glass, ceramic, or stainless steel bowl or container. Avoid reactive metals like aluminum.
-
Cheesecloth or mesh strainer
-
Glass jar for storage
That’s it! With just those few ingredients and items, you’ll be ready to cure salmon roe.
Step-by-Step Instructions
Follow these simple steps to easily cure salmon roe at home:
Step 1: Rinse the Salmon Roe
Rinse the salmon skein under cool running water to wash away any blood or impurities from the outside. Be gentle when handling the delicate membrane sack.
Step 2: Remove the Eggs from the Membrane
Place the salmon skein in a large bowl filled with cool water. Gently peel back the membrane with your fingers to release the individual salmon eggs into the water. Take care not to burst the eggs.
Once all the eggs are freed, discard the membrane sack. Drain the water and refill the bowl with fresh, cool water. Let the eggs sit briefly in the clean water.
Step 3: Rinse the Eggs
Transfer the salmon eggs into a fine mesh strainer. Rinse thoroughly under cool running water, stirring gently to wash away any remaining bits of membrane or tissue.
Repeat the rinsing process 2-3 more times until the water runs clear and eggs are clean. Drain well after the final rinse.
Step 4: Make the Curing Brine
In a nonreactive curing vessel, combine 1 cup of kosher salt with 3 quarts of boiled then cooled water. Stir to dissolve the salt completely.
For Japanese-style ikura, you can make a soy sauce brine. Simply replace 1 cup of the water with an equal amount of soy sauce. You can also add 1 tablespoon each of sake and sugar.
Step 5: Cure the Roe
Add the rinsed salmon eggs to the salt or soy sauce brine. Make sure the eggs are fully submerged.
Let the eggs cure in the refrigerator for 30 minutes for a light salt cure. For stronger flavor, cure for 1-2 hours.
For soy sauce ikura, cure 12-24 hours. The longer time infuses more umami into the roe.
Step 6: Rinse and Drain
After curing, drain the brine from the roe and discard. Rinse the cured eggs several times under cool water to remove excess surface salt.
Give a final drain in a mesh strainer or colander.
Step 7: Store and Serve
Transfer the cured salmon roe to a clean, airtight glass jar or container. Seal and store in the refrigerator.
The cured roe will keep for up to 2 weeks.
To serve, spoon the roe over rice, toast points, boiled potatoes, blini, or your favorite dishes!
And that’s it! With this easy curing technique, you can enjoy delicious salmon roe for weeks. The curing process firms up the delicate eggs and concentrates the distinctive salmon flavor.
Tips for Curing Salmon Roe
Follow these tips for getting the best results when curing salmon roe at home:
-
Look for bright orange skeins with big, plump eggs. Pale or broken skeins may be lower quality.
-
Work quickly and gently to keep the fragile eggs intact.
-
Cure roe in the refrigerator or a similarly cool environment around 40°F to prevent spoilage.
-
Glass or ceramic vessels are ideal for curing, as reactive metals can discolor the roe.
-
Rinse cured roe well to remove excess surface salt for a balanced salty-seaflavor.
-
Store cured roe in the coldest part of the refrigerator, avoiding the door.
-
Consume cured roe within 2 weeks for best quality and freshness. The eggs will gradually break down over time.
-
If roe seems too salty, briefly soak in cool water to gently desalinate.
Delicious Ways to Serve Cured Salmon Roe
The briny pop and creamy texture of cured salmon roe makes it a versatile ingredient. Here are some delicious ways to eat cured roe:
-
Ikura don – Salmon roe over sushi rice with a dollop of wasabi
-
Rice bowls – Spoon roe over fried rice or rice pilaf
-
Eggs – Top smoked salmon deviled eggs or scrambled eggs
-
Toast – Pile on bagels, crackers or crostini
-
Salads – Add to grain or potato salads
-
Seafood – Complement smoked fish, oysters, or sashimi
-
Potatoes – Garnish mashed, roasted, or hash browns
-
Pizza – Scatter over pizza bianca just before serving
-
Pasta – Toss with spaghetti, gnocchi, or linguine
-
Vegetables – Adorn roasted beets, asparagus, or avocado
With a little creativity, the possibilities are endless for enjoying cured salmon roe!
Frequently Asked Questions
Here are answers to some common questions about curing salmon roe:
What type of salmon roe is best?
Wild salmon varieties like King, Sockeye, and Coho generally produce the best quality roe. Farmed salmon may have smaller, paler eggs.
Where can I find salmon roe to cure?
Ask your local fishmonger, purchase roe from online seafood retailers, or get it straight from the source if you know salmon fishermen.
How long does cured salmon roe last?
Properly cured and stored roe will last 1-2 weeks refrigerated. Cured roe does not freeze well.
Can I adjust the curing time?
Yes, you can cure roe anywhere from 30 minutes to 24 hours depending on your taste preferences. Longer equals more intense flavor.
What should I do if my cured roe is too salty?
If the cured roe is overly salty, you can briefly soak it in a bowl of cool water to gently desalinate it. Drain and pat dry before serving.
Enjoy Delicious Cured Salmon Roe
With wild salmon populations threatened worldwide, cured salmon roe is a rare delicacy. However, if you’re lucky enough to get your hands on some high-quality salmon skeins, you can easily cure the roe at home. In just a few simple steps, transform fresh salmon eggs into incredible cured roe.
Making your own cured roe allows you to control the flavors and quality. Share this tasty treat with family and friends or keep all the popping, salty, umami goodness for yourself. However you choose to enjoy it, cured salmon roe is a sublime culinary experience.

How to Make Caviar from Roe | Fish Eggs:
I’ve always loved caviar. It has a slightly briny taste from the sea and a unique texture from the fish eggs. When you first put them loose on your tongue, they taste salty, and then when they pop open, they blast your taste buds with flavor. It’s not easy to find recipes or instructions that explain how to make caviar from fish eggs. I’m sure you’ve looked this up on the internet and seen how to make fish eggs into bait. This is not the technique you want to follow if you want to consume the resulting fish eggs. This recipe teaches you the culinary technique of Curing Salmon Roe, transforming the fish eggs into caviar.
This is a cooking technique (or “How To”) that will become a great base recipe because it shows you how to make caviar from salmon roe (eggs). If you fish for salmon or know someone who does, ask them if you can have their roe. Roe is only found in female salmon. If you can’t do this, call your local fishmonger in May, which is salmon season, and ask them to get you some. Curing Salmon Roe is the same as making caviar. The roe comes in egg sacks, also called a skein. The recipe is written for one skein, but it can be changed to fit as many skeins or egg sacks as you have on hand.
This culinary technique can be used with all types of pacific wild salmon (King [Chinnock], Silver [Coho], Red [Sockeye], Pink [Humpy] or Chum [Dog]). Not that the name would make you think so, but Chum salmon has some of the best roe to make caviar, as their egg sacks or skeins are full-flavored and large in size. It is important to also know where your salmon came from if it is wild salmon vs farm salmon and the variety of the salmon. Check out this link on salmon to understand this topic more.
Recently I have been asked many times about freezing the caviar. I haven’t tried this with this recipe, but I have made this Curing Salmon Roe recipe with frozen skeins or egg sacks before. Before making this recipe, I would put the skein or egg sack in the fridge for at least 24 hours to thaw. Once you’re done fishing, you could wash and dry the skeins or egg sacks, then freeze each one separately, making sure to get rid of as much air as you can. This would make it easier to make a lot of caviar at once, and the caviar would taste better. Most commercial examples of caviar are very salty. This is what made me come up with this recipe and the amount of salt to water, with less salt. Because it has less salt, this caviar doesn’t last as long in the fridge. If you know that the end result will taste saltier, you can add more salt to the brine.
A single salmon skein (egg sake) will weight around a pound and make about 16 ounces of salmon caviar. To get more information on wild Alaskan salmon, please check out our friends at Copper River Salmon.
Use this Curing Salmon Roe recipe to make your own ikura sushi if you like sushi and want to make it yourself.
Makes: 1 pound of Cured Salmon Roe | Caviar. This and all my recipes are scalable.

| Servings | Prep Time |
| 16 guests | 5 minutes |
| Passive Time |
| 30 minutes |
|
|
Curing Salmon Roe
|
- One salmon skein or roe bag, or about a pound of other fish roe or eggs
- 1 cup salt, kosher do not used iodized salt
- 3 quarts of water heated to 100°F (38°C) to 115°F (46°C)
- First, put the kosher salt and 3 quarts of 100°F to 115°F (38°C to 46°C) water in a stainless steel or glass bowl that can hold 3 ½ quarts. Whisk the mixture until the salt is completely mixed. Next, either take the skein or egg sack off the fish if you bought it at a fish market or take it off the fish yourself. Run cool water over the skein to get rid of any blood that is still on the sack.
- There is a thin layer that keeps the roe inside the bag.
- Add the sack to the brine mixture.

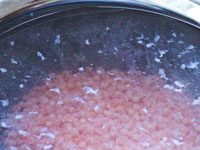
- It will change from a clear reddish orange to a cloudy orange color when you add the skein to the salt brine.
- This is the salt reacting with the membrane. Make sure the brine covers the whole skein. Let this sit for 30 minutes, to cure the eggs.
- Prepare a second bowl made of glass or stainless steel and a strainer or small colander to go in it. Take the skein out of the brine after 30 minutes. Save the brine for later use. Place the bag in the bowl and wash it under warm water to get rid of the brine.
- Next, the membrane needs to be removed. Pick up the membrane with your fingers and pull it away from you. Make sure the skein is under the bowl and strainer.
- Inside the sack are smaller membranes holding the eggs together. These also must be removed.
- After all the membranes have been taken off, the eggs need to be rinsed several times to get rid of any other membranes that might be on each one.
- A fine skimmer or other sieve will make this process.

- Once you’ve taken off all the shells and given the eggs a good rinse, drip the roe back into the salt brine you saved. The color of the eggs will turn from cloudy.
- To clear. Its like magic.

- Take the eggs out of the brine and put them in a clean glass jar. Keep this caviar in the fridge at 34°F (1°C) or below for 7 to 14 days.
- Put the jar in a container of crushed ice to keep it colder than a normal refrigerator is set to. This will help the caviar last longer. If you freeze the caviar, the texture will change.
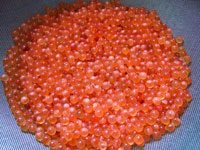
- The finished Salmon Caviar is clear and bright, and it smells and tastes like the sea. It has a light salty taste that pops when the eggs break on your tongue.
