You can smoke salmon at home with fish you bought at the store or fish you caught yourself. This easy step-by-step guide will show you how to do it. Not only is the recipe “beginner-level-easy”, but it’s also the truly best smoked salmon recipe I’ve ever eaten.
If you want to make our Smoked Salmon Pasta Salad or Smoked Salmon Cucumber Pizza, or just want to stock up on the best smoked salmon to put on a bagel with cream cheese, you’ll be hooked on smoking your own salmon.
If the thought of smoking fish scares you, I’m here to help! This easy recipe has clear steps that anyone can get through!
Some things must be done in addition to just putting salmon filets on a grill in order to smoke them. But the steps are pretty easy, and most of the time it’s just putting the fish in brine and putting it in the fridge.
If you haven’t smoked foods before, please read the whole post to learn why each step is necessary. You can use the “Jump to Recipe” button at the top of the post if you already know how to smoke.
You only need a few things that you can get at almost any store: a smoker with pellets or wood, a cooling rack, an airtight container for brining the salmon, and a baking sheet with a lip around the edge.
If you’re worried about how much time and work this recipe will take, let me give you a quick rundown of what needs to happen to make this simple smoked salmon recipe.
Now that you know how easy it is, we need to discuss the star of the show: Salmon. What kind of salmon do we smoke?.
Smoking salmon at home can seem intimidating but it gets much easier once you know how to properly prepare the fish. The key is learning how to fillet a salmon into portions ideal for smoking. With the right techniques you’ll have beautiful salmon fillets ready for curing and smoking in no time.
In this comprehensive guide, I’ll walk you through every step of filleting a whole salmon from start to finish You’ll learn
- The best salmon species to use for smoking
- Equipment needed to fillet a salmon
- How to remove pinbones
- Cutting salmon into fillets
- Trimming and portioning the fillets
- Getting the perfect size and thickness
Plus a lot of advice on how to get perfect fillets ready to be turned into tasty smoked salmon. Let’s get started!.
Step 1: Choose the Right Salmon
Because they have a lot of healthy fat, wild-caught salmon like sockeye and king make the best smoked salmon. By adding fat to the fish before smoking it, the smoke flavor can really come through.
Farm-raised Atlantic salmon also works well. Just make sure to get fresh, sushi-grade salmon from a trusted source. Poor quality fish won’t give you good results.
Aim for a whole salmon around 4 to 6 pounds. This size range provides nice thick fillets ideal for smoking after they are portioned.
Always inspect the fish before purchase. Look for:
- Clear, bulging eyes
- Bright red gills
- Firm, elastic flesh
- Scales that adhere tightly to the skin
Avoid any fish with dull sunken eyes, brown gills, dark bloodlines in the flesh, dry skin, or a strong “fishy” odor.
Step 2: Gather Your Fillet Supplies
Filleting salmon requires just a few essential tools:
-
Fillet knife – A long, thin, very sharp knife. Flexible blades work best.
-
Cutting board – Use a large board that can hold the whole fish securely. Wood or heavy plastic works best.
-
Fish gripper – Makes holding onto the fish much easier. Look for one with sturdy metal jaws.
-
Tweezers or pliers – For pulling pinbones. Needle nose pliers work perfectly.
-
Storage containers – For holding the trimmed fillets.
-
Paper towels – For keeping your workspace clean.
-
Apron – Fillet knives are razor sharp. Protect your clothes.
-
Nitrile gloves – Optional. Keeps your hands from getting messy.
Step 3: Remove the Pinbones
Before filleting, you need to remove the small pinbones running down the center of each side of the salmon. These thin, flexible bones will get in the way during the filleting process.
Start by rinsing the salmon under cold water and patting it dry with paper towels. Place the fish on its side. Work from the tail end and use your fingers or tweezers to pluck out each pinbone, pulling in the direction it’s pointing. There will be around 5 to 10 bones on each side.
Removing all the pinbones now makes the filleting go quicker and prevents damaging the flesh.
Step 4: Cutting the First Fillet
Now it’s time to start removing those fillets! Here is the process:
-
Place the fish belly-down on the cutting board with the tail facing your non-dominant hand. Use a fish gripper to hold it steady if needed.
-
Position your fillet knife at a 45° angle just above the backbone and tail fin. Make an incision all the way to the spine cutting through the ribs.
-
Turn the knife parallel to the spine. In a sawing motion, cut along the backbone from tail to head. Apply light pressure and let the sharp knife do the work.
-
Once the knife reaches the head, flip the fish over so it’s belly-up. Make another cut from the head straight down to the belly following the turn of the ribs.
-
Turn the salmon on its side. Hold the tail end securely. Carefully slice the fillet away from the ribs and belly in one piece.
-
Lay the fillet skin-side down on your cutting board. Use tweezers to remove any remaining pinbones or ribs.
Repeat these steps on the opposite side to remove the second fillet. Rinse both fillets and pat them dry, ready for trimming.
Step 5: Trim the Fillet Edges
Freshly filleted salmon will have some uneven edges that need trimming off. Here’s how:
-
Place the fillet skin-side down. Using your fillet knife, trim off any thin parts or “flaps” around the edges.
-
Make sure you leave the thick center portion intact. Discard all trimmings or reserve them for salmon patties.
-
Square off the shape of the fillet into a nice block shape with straight edges all around.
-
Turn the fillet over and repeat the trimming on the top, meaty side.
-
Rinse the trimmed fillets again. Pat them completely dry with paper towels before portioning.
Step 6: Portion the Fillets
Whole salmon fillets are quite large. For even smoking, you’ll need to portion them into smaller, uniform pieces. Here’s how:
-
Start with the skin side facing up. Measure and mark cutting lines across the fillet every 3 to 4 inches.
-
Use your fillet knife to slice cleanly through the fillet along the marking lines.
-
Repeat with the second fillet. Arrange all the portions neatly on a tray skin-side up.
-
If any pieces look uneven, trim them as needed so all portions are the same size.
Aim for portions about 3 inches wide and 1 to 11⁄2 inches thick. This size and thickness are ideal for smoking salmon.
Now the fillets are ready to brine and smoke! They’ll deliver amazing flavor and texture in the final smoked salmon.
Fillet Tips and Tricks
Follow these handy fillet tips and tricks for getting flawless, professional results:
-
Let the knife do the work. Don’t force it. Apply gentle, even pressure and let the razor-sharp blade glide through the flesh.
-
Work slowly and carefully around the ribs. They can be tricky to navigate.
-
Trim off all dark bloodline areas. This part of the flesh can taste more fishy when smoked.
-
Wipe up excess moisture as you work. A damp surface makes filleting more difficult.
-
Chill the fish before filleting if working with a whole fresh salmon. The firm cold flesh cuts easier.
-
Save the head, tails, bones, and skins to make salmon stock. Never waste any part of the fish!
-
Wrap the trimmed fillets tightly and chill before brining. Keeps them fresh for the smoking process.
-
Label fillet portions with the date before freezing. Frozen salmon fillets stay good for up to 4 months.
Ready to Become a Salmon Smoking Pro?
Now you have all the skills needed to turn fresh salmon into perfect smoked fillets.
Remember to always use ultra-sharp knives and take your time. The investment up front pays off in the end with beautiful, uniform portions ready to transform into delicious smoked salmon.
Once you master the art of salmon filleting, you can apply these techniques to other large fish like rainbow trout, snapper, or tuna. The process is very similar for all round fish with a central bone structure.
:max_bytes(150000):strip_icc()/person-loading-a-smoker-with-prepared-salmon-alaska-528230998-57ec087e5f9b586c358c9ff9.jpg)
Things to Remember When You’re Smoking Salmon
Have you ever cooked salmon and wondered what that white stuff coming out of it was? That’s albumin, and it’s safe, even if it doesn’t look very tasty.
In salmon’s raw state, albumin is a clear, liquid protein. As you expose the fish to heat, the protein coagulates to an opaque, white, semi-solid.
The more aggressively you cook the salmon, the more albumin you’ll find rising to the surface. Again, this is not a big deal, but it’s not so pretty. It also means the salmon might get a little too dry when it’s cooked.
When we smoke salmon, the slow, gentle heat should get rid of most of the albumin that we can see. Just be sure to bring the temperature up slow-and-steady. The fish filets should be brushed with maple syrup every hour after the first hour of smoking without stopping. This will get rid of any albumin that did show up.
I said it before, but it bears repeating: salmon loves to stick to the smoker rack. Please oil the skin (and skin only!!) of the salmon generously before sliding it onto your grates.
And for the love of smoked fish, please do not oil the top of the salmon. It’ll undo all that time you spent developing the pellicle on the salmon. Your end product will suffer in both texture and flavour.
How to Brine Salmon
Of all the things to brine, salmon very well may be the easiest. But why brine it at all? It’s all in the science.

When you brine or cure salmon, you do two crucial things. The first thing you do is season the salmon all the way to the middle of the filet. This helps the flavor of the whole thing.
Second, and just as important, you improve the texture by breaking down some of the muscle fibers, which makes a gel that helps the body hold on to water. This helps retain moisture during the smoking process.
In the meanwhile, the sugar in the brine is “hygroscopic”. That means it attracts water or moisture from its environment. The sugar gives your smoked fish a little sweetness and helps it keep the moisture you added when you brined it.
In other words, you keep it juicier and tastier by brining it. It takes a few more hours, but the delicious smoked salmon is well worth the wait.
The curing process is ridiculously easy. You simply whisk together cold water, kosher salt, dark brown sugar, and some aromatics.
One sliced red onion, some black pepper, and sometimes two lemon slices are used. Dissolve the sugar and salt then slide your fillets in skin side up. Place it in the fridge for 4 to 8 hours with plastic wrap or a lid that fits tightly on top.
If you like a mild flavor, you can pull the onions from the brine at the halfway mark. The onions will taste stronger in the finished smoked fish if you leave them in the brine for longer.
After brining, rinse the fish fillets a quickly to help eliminate some of the surface salt. This helps keep the salmon from being too salty.
After you brine the fish and rinse it off, you’ll need to dry it off. You might think it makes no sense to dry the fish after “moisturizing” it, but science is in charge here.
That wonderful seasoning has been added to the fish, and it would be a shame for it to evaporate while it’s being smoked. To help “seal” it in, you need to develop a pellicle.
The smoke really loves the pellicle, which is a shiny, lacquer-like layer on the outside of the salmon. It absorbs the smoke while simultaneously preventing loss of moisture in your fabulous brined salmon.
A pellicle is achieved by air-flow and cooler temperatures. Here’s how we do it.
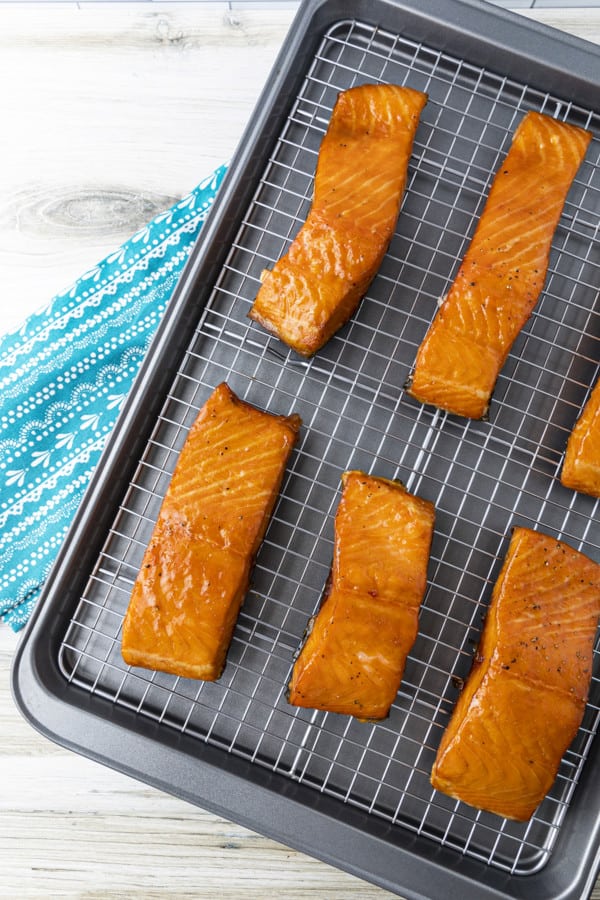
First pat the rinsed fillets with paper towels to remove excess moisture. The salmon filets are brined and patted dry. I then put the baking sheet on a wire rack and place it in front of a strong electric fan in the coolest room in my house.
Does that mean that salmon is sometimes sitting on a stool in front of a fan in my cool bedroom? Yes, it does.
In the fall and winter, you can put it in front of a fan somewhere that is at least 60ºF cooler but not frozen. It’s the combination that does the trick!.
For about an hour, while the pellicle forms, you don’t have to worry about food safety here. The salt and sugar in your brine will keep things fresh, so you can do this without worrying.
If you need to, you can put the sheet pan in the fridge (without the lid!) for up to 24 hours after making the pellicle if you need to. It’ll be just fine. Just take it out of the fridge and let it sit at room temperature for an hour before putting it on the smoker.
This is How I get PERFECT Smoked Salmon EVERY Time
Can you smoke salmon?
Smoking salmon can be a slow-moving process, but it’s well worth the effort. Smoked salmon is one of the most amazing seafood preparations on the planet, but, if you’ve never tackled this project, it can be intimidating. Relax, you’ve got this. Here’s your step-by-step guide for how to smoke salmon, the super-delicious, omega-3-rich fish.
Is smoked salmon good for you?
Salmon is a source of high-quality protein, magnesium, and selenium. In addition, it provides healthy fatty acids for the body. It contains large amounts of omega 3, which prevents cardiovascular diseases, has anti-inflammatory properties, and prevents certain types of Cancer.
How do you smoke smoked salmon?
The two popular approaches to smoking salmon are the cold-smoking method and the hot-smoking method. Hot-smoked salmon is brined briefly (for a few hours) and cooks as it smokes, typically at around 225°F.
How do you smoke salmon the day before?
Here’s how to smoke salmon: The day before (dry brine): Sprinkle the salmon fillets with salt, brown sugar, onion powder, and garlic powder ( see the recipe below for quantities). Place it on a platter uncovered in the refrigerator 4 to 6 hours. Then rinse and refrigerate it uncovered overnight. The day of smoking: Heat an outdoor smoker to 200°F.