Get ready to unleash your inner artist and craft a delightful Thanksgiving centerpiece – a charming turkey made from a humble pumpkin! This fun and easy project is perfect for families, classrooms, or anyone looking to add a touch of whimsy to their holiday décor.
Gather Your Supplies:
- A medium-sized pumpkin
- Acrylic paints in your desired colors (brown, orange, red, yellow, black)
- Paintbrushes of various sizes
- Disposable plate or palette
- Black permanent marker
- Modeling clay (optional)
- Toothpicks (optional)
- Googly eyes (optional)
- Glue (optional)
- Scissors (optional)
- Ribbon or twine (optional)
Let’s Get Crafty:
-
Paint the Pumpkin:
- Pour your chosen paint colors onto the disposable plate.
- Dip your paintbrush into the brown paint and cover the entire pumpkin with a base coat. Allow it to dry completely.
- Once dry, use a smaller brush to paint the details. You can create a classic turkey with brown feathers, an orange beak, and a red wattle, or get creative with different colors and patterns.
-
Shape the Turkey Head (Optional):
- If you want to add a 3D element to your turkey, use modeling clay to shape a head. Pinch off a small piece of clay and roll it into a ball.
- Use your fingers to shape the beak, eyes, and wattle. You can also use toothpicks to create small details like nostrils.
- Attach the head to the top of the pumpkin using glue or toothpicks.
-
Add the Finishing Touches:
- Use a black permanent marker to draw the pupils of the eyes.
- If you’re using googly eyes, glue them onto the head.
- Cut out a small triangle from red felt or paper and glue it onto the wattle.
- Tie a ribbon or twine around the pumpkin’s stem to create a festive touch.
Gobble, Gobble, It’s Time to Display Your Masterpiece:
Place your adorable pumpkin turkey in a prominent spot in your home or classroom. It’s sure to bring smiles and Thanksgiving cheer to everyone who sees it!
Tips and Tricks:
- For a more realistic look, use a variety of shades of brown for the feathers.
- You can also add other details to your turkey, such as wings, legs, or a tail.
- Get creative with the paint colors and patterns to create a unique turkey that reflects your personality.
- This project is a great way to use up leftover paint from other projects.
- If you don’t have modeling clay, you can use cardboard or paper to create the turkey head.
With a little creativity and some simple supplies, you can transform an ordinary pumpkin into a festive and fun Thanksgiving decoration. So grab your paints, gather your family, and get ready to gobble up the fun!
Step 1: Dice Those Foods
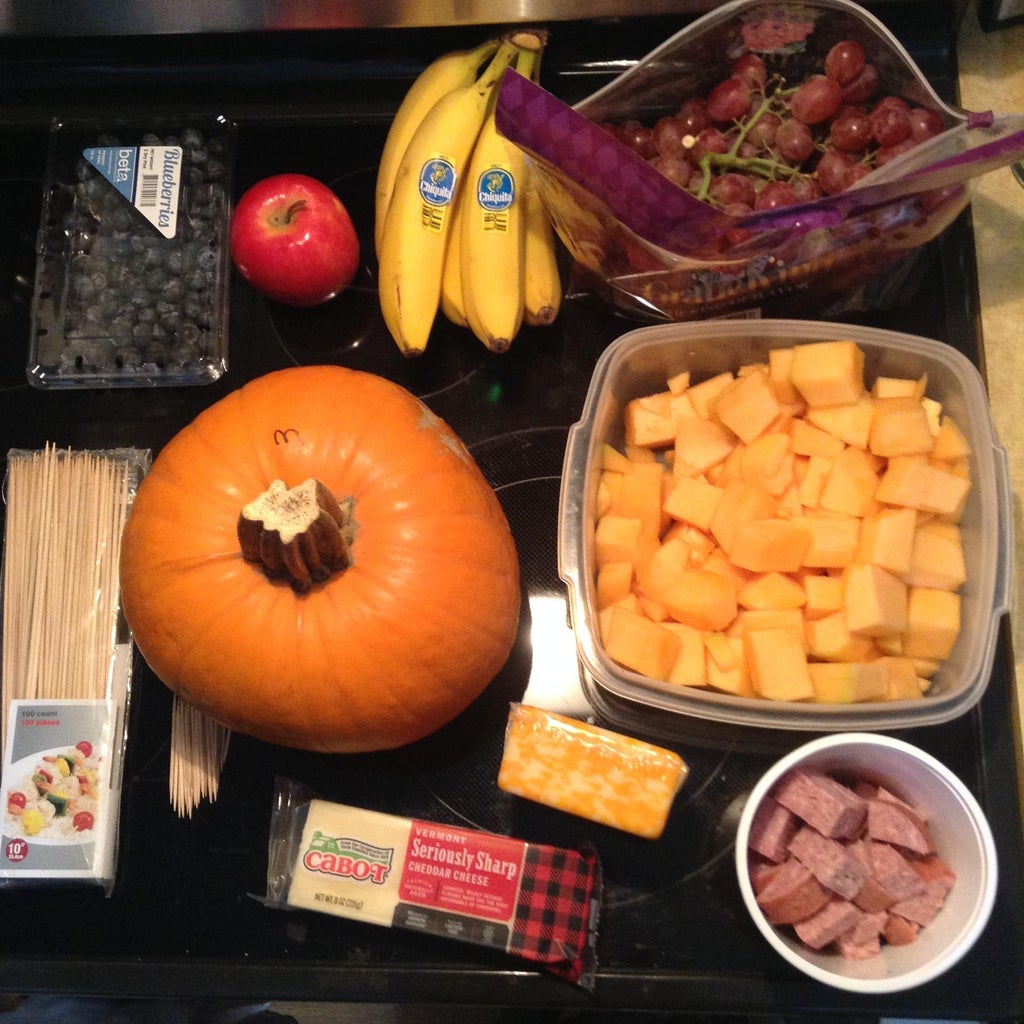
First you will need to find a nice pumpkin for the base of your turkey. A medium pie pumpkin seems to work best for me, but you can change the size of your pumpkin to suit the number of people attending.
Next, choose whether you want to make a turkey that has cheeses, meats, fruits, or a combination of these, or one that has something completely different. I used both fruits and meats/cheeses.
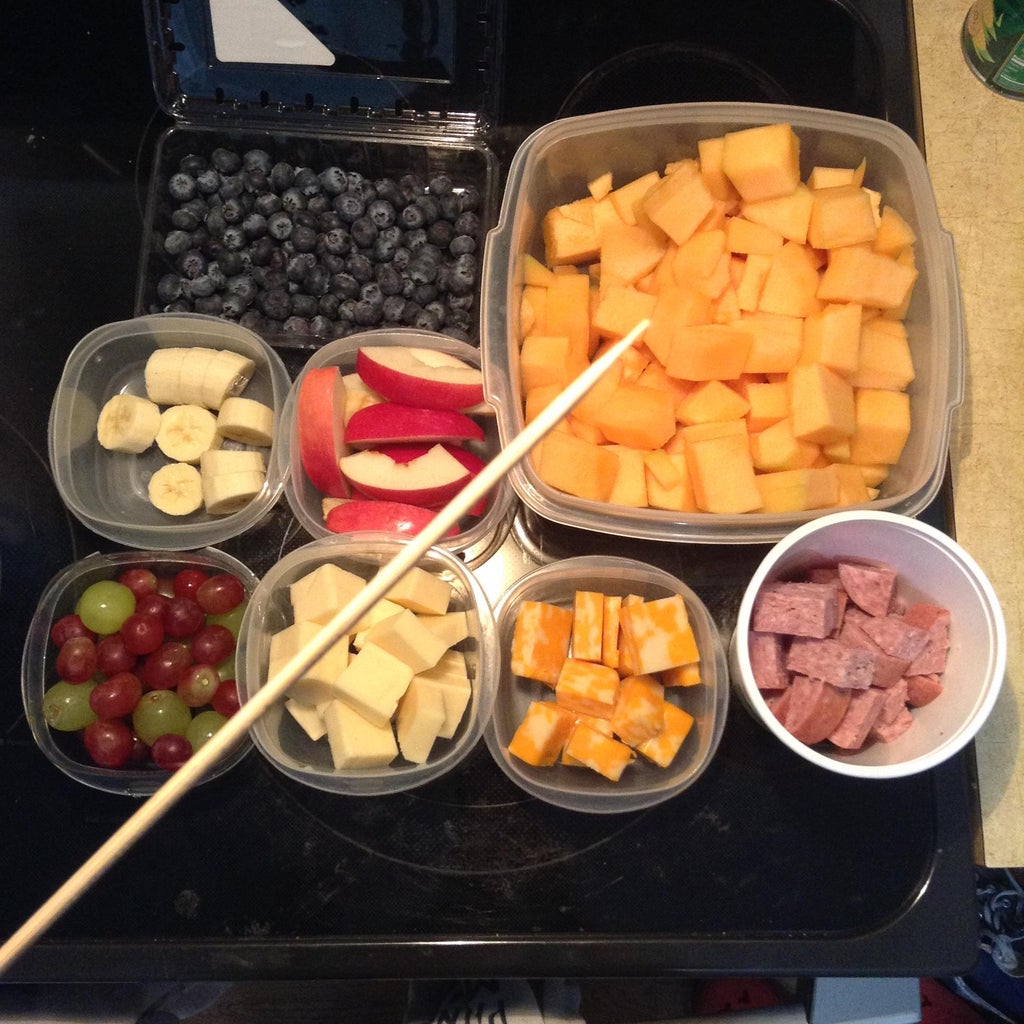
Gather all your selected foods. I selected summer sausage, white cheddar cheese, Colby jack cheese, blueberries, bananas, cantaloupe, and red and green grapes. Cut the cheeses, sausage and large fruits into roughly 1″ cubes, slice the apple and banana.
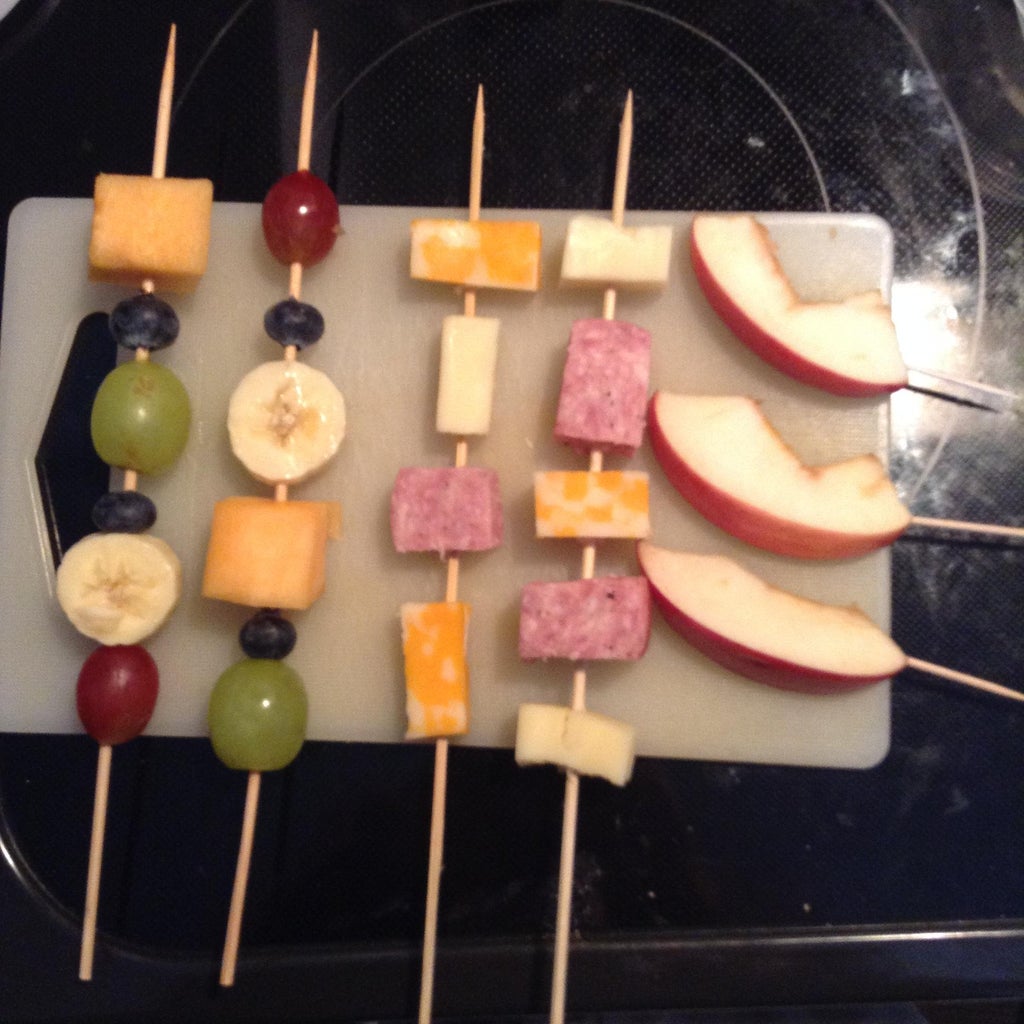
Step 2: Skewer Those Dice

Now you have to figure out how many skewers you’ll need, taking into account your pumpkin’s size and the feather density. The best way to figure this out is to either draw your placement or pre-poke your pumpkin.
Using either method, turn your pumpkin over and choose which side will be the top of your turkey. Next, choose whether to use the stem as the face or attach a different piece for it. Orient your pumpkin with the “face” facing you and the top facing up. With a sharpie, mark dots at least an inch apart across the top of the pumpkin. Once you have one row of dots, add another row a few inches closer to the front of your pumpkin, spacing the dots apart from the first row. This will tell you how many skewers you will need. Alternatively stab the empty skewers into the pumpkin, remembering to leave space for the fruits between skewers. If you have a larger gathering you can always add more rows of skewers.
Once you have figured out how many skewers you will need, add the food pieces to them. I decided to do one row of fruit and one row of meat/cheese. In order to pierce the pumpkin and hold it while eating, don’t forget to leave a few inches on each end of the skewer.
Since apple slices are already pretty tall, I used them as a front row of shorter feathers. Slice one apple and stab with a toothpick, leaving about half the toothpick out of the apple slice.