Looking for a healthier alternative to traditional pepperoni? This recipe for low-fat turkey pepperoni using UMAi Dry Salumi Casing and spices is the perfect solution!
This guide combines the best of both worlds: the detailed instructions from the UMAi Dry website and the visual clarity of the YouTube video
Prepare yourself for a delectable journey into your kitchen as you make your own fermented, slow-dried turkey pepperoni!
Ingredients:
Essential Basic Ingredients:
- UMAi Dry Sausage Kit 32mm: Includes 30 ft of UMAi Dry Salumi Casing, Powdered Dextrose, #2 Curing Salt, and Bactoferm T-SPX Starter Culture (for 300 lbs of meat with 18-month expiration date)
- Turkey thigh meat 5 lb / 2200g (dark meat with skin on)
- T-SPX Starter Culture 1/4-1/2 tsp (add more as culture approaches expiration)
- Powdered Dextrose 1/2 -1 tsp (feed your starter culture generously)
NO MATH Easy Method:
- UMAi Dry Pepperoni Spice Blend
- UMAi Dry Premixed Curing Salts Blend for 5 lb Recipe
OR
MATH Method:
- #2 Curing Salt
- Black Peppercorns
- Crushed Red Pepper Flakes
- Fennel Seeds
- Garlic Powder
- Paprika
- Cayenne Pepper (optional)
- White Wine (optional)
⏱️ Prep Time: 15 minutes
Author: UMAi Dry Team
Video Tutorial:
For a visual guide, check out this helpful YouTube video: https://m.youtube.com/watch?v=uow3mVtMH7k
Instructions:
1. Chill the Turkey Meat:
- Place the turkey thigh meat in the refrigerator for at least 30 minutes to ensure it’s properly chilled before grinding.
2. Grind the Turkey Meat:
- Grind the chilled turkey thigh meat through a 3/16″ or 4.5mm grinding plate.
3. Mix the Cure, Spices, and Starter Culture:
- In a large bowl, combine the ground turkey meat with the curing salt, spices, and starter culture. Mix thoroughly until everything is evenly distributed.
4. Stuff the Casings:
- Attach the UMAi Dry Salumi Casing to your sausage stuffer and begin stuffing. Avoid overfilling the casings.
5. Ferment the Sausage:
- Place the stuffed sausages in a single layer on a drying rack in a cool, humid environment (ideally 60-70°F and 70-80% humidity). Ferment for 24-48 hours.
6. Dry the Sausage:
- After fermentation, move the sausages to a cool, dry environment (ideally 55-60°F and 60-70% humidity). Dry for 7-10 days, or until the sausages reach your desired firmness.
7. Enjoy!
- Your delicious low-fat turkey pepperoni is now ready to enjoy! Slice it thin and serve on pizzas, sandwiches, or as a delicious snack.
Tips:
- For a more intense flavor, you can add a splash of white wine to the meat mixture.
- If you don’t have a sausage stuffer, you can use a funnel to stuff the casings.
- Be sure to monitor the temperature and humidity during the drying process to ensure the sausages dry properly.
- Store the finished pepperoni in the refrigerator for up to 2 weeks.
Making your own low-fat turkey pepperoni is a fun and rewarding experience. You can quickly and simply make delectable, healthful pepperoni in your own kitchen with UMAi Dry Salumi Casing and spices. So gather your supplies, adhere to these guidelines, and then prepare to savor the results of your hard work!
How To Shape/Stuff Pepperoni
We’re giving you instructions for two ways to make the pepperoni. One option involves no special equipment at all. The other involves the use of a sausage stuffer.
How To Make Pepperoni With A Sausage Stuffer

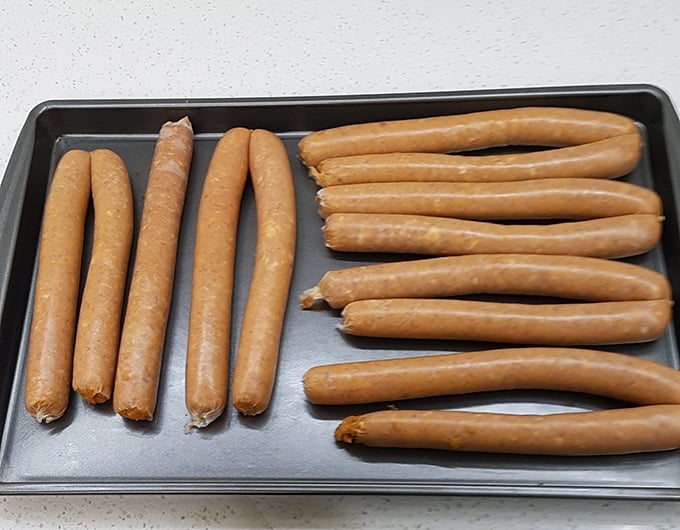
The above picture is what your pepperoni sticks will look like before you cook them.
Whether you have a Hand Crank Sausage Stuffer, or a KitchenAid Attachment, you should read the instructions that came with your equipment, and buy the casings that they recommend in terms of size and material. We use collagen casings, like these.
It’s a good idea to read the instructions on the casings that you get as well. If they don’t have instructions, read the reviews on Amazon. You’ll discover if the casings need to be moistened in advance and get useful guidance on how to cook the pepperoni without them breaking.
As mentioned, you should read the instructions on your sausage-stuffing machine. But basically, you’ll be putting your meat mixture into the sausage stuffer meat compartment. Then you’ll put the casing on the tube that the meat comes out of. Finally, you have the option of controlling the meat’s extraction with the hand crank or having the machine do it for you.
It’s your responsibility to control the amount of casing you feed at a time so that the sausage stuffing is evenly thick. Do not overstuff the sausages. This could lead to the casings splitting while being stuffed or even after you try to cook them.
Be aware that feeding the meat into the casing takes some practice. You must first determine how much meat fits through the casing before twisting it to form individual sausages as opposed to one long, single sausage. Squeeze the meat through to make a nice indentation, then twist the casing.
You will get the hang of it though. It just takes a little bit of practice. Be sure to take pictures of your first pepperonis coming out of the stuffer though. It’s an achievement, and you’ll be amazed at how much better you get at it.
After you’ve stuffed the pepperoni, arrange it in the refrigerator for 24 hours in a single layer. If you pile it, the top ones will squish the bottom ones. To ensure the cure penetrates completely and distributes more evenly, the pepperoni must be refrigerated for an entire day. Some of your pepperoni may not turn pink or red if you don’t let it stay in the refrigerator because the curing process might not have reached that area.
Low Fat Turkey Pepperoni w/ UMAi Dry® Dry Sausage Kit
FAQ
What makes turkey pepperoni?
How is pepperoni made step by step?
Are turkey pepperoni healthy?
Can you get turkey pepperoni?
