Growing brine shrimp from eggs is a simple and cheap way to make sure your aquarium fish always have healthy, live food. To create a “grow-out” system of your own, youll need a few simple supplies. Setup is simple—especially if youre a seasoned aquarist.
Brine shrimp, also known as sea monkeys, are a popular live food source for aquarium fish While brine shrimp eggs are readily available in stores, hatching and raising brine shrimp yourself can be an educational and rewarding experience.
Adult brine shrimp are nutritious snacks that most aquarium fish love. Plus, home raised brine shrimp are free of parasites and diseases that may be present in store-bought eggs or live brine shrimp. Raising brine shrimp is relatively simple if you follow some key steps.
Benefits of Raising Your Own Brine Shrimp
Here are some of the top reasons for incubating brine shrimp eggs and nurturing them to adulthood in your home
-
Economical – Once you purchase brine shrimp eggs, you can hatch endless batches of baby brine shrimp at virtually no cost. Much cheaper than buying live brine shrimp.
-
Convenience – Freshly hatched brine shrimp are available anytime without leaving home. No more emergency trips to the pet store.
-
Healthy – You control the environment, food, and water parameters for your brine shrimp. This means they stay free of diseases, parasites, and contamination.
-
Fun – Watching brine shrimp hatch and grow can be an educational and entertaining hobby. Kids love observing the shrimp through their life stages.
Step 1: Buying and Hatching Brine Shrimp Eggs
Brine shrimp eggs are available at most pet stores and online. When buying brine shrimp eggs, look for eggs marketed specifically for aquarium use. Make sure the eggs have not expired.
Hatching brine shrimp, also called artemia, is a simple process:
-
Fill a hatchery container with non-chlorinated saltwater, heated to ~82°F. Instant ocean salt mix works well.
-
Add brine shrimp eggs and aerate the water with an air pump and stone.
-
Within 24 hours, the eggs will hatch into tiny free-swimming nauplii about 0.08 inches long.
-
After 48 hours, turn off the air pump and light. The nauplii will gravitate to the light source – collect them here with a pipette.
Now you have a fresh batch of newly hatched brine shrimp ready to grow into adults!
Step 2: Setting Up the Grow-Out Container
To raise brine shrimp to maturity, you’ll need a suitable grow-out container. Here are some tips:
-
A clean 5-10 gallon tank or bucket works well. Ensure it’s food-grade plastic safe for live animals.
-
Fill with non-chlorinated saltwater at a specific gravity of 1.018. Instant ocean salt mixes simplify achieving the correct salinity.
-
Use an air pump with air stone(s) to continuously oxygenate the water and keep food suspended.
-
Position near a light source to nourish any microalgae growth. This supplements the brine shrimp’s nutritional intake.
-
Place a filter on the tank to keep water clean. Sponge filters work well for gentle filtration.
Step 3: Introducing the Baby Brine Shrimp
Once your grow-out container is prepped, slowly acclimate and add your hatched brine shrimp nauplii. Here’s how:
-
First, rinse the nauplii with saltwater matching the container’s salinity to remove any egg casings.
-
Next, float their hatching container in the grow-out tank for 15 minutes to equalize temperatures.
-
Finally, gently pour the nauplii into grow-out tank.
Avoid pouring nauplii directly from the hatchery into the new environment. This temperature and salinity shock can kill them. Proper acclimation is key!
Step 4: Feeding the Growing Brine Shrimp
Feeding brine shrimp a nutritious diet is vital for them to grow and thrive in your system. Here are some feeding best practices:
-
Feed them 2-3 times daily while they are rapidly growing from nauplii to adults.
-
Use a powdered brine shrimp food or make your own mix, like blended spinach and spirulina powder.
-
Feed just enough that some powder remains suspended in the water to graze on. Avoid overfeeding.
-
As they mature, supplement with a fatty acid blend like Selco to enhance nutrition.
-
Once adults, you can reduce feeding frequency to just 1-2 times daily.
Step 5: Maintaining Water Quality
Performing weekly water changes is crucial. Here’s how:
-
Use an extra 5-gallon bucket as a transfer tank during water changes.
-
Fill transfer tank with saltwater matching the grow-out tank’s parameters.
-
Move air pump and brine shrimp to transfer tank.
-
Clean grow-out tank thoroughly and refill with clean saltwater.
-
Move brine shrimp and air pump back to grow-out tank.
Replacing 25% of the water weekly will remove waste and keep your shrimp healthy.
Step 6: Harvesting Adult Brine Shrimp
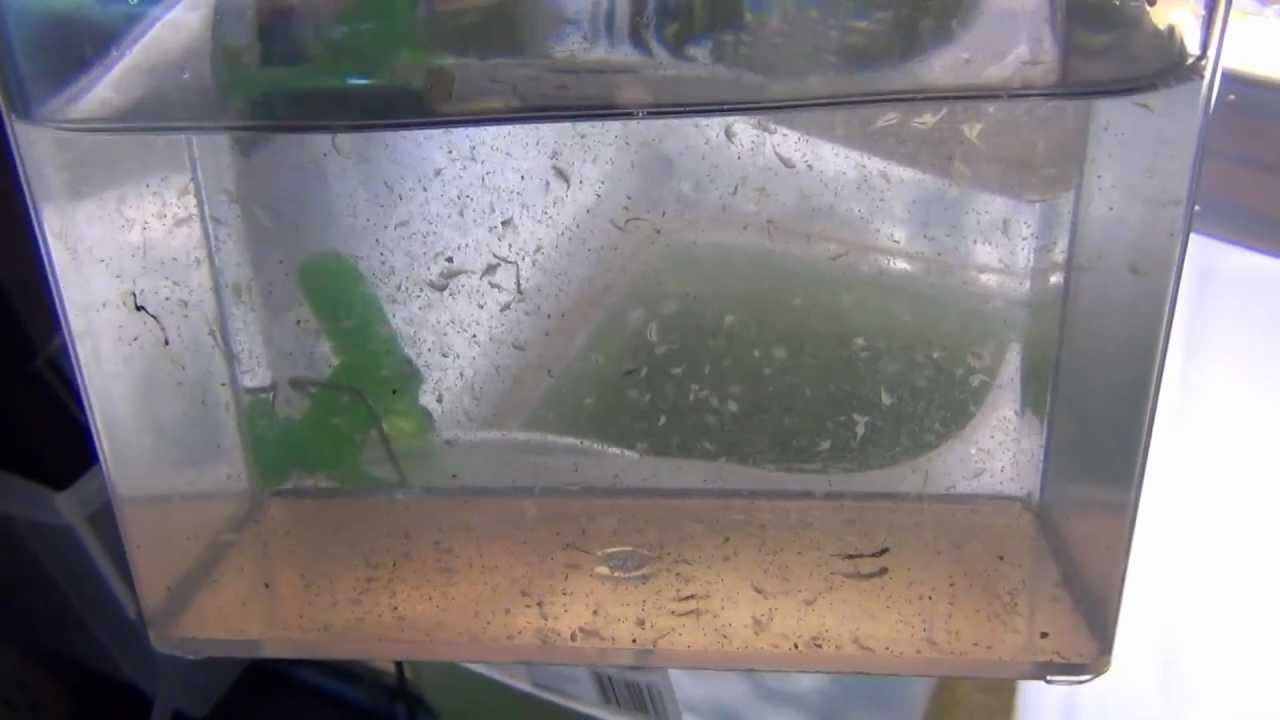
In just 2-3 weeks, your brine shrimp will grow from 0.08 inch nauplii to nearly 0.5 inch adults! Now it’s time to harvest them as nutritious fish food.
-
Turn off air pump and light for 20-30 minutes. This will cause adults to congregate at surface.
-
Use a small net to scoop adults from the surface. Transfer to a container of tank water.
-
Rinse harvested adults in tank water via nets to remove debris.
-
Feed adults immediately to your fish as a treat 1-2 times weekly.
Storing and Preserving Your Brine Shrimp
Freshly harvested brine shrimp are best fed to your fish right away. But you can preserve excess using these methods:
-
Refrigeration – Place adults in container of saltwater and refrigerate up to 3 days. Rinse before feeding to revive.
-
Freezing – Spread adults in single layer on tray and freeze. Transfer to ziplock bags. Thaw before feeding.
-
Drying – Pat adults dry with paper towel. Place in dehydrator on low temp until fully dried. Store in air-tight container.
Troubleshooting Common Brine Shrimp Problems
If issues pop up in your brine shrimp grow-out system, check here for help:
Cloudy water – Increase water changes to 50% weekly. Ensure not overfeeding. Check water parameters.
Shrimp dying – Test water parameters like salinity, temp, ammonia, nitrites. Adjust as needed.
Not growing – Increase feeding amount and frequency. Supplement diet with fatty acids. Check water quality.
Low hatch rates – Ensure eggs are not expired. Verify proper incubation temp and salinity. Rinse eggs before hatching.
Raising Brine Shrimp Can Be Simple and Fun!
While it takes some initial equipment and effort, culturing brine shrimp to adulthood can be an enjoyable and cost-effective way to produce live fish food at home. Plus, it provides great hands-on learning.
Follow these key steps, and with a little practice you’ll be an expert at hatching and growing brine shrimp in no time! Before you know it, you’ll have a sustainable population delivering regular harvests of nutritious live food your fish will love.
How to Grow Brine Shrimp
If you already have a brine shrimp hatchery set up, you will need a few things to make a grow-out system for your nauplii (baby shrimp). Although nauplii are an excellent food source for fish, they are too small to feed adult fish. To grow them bigger, you will need:
- Containers (at least two)
- Air pump and tubing
- Airstones
- Food supply for the shrimp
Prepare Food
For brine shrimp to grow, they need a steady supply of food that tastes good and is easy for these filter-feeders to eat (microscopic). There are a few yeast-based brine shrimp foods on the market, but they don’t have enough of the nutrients shrimp need to grow and build proteins.
In her book How To Raise a Successful Child, April Kirkendoll includes a great recipe for brine shrimp food. Usually, I add a drop of a liquid vitamin supplement. Just to be safe, I’ll also sometimes add a small amount of a fatty acid enrichment mix like Super Selco. Then I put it all in a small bottle that can be closed again, like one used for water or soda, and shake it really well. “.
The mixture will keep well in your refrigerator for about a week if it is sealed. Shake the container well before each feeding.
Raise Brine Shrimp Indoors to Adults, easy and almost free
How do you raise brine shrimp?
Raising tiny creatures like newly hatched brine shrimp to adulthood is quite possible but it is not especially easy. You will need a supply of RO or DI water and a salt mix made for marine tanks to start with; plus a tank to keep them in. Many of these shrimp come from waters that are highly concentrated in salts.
Are brine shrimp a good live food?
They are a good live food for all kinds of fish, when they are adults. Raising tiny creatures like newly hatched brine shrimp to adulthood is quite possible but it is not especially easy. You will need a supply of RO or DI water and a salt mix made for marine tanks to start with; plus a tank to keep them in.
How do you grow a brine shrimp aquarium?
To grow brine shrimp from eggs to adulthood, you need to keep the shrimp and their food in constant motion for best results. Use an air pump that is powerful enough to deliver a good air supply to the bottom of the grow-out container and drop one or more air stones into it to circulate the water or use an aquarium bubbler.
Can you raise brine shrimp from eggs?
Yes, you can raise brine shrimp from eggs. It’s an easy and economical way to keep a steady supply of nutritious, live food for your aquarium fish. To create a ‘grow-out’ system of your own, you’ll need a few simple supplies. Setup is simple—especially if you’re a seasoned aquarist. What Are Brine Shrimp?