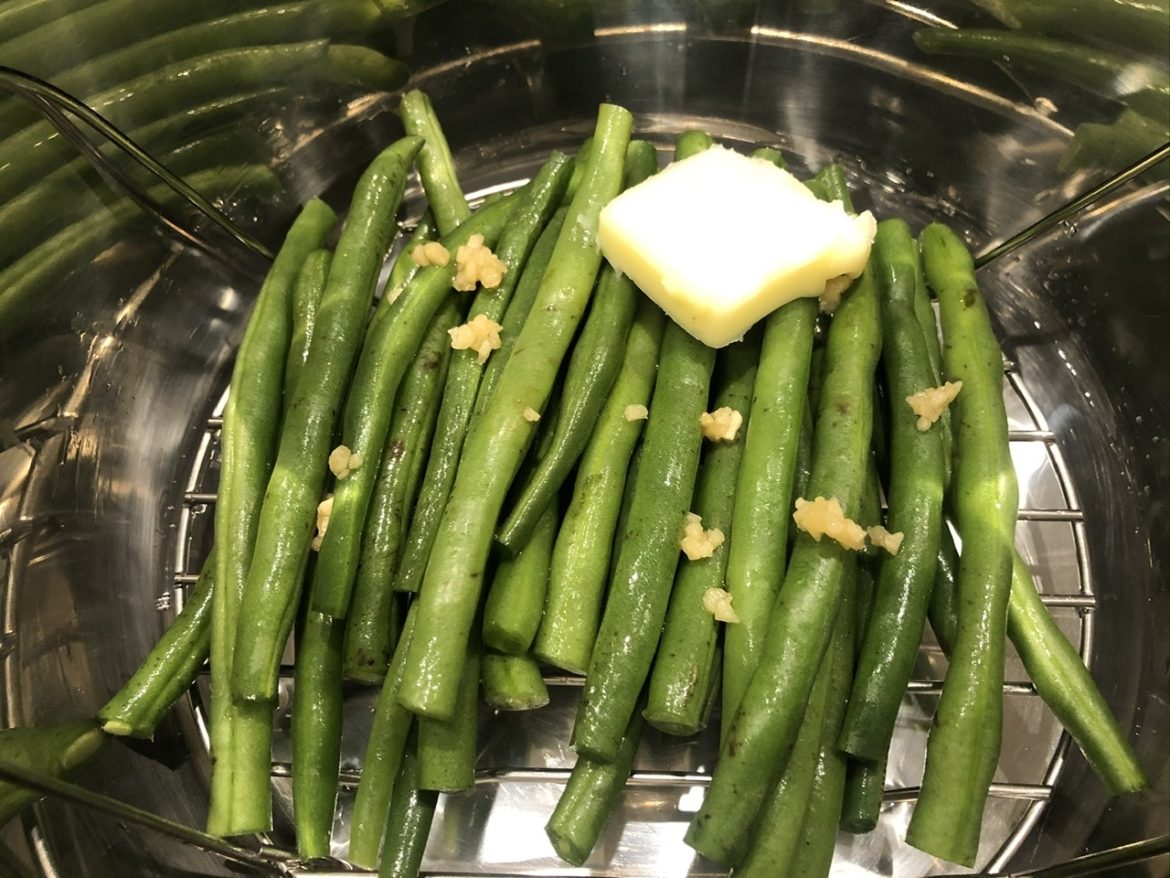
You can make these green beans in your Instant Pot in no time at all. They will make you miss Sunday dinners at Grandma’s house.
I cant believe Im about to say this, but here it goes. Green beans are a vegetable that I prefer canned rather than fresh. Im not sure what happens when theyre canned, but I love the texture. I think it’s because I like them cooked “to death” in a very porky broth! There are times and places for haricots vert, which is French for “barely cooked” green beans, but these Instant Pot green beans are not at all that. These remind me of Sunday dinner at Moms house.
As a busy home cook, I’m always looking for ways to preserve fresh produce that are fast, easy and safe. Recently, I discovered that my beloved Instant Pot can be used for canning green beans! I was initially skeptical, but after researching proper methods, I tried canning green beans in my Instant Pot and was thrilled with the results.
In this article, I’ll share everything I’ve learned about this quick, convenient canning method so you can enjoy tasty home-canned green beans without needing a separate water bath canner or pressure canner.
Canning green beans using a standard pressure canner or water bath canner can be time consuming and require extra equipment. However, the Instant Pot’s ability to reach high temperatures under pressure makes it possible to safely can low-acid foods like green beans.
The key is understanding proper canning methods for using the Instant Pot. When done correctly, canning green beans in an Instant Pot takes only minutes hands-on time. The pressurized environment allows the jars to heat evenly while killing off any potentially harmful bacteria.
I was pleasantly surprised by how easy it was and the high quality of my finished canned green beans, They retained their crisp texture and vibrant color Having a stock of Instant Pot canned green beans ready to go has made quick dinners a breeze Read on for all the details on how to do it yourself!
Equipment You’ll Need for Canning Green Beans in an Instant Pot
Canning green beans in an Instant Pot requires just a few supplies:
- Instant Pot electric pressure cooker
- Canning rack to elevate jars off the pot bottom
- Wide-mouth glass canning jars with lids and bands (1 pint or 1 quart size)
- Canning tools like jar lifter, funnel, bubble remover, lint-free towel
- Fresh green beans, washed and trimmed
You’ll also need water white vinegar and non-iodized canning salt if including in your recipe. I’ll provide measurements later when I share my process.
The key equipment is an Instant Pot with canning or manual settings. Models like the Duo Plus and Ultra have specific canning programs, while others require manually adjusting to achieve the right pressure and timing.
Step-by-Step Guide to Canning Green Beans in an Instant Pot
Here is a step-by-step overview of the entire process for how to can green beans using an Instant Pot:
-
Wash and sterilize canning jars and lids.
-
Prepare green beans by washing, trimming ends, and cutting into pieces.
-
Pack prepared green beans into hot jars, leaving 1 inch headspace.
-
(Optional) Add salt, vinegar, spices as desired.
-
Fill jars with hot water, maintaining 1 inch headspace.
-
Apply lids and bands; check jar seals.
-
Place filled jars in Instant Pot on canning rack. Add water to pot.
-
Close lid; select canning program or manual settings.
-
Vent pressure once process complete. Remove jars carefully.
-
Allow jars to seal and cool completely undisturbed.
-
Check jar seals; clean, label and store sealed green beans. Enjoy!
Now let’s go through each step in more detail.
Step 1: Sterilize Jars and Lids
Start by washing and sterilizing your canning jars, lids, and bands. You can sterilize using your dishwasher’s sanitizing cycle, or by submerging in boiling water for 10 minutes. Keep jars hot until ready to fill.
Inspect jars for any cracks or chips; these small flaws can prevent an airtight seal. Use only undamaged jars for canning.
Step 2: Prepare the Green Beans
Rinse fresh green beans under cool running water. Snap off the stem and tip ends. Leave beans whole or cut into uniform 1-2 inch pieces for evenly cooked canned beans.
I recommend 1 pound of trimmed beans per quart jar. Sort beans by size if needed so they fit neatly into jars.
Step 3: Pack Jars with Green Beans
Working with one jar at a time, pack prepared green beans vertically into the hot, sterilized jars. Press beans gently into place, leaving 1-inch headspace between beans and the jar rim.
The beans will shrink slightly during processing, so resist overfilling. Headspace is critical for achieving a proper seal.
Step 4: Add Flavorings (Optional)
Now is the time to add any extra flavor if desired. I like to put a teaspoon of canning salt and a tablespoon of white vinegar into each quart jar before filling with water.
You can also add spices like dill, garlic, or peppercorns. Get creative with flavors! Just avoid thick seasonings that could clog the jar rim.
Step 5: Fill Jars with Hot Water
Pour boiling hot water over the green beans in each packed jar, again leaving 1-inch headspace. Water is necessary to create steam inside the jars during pressurized canning.
Use a non-metallic plastic or silicone bubble remover tool to release any trapped air pockets. Air bubbles can prevent proper sealing.
Step 6: Apply Lids and Bands
Wipe each jar rim clean of any food residue or oils with a damp cloth. Center lids on jars and screw bands on fingertip tight. Don’t overtighten bands.
At this point, I lift and tip each jar, watching for any escaping bubbles that indicate an imperfect seal. Catch these before processing!
Step 7: Load Jars into Instant Pot
Place the filled jars carefully onto the canning rack inside your Instant Pot. Use a silicone trivet or extra rack to create space between jars.
Add 2 cups hot water to the pot. This additional water creates steam to vent and build pressure. Never place jars directly on the pot bottom.
Step 8: Start Canning Process
Lock the lid on your Instant Pot. Select your model’s “Canning” preset program based on jar size, or use the manual settings outlined next. Set to high pressure for the appropriate time based on jar size and altitude.
For manual settings, select high pressure for 25 minutes for pints or 30 minutes for quarts. Increase time by 5 minutes if you live at a higher altitude.
When time is up, allow pressure to release naturally until the pin drops. Carefully unlock and remove lid.
Step 9: Remove Jars and Finish Sealing
Lift jars from pot using a jar lifter. Don’t tilt or tip. Place on a towel or cutting board spaced a couple inches apart.
Leave jars undisturbed for the next 24 hours to fully seal and cool. You should hear the satisfying “ping” of each lid sealing.
Step 10: Check Seals and Complete Canning
After 24 hours, test seals by pressing the center of each lid. It should not pop up and down if properly sealed. Remove bands and inspect for flaws; lids should remain fixed.
Wipe and label sealed jars with contents and date. Store in a cool, dark place for up to a year. Enjoy your tasty Instant Pot canned green beans!
Troubleshooting Common Problems with Canning Green Beans in an Instant Pot
Follow these tips to avoid possible pitfalls when canning green beans using an Instant Pot:
-
Use properly calibrated and functioning equipment; test your Instant Pot regularly.
-
Allow adequate venting and pressure release; don’t rush the process.
-
Ensure accurate processing time based on jar size, contents, and altitude.
-
Discard any jars with imperfect seals or signs of spoilage.
-
Clean jar rims thoroughly and apply bands evenly for a tight seal.
-
Use new lids each time; don’t re-use lids between batches.
-
Avoid overfilling jars or inadequate headspace.
With careful attention to each step, you’ll find canning green beans in the Instant Pot to be almost fail-proof. The results are amazing!
Frequently Asked Questions About Canning Green Beans in an Instant Pot
If you’re new to Instant Pot canning, chances are you have a few questions. Here I’ll tackle some of the key topics that often come up:
Is it safe to can green beans without a separate pressure canner?
Yes, when following proper processing guidelines for your Instant Pot model, green beans can be safely canned. The pressurized environment creates sufficient heat to destroy any dangerous bacteria.
Do I need to sterilize jars and lids before canning in the Instant Pot?
Yes, all canning jars and lids should be sterilized through boiling water or a dishwasher’s sanitizing cycle before each use. This prevents contamination.
How long will home-canned green beans last when stored properly?
Instant Pot canned green beans stored in a cool, dark place should retain optimal quality for 12 months. Always inspect jars for signs of spoilage before consuming.
Can I customize canned green beans with different seasonings?
Yes, feel free to add your favorite seasonings or spices to the jars. Avoid thick
More Southern Style Pressure Cooker Sides
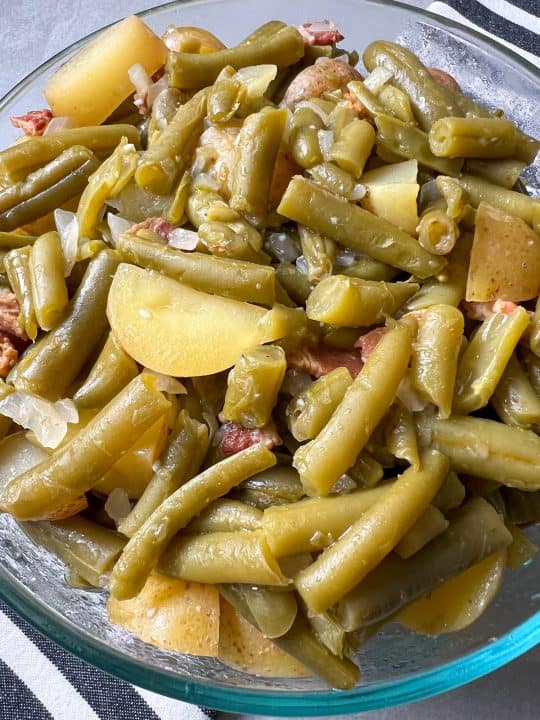
Why This Recipe Works
- With canned green beans, you can get perfectly cooked potatoes without giving up the flavor and tenderness of the green beans.
- The dish tastes rich and savory because the bacon is cooked right in the Instant Pot.
- Every bite of this Southern comfort food is filled with soft green beans, hearty potatoes, and smoky bacon.
- Apple cider vinegar adds a light sourness that balances out the richness of the bacon and makes the whole dish taste better.