As a home gardener getting those first tender green bean seedlings off to a strong start is so rewarding. Gently moving them from indoor pots to the outdoor garden is a critical step. But can you actually transplant green beans successfully?
While beans prefer direct sowing, transplanting is possible with careful handling By understanding bean seedling anatomy, timing the transplant properly, and taking precautions, you can minimize stress and give your beans the best chance to thrive
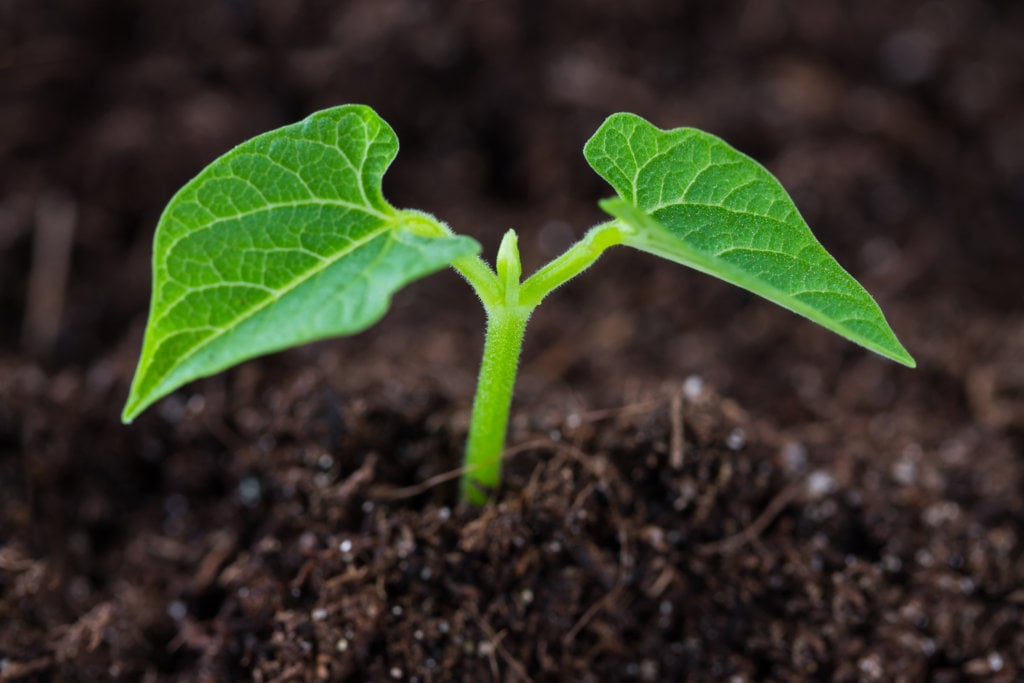
The Delicate Nature of Bean Seedlings
Green beans are warm weather crops that don’t tolerate cold or frost. This means transplanting should be timed for after the final spring frost when soil has warmed. Typically, this is 4-6 weeks after the average last frost date in your area.
But why not start earlier indoors and transplant sooner? The reason lies in the structural fragility of bean seedlings.
Bean seeds sprout two very slender leaves called cotyledons. Below these, the main stem and tiny new root system are extremely delicate at this stage. Rough handling easily snaps stems or strips away the emerging roots.
Beans also resent having their roots disturbed once begun. After germinating, they form a taproot that plunges deep into the soil seeking moisture and nutrients. Transplanting means severing some of these anchoring roots in the process.
For these reasons, beans are best directly sown in their permanent outdoor location whenever possible. But transplanting can work if handled with care.
Minimizing Transplant Shock
If you do opt to transplant beans, utilize these tips to prevent transplant shock:
-
Wait until seedlings have at least 2 sets of true leaves for more established root system
-
Water seedlings well 1-2 days before transplanting
-
Dig holes in advance based on final plant spacing
-
Carefully detach entire root system if starting in peat pots
-
Set plant at same level it was growing previously
-
Firm soil gently and water in transplants immediately
-
Provide shade for 1 week while plants establish
-
Mulch around seedlings to retain moisture
-
Stake climbing varieties to support stems right away
With diligent, gentle handling, you can minimize root damage and keep disruption to a minimum. The goal is preventing stress so growth continues uninterrupted.
Ideal Conditions for Transplanting Beans
In addition to careful handling, creating optimal conditions reduces transplant shock.
Avoid hot midday sun – Transplant in early morning or late evening when sun is less intense
Choose an overcast day – Bright sun stresses tender seedlings
Water seedlings beforehand – Moist soil around roots prevents excessive drying out
Prepare soil well – Beans need loose, fertile soil to thrive. Incorporate compost before transplanting.
Space properly – Follow spacing guidelines for variety to prevent overcrowding later on
Provide wind protection – Shield transplants from harsh winds which dry and damage tender growth
Water thoroughly after – Settle soil around roots and minimize moisture stress
Mulch transplants – Retains humidity while suppressing weeds
With the right conditions and careful handling, transplanted beans can establish smoothly, showing no setback in growth or maturity.
Direct Sowing vs. Transplanting Beans
For best results with beans, direct sowing is recommended whenever possible:
-
Less root disturbance
-
No interruption of taproot growth
-
Less transplant shock
-
Earlier maturity and production
But transplanting can work if:
-
Seedlings are handled gently to minimize root damage
-
Transplant timing is optimal for weather and soil warmth
-
Seedlings are kept well-watered before and after transplant
-
Measures are taken to prevent drying winds and sun
So while beans may not be the easiest veggie to transplant, with care and the right conditions, it is possible to transplant beans successfully.
Step-by-Step Guide to Transplanting Beans
If transplanting beans can’t be avoided in your situation, follow this detailed process:
Prepare Seedlings
- Start beans 3-4 weeks before last frost date
- Allow to develop at least 2 sets of true leaves
- Harden off seedlings for 7-10 days before transplanting
Prepare Garden Bed
- Choose a site with full sun and fertile, well-draining soil
- Amend with compost and mix in 1-2 inches deep
- Dig holes for seedlings based on spacing needs
Transplant on an Overcast, Cool Day
- Water seedlings well 1-2 days prior
- Gently remove seedling with entire root system intact
- Place in hole at same depth it was originally growing
- Backfill soil around stem and firm gently
- Provide shade for newly transplanted seedlings
Care for Transplants
- Water gently every day for first week
- Mulch around seedlings to retain moisture
- Install supports for climbing varieties
- Monitor for pests or signs of transplant shock
With this process, you can execute bean transplanting successfully and get your crop established with minimal setback. Adjust any variables as needed to ensure your specific seedlings thrive in their new home.
Reap a Healthy Harvest From Transplanted Beans
While direct sowing is ideal, with extra care and diligent technique, transplanted green beans can flourish and yield a bountiful harvest.
Monitor seedlings daily for signs of distress, adjusting your care as needed. Be prepared to provide extra protection if weather turns harsh. With attentive nurturing, the seedlings will establish strongly.
Soon you’ll have vigorous bean plants crawling up trellises or spreading bounteous foliage. The dangling bean pods will steadily fill out, ready for you to harvest. And not long after, you’ll be enjoying the literal fruits of your transplanting labor in the form of crisp, flavorful green beans!
So don’t shy away from green bean transplanting. Just take some extra precautions, handle seedlings with care, and you can reap a healthy harvest from transplanted beans.
How to transplant beans
FAQ
Do green beans like to be transplanted?
When should I transplant my beans?
Can you do a second planting of green beans?
How to replant green beans?