Growing your own lima beans is an easy and fun science experiment that kids of all ages will enjoy. With just a few simple materials, you can watch the entire bean growing process from seed to sprout right before your eyes. This activity is perfect for springtime as an engaging way to teach children about plant biology and the amazing world of plants. Follow the steps below to grow lima beans in a cup!
What You’ll Need
- Plastic cup or clear plastic bag
- Paper towel
- Lima bean seeds
- Water
- Sunny window
Step-by-Step Instructions
-
Take a paper towel and dampen it with water Make sure it’s moist but not overly soggy Carefully fold or roll the paper towel so it fits snugly inside the cup or bag.
-
Slide a few lima bean seeds in between the paper towel and the sides of the cup or bag. Make sure the beans are visible and not at the very bottom. This allows space for the roots to grow downwards.
-
Place the cup or bag in a sunny spot by a window Make sure the beans get sunlight to grow.
-
Check the paper towel daily and keep it damp, adding water as needed. Don’t oversaturate.
-
Within several days, the seeds will begin to sprout! You’ll first see a little white root peeking out. Soon after, the stem and leaves will emerge.
-
Over 1-2 weeks, the beans will grow taller and the leaves will open up. Your little seedlings will start looking like baby bean plants.
-
Wait about 2-3 weeks for the bean plants to mature. Once the leaves turn yellow and wilt, your beans are ready to harvest.
-
Tip the cup over and gently peel off the paper towel. Your homegrown lima beans are now fully grown and can be removed from the stems.
The Science Behind It
There’s so much cool science happening as those lima beans transform from dry seeds to sprouted plants. Here’s a quick rundown of what’s taking place during those magical weeks:
-
Germination – When the seed gets moistened, it emerges from dormancy. The seed coat cracks open and the embryonic root pokes out and starts growing down searching for nutrients and water.
-
Photosynthesis – As the leaves emerge, they start converting sunlight into energy through the process of photosynthesis. This supplies the nutrients for the plant to grow taller.
-
Energy Storage – Photosynthesis produces glucose for the plant to use as energy. Excess glucose gets stored in the beans, causing them to enlarge as they fill with nutrients.
-
Reproduction – Once fully grown, the beans contain mature seeds which can be harvested and replanted, continuing the lifecycle.
Growing beans in a cup allows kids to observe these plant growth stages up close. It’s an engaging hands-on activity that reinforces plant biology concepts.
Tips for Growing Healthy Bean Sprouts
- Place in direct sunlight for at least 6 hours per day. Beans crave lots of light.
- Keep the paper towel moist. Add water when needed.
- Use clean materials to prevent mold growth.
- Sprout 2-3 beans together for best results. They like having company!
- Plant in spring or summer for warm growing temps.
- Use filtered water if possible for optimal mineral absorption.
- Rotate the cup so all sides get equal sunlight and growth.
- Loosen or replace towel as the roots grow to allow downward growth.
- Harvest beans when leaves yellow and wilt for fullest nutrients.
- Remove wilted plants right away to prevent mold from killed plants.
Fun Learning Activities
Growing beans in a cup isn’t just fun, it also opens up lots of learning opportunities:
-
Place cups in different conditions (sun vs. shade, lots of water vs. less water). Observe how the plants grow differently.
-
Plant cups with different types of beans – lima, pinto, kidney, etc. Compare the sprouts.
-
Use a magnifying glass to observe the roots and shoots up close as they emerge.
-
Practice counting while adding cups and tracking how many seeds sprout each day.
-
Measure plant height with a ruler as the sprouts grow tall. Graph the results.
-
Place plastic figures next to the plants and create imaginative bean plant stories.
-
Make an illustrated bean plant journal depicting the growth stages.
-
Time how long it takes from seed to harvest and compare with other veggies.
Grow a Bean Trellis
Once your beans have sprouted in the cup, transplant them into soil to grow even bigger! Insert a bean seedling carefully along with some of its paper towel into the ground and water gently. As the plant matures, construct a trellis by placing long sticks or poles into the ground on either side and lacing some string between them. Have the kids help guide the bean vines up the trellis as they grow. The beans will happily climb up their new support system.
Enjoy Your Homegrown Beans
The best part comes when you finally get to eat your delicious homegrown lima beans! Harvest them from the vine once the pods plump up and the beans inside reach full size. Cook them up to enjoy a healthy plant-to-plate experience with your kids. Sauteed in olive oil with a pinch of salt makes a tasty, nutritious side dish. Congratulations on successfully growing lima beans from seed to harvest!
Growing lima beans in a cup brings science to life while teaching children about plants in a hands-on way. Let their curiosity bloom as they get to witness firsthand the amazing process of seeds sprouting into bean plants. It’s both educational and delicious fun the whole family will love.
Plant beans in soil and plastic sandwich bags.
- plastic cups (with hole poked in bottom for drainage)
- plastic plates to rest the cups on
- potting soil, without added fertilizer
- Dry lima or kidney beans (NOTE: these need to be soaked first)
- water spray bottles
- tape
- plastic wrap
- paper towels
- plastic sandwich bags
- magnifying glasses
- camera
- There is a big wall chart called “Our Plants” that talks about it in the Watch Them Grow learning center.
- Plants grow from seeds.
- Plants need water to grow.
Encourage children to use the plant words bean, seed, and soil. Emphasize science process words like observe, describe, compare, and predict.
Tell children that they will be planting two different ways. They will plant some bean seeds in soil and some in a plastic bag without soil.
Planting in Soil
- Let each kid put two or three beans in a plastic cup that is mostly full of potting soil. Cover the seeds gently with soil. (Plant some extra seeds in a few extra cups in case some of the kids’ don’t grow.) ).
- Use the water spray bottle to show the kids how to wet the soil. Ask them, “Why do you think we’re watering the seeds?”
- Write the kids’ names on tape and put them on their cups. Cover the cups with plastic wrap and put them in the Watch Them Grow. (The plastic wrap will help the soil stay moist. Remove the plastic when seedlings appear. – Do you think we’ll be able to see the beans grow for the first time? Why or why not?
Planting in Plastic Bags
- Next, tell the kids they are going to plant beans in clear plastic bags that don’t have soil in them. Ask, “Do you think the seed will grow in the bag?”
- Tell the kids to fold up a paper towel so it fits in a sandwich bag. Then have them wet the paper towel and put it in the bag. Put three to four beans on the towel, and then fold the bag’s top over. Help the kids write their names on their bags and tape them to a window or bulletin board that you’ve set aside as the Watch Them Grow learning center.
Documenting Plant Growth
Explain that they will check on the beans in their cups and bags each day. Take photos of children’s planted beans in the cups and bags. During learning center time, post them on Day 1 on the large wall chart, “Our Plants. ”.
Talk about what they think will happen with their planted beans. What do you think will happen in the cups and bags? Why do you think that? Have the kids draw pictures of the beans they planted in the cups and bags in their Plant Journals.
If you haven’t already, have children add some dry beans to the Seed Museum.
STEM – Lima Beans in a Bag
FAQ
Can you grow beans in a cup?
How do you grow beans in a cup with paper towels?
Do lima beans need to climb?
Do you need to soak lima beans before planting?
How to grow lima beans?
To grow lima beans, find a deep cup like a Solo cup and fill it with water. Let the bean soak overnight to help it germinate faster. The next morning, drain the water and add fresh soil to the cup. This will provide the lima bean with the necessary conditions to grow.
How far apart should lima beans be planted?
Bush lima beans do not need support. Plant pole lima beans 6 to 10 inches (15-25cm) apart; set rows 30 to 36 inches (76-91cm) apart. Pole lima beans need support. Set poles, stakes, or supports in place at planting time. Pole beans also can be planted in inverted hills–5 or 6 seeds to a hill; space hills 40 inches (101cm) apart.
How big do Lima beans get?
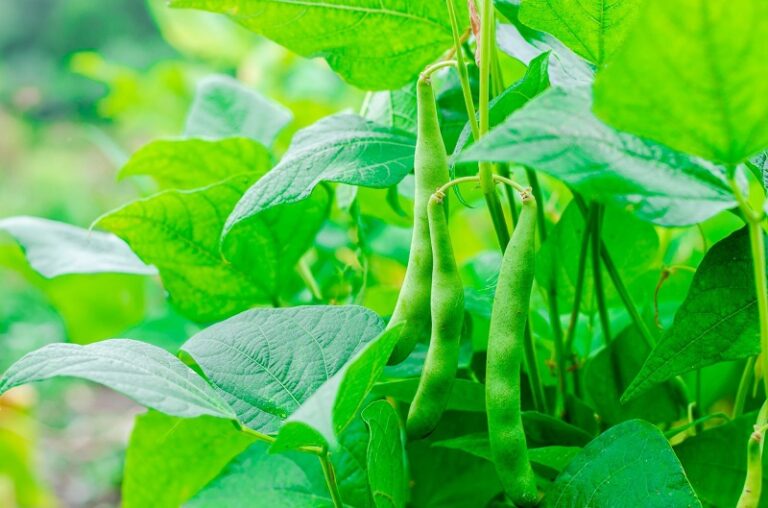
Lima bean pods have a curved, flat appearance and range in length from 3 to 8 inches. Lima beans are grouped into two categories: bush beans and vining beans. The plants of bush lima beans, also called butter beans, grow about 20 inches tall and yield an early crop of small-sized seeds.
Can lima beans grow in heavy clay soil?
Heavy clay soil can pose problems because lima beans have deep, expansive roots and don’t like to sit in wet soil. The soil pH should be slightly acidic to neutral. Keep the soil evenly moist but not soggy until germination. After sprouting, the plants should get at least 1 inch of water weekly.