Green beans are a cheap, healthy, and convenient food. Have garden fresh beans? Here is your complete guide on how to can green beans. Table of Contents.
Every year our garden overflows with green beans. This year we had both bush green beans and pole beans. Sometime each month, I love to get out the canner and put some of our garden beans in it.
Home-canned vegetables have amazing flavor, are less expensive and have no additives compared to store bought green beans. They make for easy side dishes and are great with many main dish recipes.
Canning green beans is a great way to preserve the bounty from your garden or local farmers market to enjoy all year long While there are a few methods for canning beans, the cold pack method is one of the easiest and most efficient ways to can green beans Here’s a step-by-step guide on how to successfully cold pack green beans for canning.
What is Cold Pack Canning?
Cold pack, also known as raw pack, is a canning method where you fill jars tightly with raw, uncooked food. The benefit of cold packing is that more food can typically fit into each jar since the food shrinks during processing.
With the cold pack method for green beans, you simply wash and trim whole raw beans, tightly pack them into jars, cover with boiling water or other liquid, apply lids and process in a water bath or pressure canner. The beans cook and shrink down during processing resulting in more beans per jar than hot packing where beans are partially cooked first.
Why Choose Cold Pack for Green Beans?
There are a few key reasons the cold pack method works well for canning green beans:
-
Maximizes jar space – More raw beans fit per jar so you get more canned beans from your harvest.
-
Preserves texture – Cold packed beans retain a nice tender-crisp texture.
-
Preserves nutrients – Shorter cooking time helps retain more vitamins.
-
It’s faster – No time spent blanching beans beforehand. Just wash, trim, pack and process.
-
Easy to see condition of beans – You can inspect beans for blemishes as you pack jars.
For these reasons, cold pack is my preferred method when canning green beans.
Step-by-Step Guide to Cold Packing Green Beans
Follow these simple steps for successfully cold packed green beans:
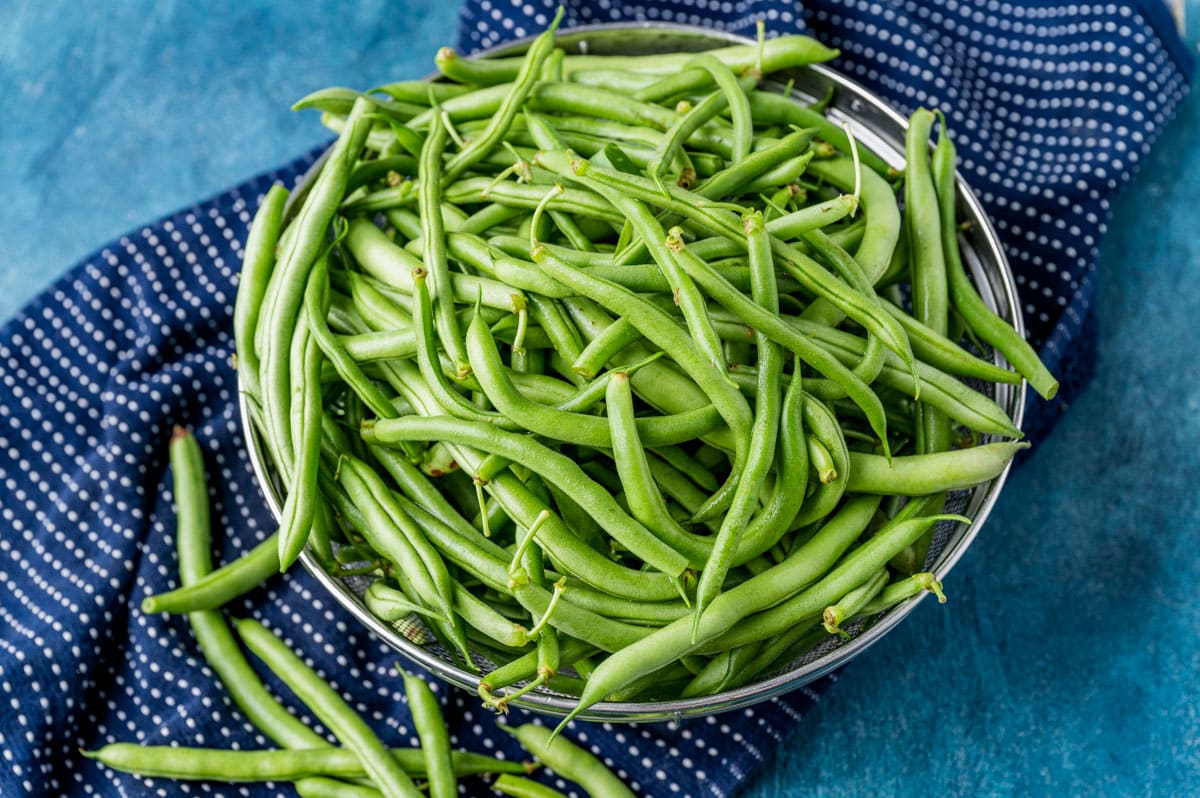
1. Wash and trim green beans
Rinse picked green beans under cold water to remove any dirt Trim the ends off the beans I recommend trimming both ends for more even cooking but some prefer leaving the stem end intact,
2. Prep canning jars and lids
Wash jars and lids in hot, soapy water and rinse well. Simmer the jars in a big pot of hot water for 10 minutes to sterilize. Leave jars in the hot water until ready to use.
3. Pack raw beans tightly into jars
Working with one hot jar at a time, tightly pack washed and trimmed raw green beans into the jar leaving 1-inch headspace at the top. Pack them vertically and tight, pushing beans down to fit more in.
4. Add salt (optional)
If desired for flavor add 1/2 tsp salt to pint jars or 1 tsp to quart jars.
5. Pour boiling water over beans leaving 1-inch headspace
Pour boiling water over the packed beans leaving 1-inch of headspace at the top of the jar. The water should cover the beans by 1-inch.
6. Remove air bubbles
Use a chopstick or other non-metal utensil to slide down the inside of the jar and release any trapped air bubbles. Add more boiling water if needed to maintain headspace.
7. Wipe jar rims
Wipe the jar rims with a clean, damp cloth to remove any food residue or stickiness.
8. Apply lids
Place prepared lids on jars and screw bands on fingertip tight. Do not overtighten.
9. Process filled jars
Place jars in canner and process at 10-15 PSI for your altitude using the processing time recommended by your canner’s manufacturer based on jar size. Refer to a credible canning guide if unsure.
Once cooled, test seals on jars then store in a cool, dark place. Properly sealed beans will keep up to a year but best consumed within one year for optimal quality.
And that’s it! With these simple steps you’ll have a pantry stocked with delicious home-canned green beans using the easy cold pack method.
Tips for Successful Cold Pack Green Beans
Follow these handy tips for getting the most out of cold pack green bean canning:
-
Pick young, tender beans – Older, more mature beans don’t cold pack as nicely. Choose beans under 5 inches long.
-
Use wide mouth jars – The wider opening makes fitting in more beans easier.
-
Pack different sizes – Mix heights to help fill in gaps efficiently.
-
Press beans down – Compress with fingers when packing to fit more in.
-
Remove air bubbles – This helps maximize jar space for more beans.
-
Clean rims well – For a good jar seal, ensure the sealing surface is clean.
-
Don’t overtighten lids – Finger tight is sufficient. Overtightening can affect the seal.
-
Check seals – After processing and cooling, ensure all jar lids sealed properly before storing.
Follow these tips and with a little practice you’ll be cold packing green beans like a pro!
Frequently Asked Questions
Here are answers to some common questions about cold pack canning green beans:
What size jars work best?
Both pint and quart jars work well, though wide-mouth versions are easier to pack. Match jar size to how you plan to use the beans.
How long do I process quart vs pint jars?
Quarts should be processed for 25 minutes at 10-15 PSI. Pints for 20 minutes.
Can I use other liquids besides water?
Yes. You can cover beans with broth or other liquids following safe canning guidelines.
How do I know if my beans sealed properly?
After processing and cooling, pressed on the center of the lid. It should not flex up and down at all if properly vacuum sealed.
Can I freeze beans instead of canning?
Absolutely. Blanch and freeze beans in portions to add to soups and stews all winter.
Can I pressure can instead of water bath?
Yes, you can pressure can pint or quart jars of green beans for higher temperatures and shorter time.
Can I water bath can green beans?
No, a pressure canner must be used as green beans are a low-acid vegetable.
Cold pack canning takes a little practice but soon you’ll be enjoying fresh tasting green beans all year long. The satisfaction of stocking your pantry with food preserved at the peak of ripeness can’t be beat.

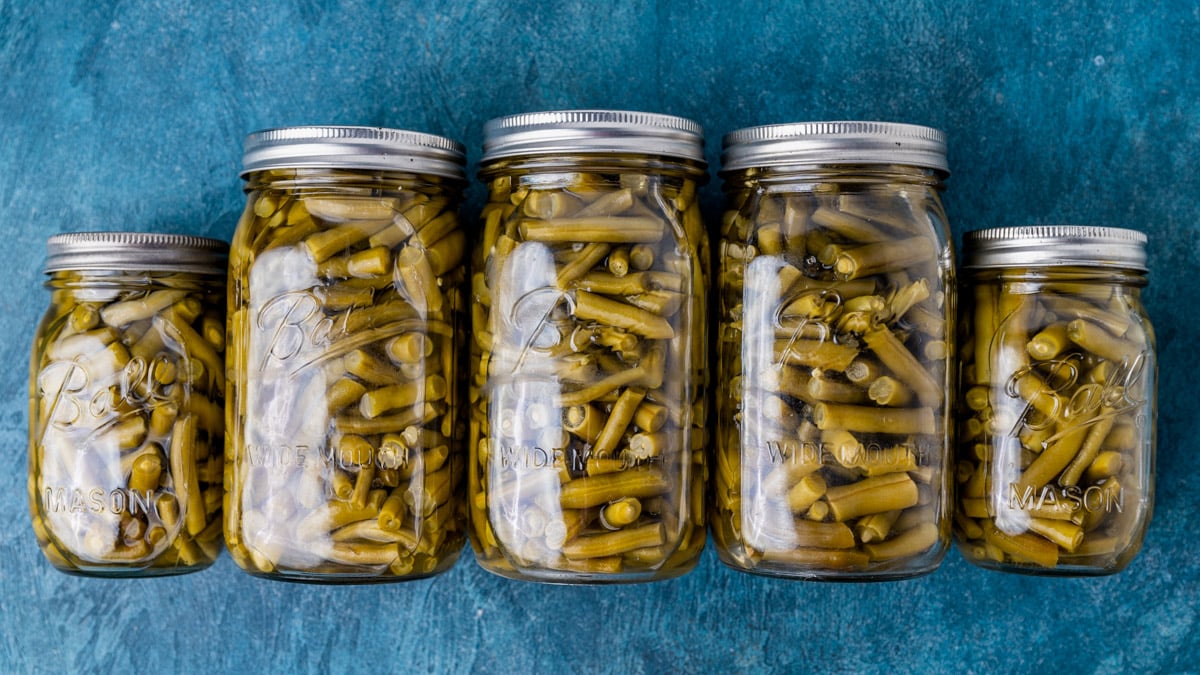
my green beans aren’t bright green anymore.
You’ll notice that green beans lose some of their bright color after the canning process. That’s ok. They are still fine to eat.
Canned Green Beans vs Frozen Green Beans
Fresh green beans are picked at their peak, so both canned and frozen green beans are full of healthy vitamins and nutrients.
Green beans may lose some of their water-soluble vitamins when they are canned, but they will still have a lot of other nutrients and minerals. And because many families like canned fruits and vegetables, canning is a great way to eat more of them.
You do want to watch the sodium, so if you’re purchasing canned vegetables, look for low sodium options.
Here is a list of what you’ll need to can green beans:
- Mason jars (pint jars or quart jars).
- Mason jar lids & rings. Check the mouth of the jars you have. There are regular and wide mouth canning jars. Make sure you have the correct size.
- Fresh garden green beans.
- Pickling & Canning salt. I buy Morton brand either in the baking aisle or the canning aisle, depending on the store.
- Funnel.
- Canning jar lifter tongs.
- Small and medium saucepan for boiling water.
- Pressure canner (Pressure cooker)
- Clean towels.
- Wire rack.