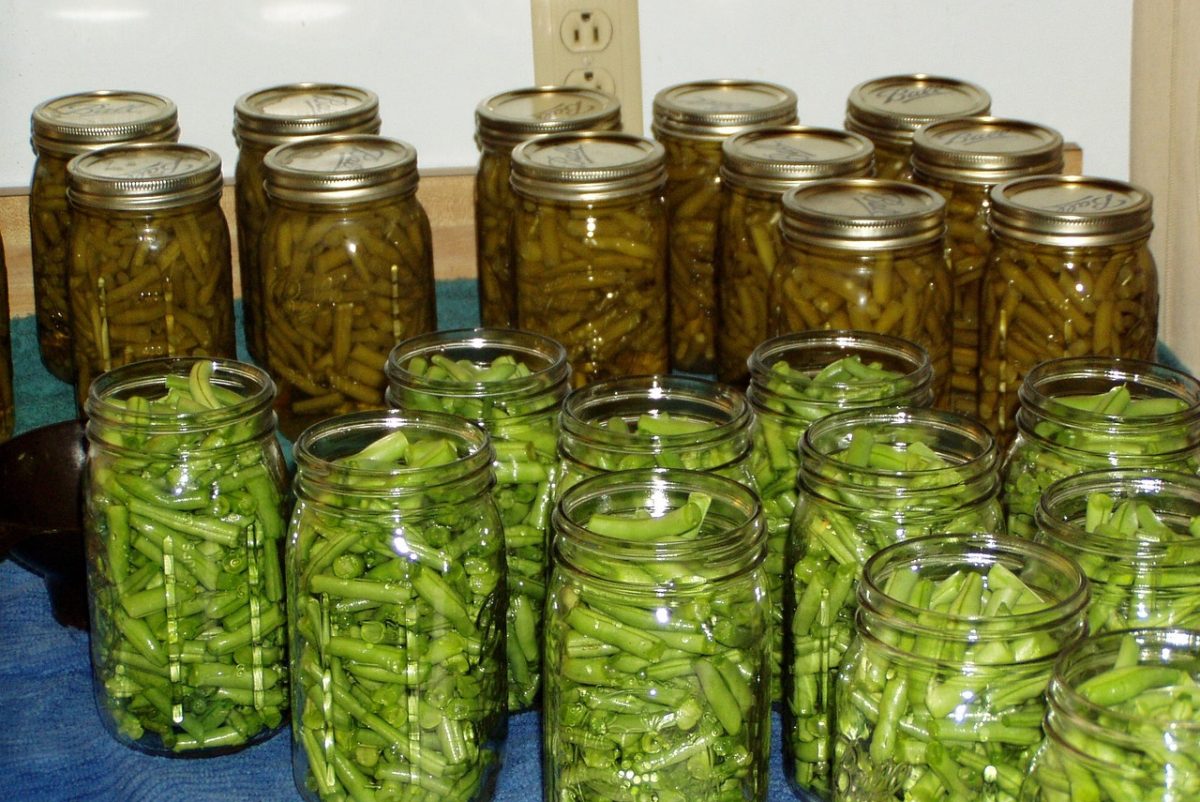
Canning green beans with vinegar is a time-tested method for preserving fresh green beans so you can enjoy their crisp, vibrant flavor all year long. The vinegar helps maintain the beans’ texture and color while acting as a preservative. Follow this simple canning process for delightfully tangy and crunchy canned green beans.
Benefits of Canning Green Beans with Vinegar
Canning green beans with vinegar has several advantages
- Extends shelf life – Properly processed jars can be stored for up to 1 year
- Enhances flavor – The vinegar adds a pleasant tartness
- Maintains texture – Helps keep beans crisp-tender rather than mushy
- Boosts safety – Vinegar increases acidity to prevent botulism risk
- Convenience – Enjoy fresh-tasting beans anytime without thawing
- Economical – Make the most of seasonal abundance or garden surplus
Step-by-Step Guide
Follow these steps for safely canning crisp. flavorful green beans preserved in a vinegar solution
1. Select Beans and Prep Jars
- Choose fresh, firm, brightly colored beans. Avoid old, dried out, or blemished beans.
- Wash and trim ends. Cut into uniform pieces to ensure even cooking.
- Wash canning jars in hot, soapy water. Rinse. Sterilize jars by boiling 10 minutes. Keep hot until ready to fill.
2. Blanch Beans
- Fill large pot with water, bring to a boil. Add beans, blanch 3 minutes.
- Transfer beans immediately to an ice bath to stop cooking. Let cool 1-2 minutes.
- Drain beans well. This enhances crispness by removing excess moisture.
3. Pack Jars Tightly
- Fill sterilized jars tightly with blanched beans, leaving 1 inch headspace.
- Press beans down, add more beans to fill gap. wipe rims clean.
4. Prepare Vinegar Solution
- In a saucepan, combine 1 cup vinegar (5% acidity) and 1 cup water per quart jar.
- Bring vinegar solution to a simmer.
5. Pour Vinegar Solution into Jars
- Carefully pour hot vinegar solution into packed jars, leaving 1/2 inch headspace.
- Remove air bubbles by sliding a chopstick around jar sides.
6. Seal Jars
- Wipe jar rims & threads clean. Place lids & rings on filled jars.
- Process in a water bath canner for 15 minutes (pints) or 20 minutes (quarts) at sea level.
7. Cool, Label & Store
- Remove jars from canner, avoid drafts. Let cool 12-24 hours.
- Check seals, remove rings. Label with contents and date.
- Store in a cool, dark place up to 1 year.
Helpful Canning Tips
Follow these tips for safe, successful results:
- Use pint or quart jars. Match jar size to time requirements.
- Keep vinegar solution hot until ready to fill jars to prevent spoilage.
- Let jars seal and cool properly to form an airtight vacuum.
- Check seals before storing. Lid center should not flex up and down when pressed.
- Use fresh solution each batch. Reusing liquid risks contamination.
- Add herbs and spices to vinegar for flavor if desired. Avoid oil-based seasonings.
- Adjust processing time for higher elevations. Consult canning guides for details.
- Refrigerate after opening. Use within a week for highest quality.
Reasons for Canning Failures
If your canned beans spoil, it could be due to:
- Incorrect vinegar-to-water ratio – Use a 50/50 mix for safety
- Processing too short – Follow verified directions precisely
- Letting jars cool before sealing – Lids must seal on hot jars
- Storing improperly – Fluctuating temps can break seal
- Reusing old vinegar solution – Always start fresh
- Contaminated equipment – Sterilize all gear, don’t reuse lids
- Allowing beans to float – Keep fully submerged in liquid
Enjoy Your Canned Green Beans
Now that you know the ins and outs of canning green beans with vinegar, stock up on this classic preserved food. Enjoy tangy, tender-crisp beans year-round on their own as a snack or side, added to soups and salads, or combined into casseroles and other dishes. The versatility, convenience and old-fashioned goodness of home-canned vegetables can’t be beat.

Get the latest recipes!
|
||
Looking for a recipe?

Welcome to my kitchen! This is where I talk about simple, self-sufficient living in the city, backyard homesteading, how to can and store your own food, and everyday recipes.
GREEN BEANS – VINEGAR CANNING, STEP BY STEP [HOW TO DO IT] (OAG)
FAQ
How do amish can green beans?
Can you safely can green beans without a pressure canner?
How much vinegar to add when canning?
How do you preserve green beans?
The vinegar solution is what will help to preserve the green beans. To make the solution, you will need to combine water and vinegar in a pot, and bring it to a boil. Once it’s boiling, you can pour the hot vinegar solution over the packed green beans in the jars, leaving about a half-inch of headspace at the top.
Can you use vinegar to preserve green beans?
It’s best to use a vinegar with 5% acidity, such as white vinegar or apple cider vinegar, to ensure that the beans are safely preserved. Do I need to add any salt or sugar to the vinegar solution? Adding salt and sugar to the vinegar solution can help to enhance the flavor of the green beans, but it is not necessary for safe preservation.
How do you cook green beans in a jar?
Once it’s boiling, you can pour the hot vinegar solution over the packed green beans in the jars, leaving about a half-inch of headspace at the top. After the jars are filled with the vinegar solution, you will need to process them in a water bath canner for the appropriate amount of time.
Can you add salt to green beans with vinegar?
Adding salt and sugar to the vinegar solution can help to enhance the flavor of the green beans, but it is not necessary for safe preservation. Can I can green beans with vinegar without a water bath canner?
