
Step 4: Colonization and fruiting
At this point, the hard work is behind you!
Depending on the temperature, the mushroom culture should fully colonize the log in 7–14 days. The best conditions for incubating logs are at room temperature and out of direct sunlight.
Verify your logs every few days to make sure colonization is taking place and contamination is being avoided. Make sure that multiple logs are not crowded closely together during incubation if you are performing multiple logs.
As they settle, they produce heat, and if they become too hot, the mushroom culture will perish and the log will become contaminated.
It would be best to dispose of your log in the garbage or a compost pile if you detect any offensive odors or bright growth in it.
However, it’s more likely that you’ll only notice lovely white mycelial growth.
The log is ready to fruit when the entire surface is covered in white mycelium. Fruiting will probably happen naturally if the right circumstances exist, or outside. The holes in the plastic will first start to form pins or tiny fruit bodies.
Try not to let the mushrooms dry out as they grow, which can be achieved with regular misting of the mushrooms. These mushroom fruit bodies will grow quite fast, sometimes doubling in size every day.
If growing indoors, you might need to change the environment to encourage fruiting, specifically by adding light, slightly lowering the temperature, and increasing humidity. To maintain ideal conditions, you might need to build a grow chamber, but if a regular misting schedule is kept up, successful indoor grows can be accomplished under typical living room conditions.
There are many different indoor growing chamber options, which may require their own post.
Trichoderma mold contamination on a straw log.
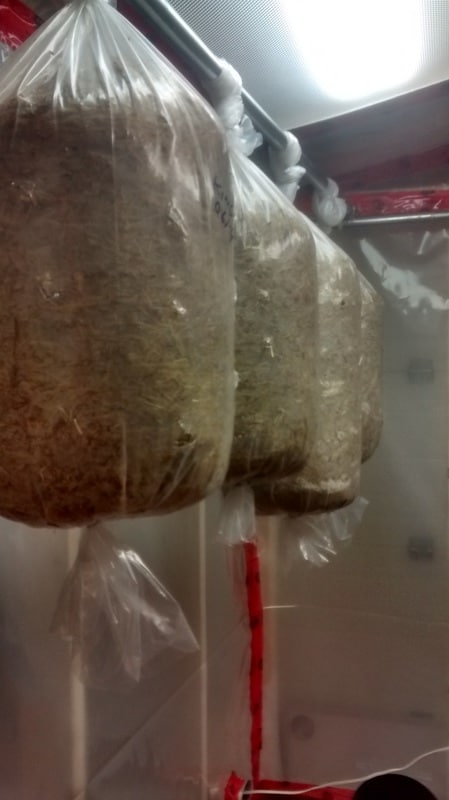
White mycelial growth that is flourishing, with young king oysters poking through the plastic.
Primordial oyster mushrooms emerging through the log.
Youngs Blue oyster cluster. As they ripen, these mushrooms typically lose their blue color.
Step 3: Inoculate the logs
You incorporate your grain spawn into the straw in this step.
Your chances of success will increase by using a higher spawn:straw ratio, which will speed up colonization times. I like to use 3lbs of spawn for each 20lbs of wet straw, or a ratio of about 15% Using less than 10% greatly increases the chances of contamination.
Mix your spawn Thoroughly combine your straw and spawn using a large tote or table. Try to get an even and thorough distribution. Additionally, make sure there aren’t any pasteurized pockets of packed straw that are still too hot. Again, make sure hands are disinfected or use nitrile gloves.
Stuff mixture into bags or container
The mixture must now be stuffed into a suitable container. Laundry baskets, 5-gallon buckets with holes drilled into the side, plastic bags, and other items all work.
Poly tubing, in my opinion, is the best material to use for a container because it is adaptable, allows you to monitor colonization, makes it simple to identify contaminants, and lets you cut the log to any desired length. Additionally, the shape of the tubing provides a lot of fruiting surface area. You can also cut as many holes as you like into it, even if you notice unwelcome pinning under the plastic.
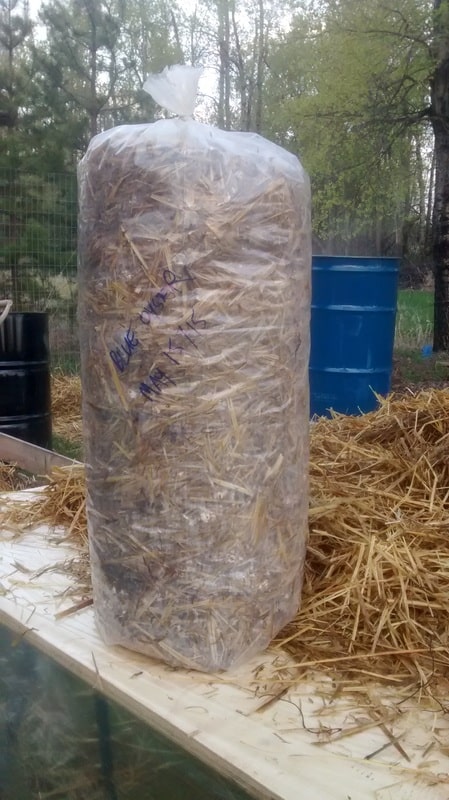
You can get a log about 10 inches long by using poly tubing with a 16-inch lay-flat diameter. 5 inches thick, which is a perfect size. Going too big will result in an anaerobic core, which will eventually cause the log to become contaminated.
Place a handful of the mixture into the tubing at a time and secure one end with wire or a zip tie. As you move, apply pressure and cram the straw as tightly as you can.
The mushrooms won’t be able to pin under the plastic because air pockets won’t form between the straw and the tubing. When the log reaches the desired length, twist the top of the tubing while applying intense pressure to the log to expel all the air.
Retie the top off using wire or a zip tie.
Punch holes in the log’s side for fruiting There are two reasons why you need to do this. Your mushroom log must first breathe for colonization to take place.
If no holes are punched, contamination is imminent. Further, your mushrooms will eventually fruit through these holes. It is similar to how they grow in nature.
The holes represent cracks in the bark where the organism detects fresh air and a chance to fruit and eventually spread spores, while the plastic acts like the bark on a tree protecting the mushrooms.
Cut small x’s around the entire bag at intervals of about 5 inches using a blade. You can also use an arrowhead for faster hole punching. To prevent contaminating the log, make sure to first sanitize the blade or arrowhead with alcohol.
Make a few holes in the bottom of the log if you intend to hang it so that any extra moisture can drain out.
16″ Poly tubing is great for making straw logs.
LOCATION
This should be put in a wind- and wind-protected area that is close to your garden hose in a shady area.