So I’m going to put two question about freezing green beans right here at the top. There’s usually a question-and-answer part after the steps, but this is the most-asked question when we talk about freezing green beans.
It’s the end of green bean season and your freezer is loaded with beans you harvested and froze earlier in the summer Now you’re wondering – can you actually can frozen green beans instead of letting them go to waste?
The short answer is yes, you can safely can green beans that were previously frozen However, there are some important guidelines to follow for best results.
In this complete guide, we’ll cover:
-
Is it safe to can frozen green beans?
-
How to can frozen green beans step-by-step
-
Tips for maintaining quality
-
Answering frequently asked questions
-
Other uses for frozen green beans
By the end, you’ll know everything you need to successfully can frozen green beans at home!
Is Canning Frozen Green Beans Safe?
First things first – is it even safe to can green beans that were previously frozen?
The USDA approves canning frozen vegetables, including green beans, as long as proper procedures are followed.
It is critical to thaw the beans completely, heat them to a boil, and follow an approved canning process. As long as care is taken to follow safe canning methods, botulism and other foodborne illnesses can be avoided.
So yes, you can safely can those bags of frozen green beans with confidence! Now let’s look at the best practices for doing it right.
Step-by-Step Guide to Canning Frozen Green Beans
Follow these simple steps for safely canning frozen green beans at home:
Ingredients/Equipment:
- Thawed green beans
- Canning jars, lids, and rings
- Pressure canner or large stockpot with rack
Instructions:
-
Thaw beans completely in the refrigerator until no ice crystals remain. This may take 1-2 days.
-
Rinse beans and drain any excess liquid. Prepare jars and lids.
-
In a large pot, bring beans and enough water to cover to a boil.
-
Reduce heat and simmer 5 minutes.
-
Using a slotted spoon, pack hot beans into jars leaving 1-inch headspace.
-
Remove air bubbles and adjust headspace as needed. Wipe rims clean.
-
Apply lids and process in a pressure canner at 11 PSI for 20 minutes for pints or 25 minutes for quarts.
-
When processing is complete, allow canner to depressurize naturally.
-
Remove jars and allow to cool undisturbed 24 hours. Check seals, then store.
And that’s it! Now let’s go over some tips for the best results.
Tips for Maintaining Quality
Follow these tips when canning previously frozen green beans:
-
Select young, tender beans before freezing for best texture. Older beans may turn mushy.
-
Sort beans by size before freezing. Canning uniform sized beans ensures even cooking.
-
Avoid overcrowding beans in freezer bags. This can crush beans and damage texture.
-
Handle beans gently when thawing and prepping to avoid bruising.
-
Use thawed beans within 2 days for optimal freshness.
-
Don’t can beans directly from the freezer or add cold beans to hot jars.
-
Re-blanch beans for 1-2 minutes before processing if thawed more than 2 days.
-
Add citric acid or lemon juice to jars to preserve color and flavor.
-
Process at 11 PSI pressure to destroy any bacteria from previous freezing.
Following these guidelines will help maintain the texture, color, and flavor of your frozen green beans even after canning.
Frequently Asked Questions About Canning Frozen Beans
Here are answers to some common questions about canning frozen green beans:
Is it necessary to re-blanch frozen beans before canning?
If beans are used within 2 days of thawing, re-blanching is not required. After 2 days, blanch 1-2 minutes.
Do you have to change the processing time for frozen beans?
No, follow the standard approved processing time for fresh green beans.
Can you substitute frozen beans in any green bean canning recipe?
Yes, frozen green beans can be safely substituted in any hot pack canning recipe.
How long will canned frozen green beans last?
If processed correctly, the shelf life is the same – up to 2 years. Always check seals before consuming.
Will canned frozen beans have a different texture?
They may be slightly softer but still tender. Use young, not over-mature beans for best results.
Is it necessary to add lemon juice or citric acid to jars?
While optional, it does help retain color and flavor for frozen beans.
Can you can green bean mixes that contain frozen beans?
Only can recipes formulated for use with frozen beans, like three bean salad.
Other Uses for Frozen Green Beans
If canning frozen green beans doesn’t appeal to you, here are some other great ways to use up those beans in the freezer:
-
Add to soups, stews, pasta dishes, and stir fries. The extra cooking helps soften beans.
-
Puree into dips, spreads, and sauces. Frozen beans create thick texture.
-
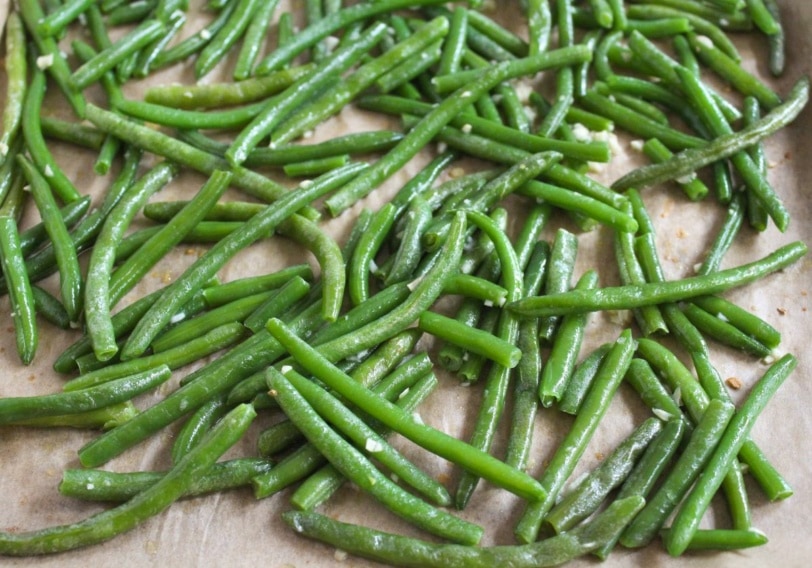
Roast frozen beans tossed in oil and spices for flavorful side dishes.
-
Meal prep freezer-ready entrees like green bean casserole or chicken & green beans.
-
Blend into smoothies, juice, or health shakes. Beans provide extra nutrition.
With a little creativity, you can take advantage of the convenience of frozen green beans. Canning them is just one option for enjoying their flavor all year long.
The Takeaway on Canning Frozen Green Beans
Canning green beans that were previously frozen is completely safe when USDA guidelines are properly followed. Thaw beans fully, boil 5 minutes, and process using a pressure canner for the full recommended time.
While frozen green beans may be slightly softer in texture after canning, they still make a quick, easy, and nutritious addition to meals. With a few tips, you can maintain decent quality and enjoy your frozen green bean bounty all year long.
So pull those forgotten bags of beans from the freezer and can up a storm. You’ll be glad you did when you open a jar of summery green beans in the middle of winter!
Freezing Green Beans: Step-By-Step Directions
- Pick
- Snap
- Blanch
- Pat dry
- Bag or put in container.
- Mark the bag
- Freeze
It’s that easy.
You should pick your own green beans in the morning because that’s when they are freshest and most flavorful. Pick young pods that have not had their seeds develop fully. Look for about the thickness of a pencil is what I always tell my boys. After you pick them, put them all in a big bowl or pot and wash them in cold, clean water.
If you want to buy green beans, you should try to get to the farmers market or store early. Make sure you know when the beans were picked. If they have been sitting around for a couple days they won’t be as fresh and nice. It will still work but the fresher you can get your beans the better.
Why do you need to blanch green beans before blanching?
Blanching helps maintain vitamins and reduces the actions of enzymes. Enzymes is what breaks down food as it ages. Freezing slows that and will help your green beans stay fresh longer in the freezer.