As a busy home cook, having simple side dishes prepped and ready to go can be a lifesaver on hectic weeknights Fortunately, blanching green beans ahead of time is an easy way to get a jumpstart on meal prep With just a few minutes of hands-on time, you can have tender, crisp-cooked beans at the ready anytime.
Blanching is a simple cooking technique that temporarily partially cooks vegetables before shocking them in ice water. This process brightens color, softens texture, and helps lock in nutrients. Blanching green beans in advance yields convenient ready-to-use beans while preserving their fresh flavor and crunch.
Keep reading to learn how and why to blanch green beans ahead, proper storage methods, serving ideas, and handy time-saving tips for this handy kitchen trick.
Why Blanch Green Beans Ahead of Time?
Blanching green beans in advance offers several advantages:
-
Saves Time Beans are partially pre-cooked so require less time to finish cooking later.
-
Bright Color Blanching helps beans retain their vibrant green hue
-
Crisp Texture: Beans stay crisp-tender, not mushy or overdone.
-
Locks in Nutrients: Blanching helps retain more vitamins and minerals compared to cooking completely.
-
Easy Meal Prep: Have pre-prepped beans ready for quick meals and sides.
-
Flexible Storage: Blanch then refrigerate or freeze beans for longer storage.
So whether you want to save time on busy weeknights or prep recipes ahead of time, blanching green beans in advance can be a handy kitchen trick.
How to Blanch Green Beans Ahead of Time
Step 1: Prep Beans
Rinse green beans under cool water and trim ends. Leave whole or cut into pieces.
Step 2: Blanch in Boiling Water
Add beans to boiling salted water and blanch for 2-3 minutes.
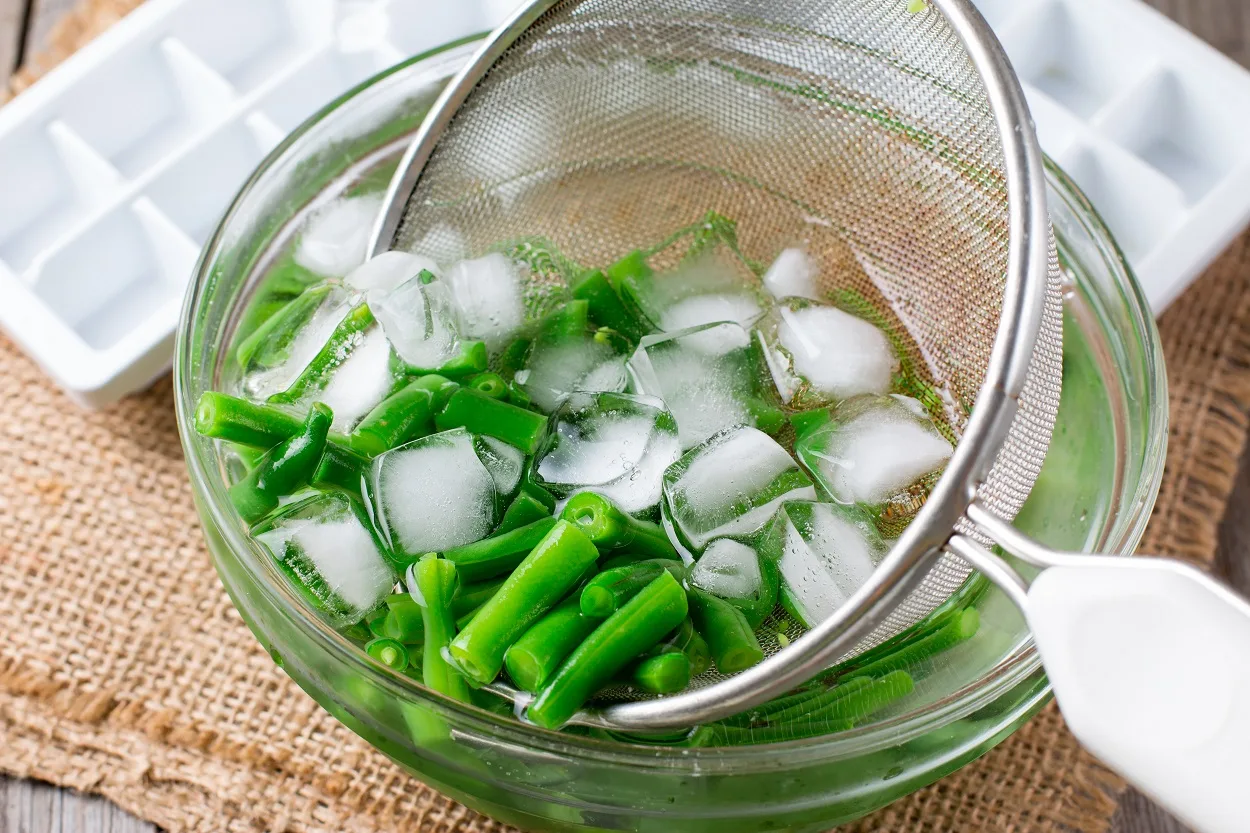
Step 3: Shock Beans in Ice Water
Drain beans and immediately plunge into ice water to stop cooking.
Step 4: Pat Dry and Cool
Drain beans well and pat completely dry with paper towels or a clean dish towel. Allow to cool.
Step 5: Store Properly
Refrigerate beans in an airtight container up to 4 days. Or, freeze for longer storage.
It’s that easy! In just a few minutes you can have prepped green beans ready to reheat and serve anytime.
Handy Tips for Blanching Ahead
Follow these tips for best results when blanching green beans in advance:
-
Use fresh, crisp green beans – avoid limp or bruised.
-
Wash beans well before blanching even if they look clean.
-
Blanch only 2-3 minutes – beans should stay bright green and crisp.
-
Use plenty of ice to cool beans quickly to stop cooking process.
-
Dry beans very well before storing to prevent sogginess.
-
Place blanched beans in single layer on paper towels in an airtight container.
-
Refrigerate up to 4 days for maximum freshness and flavor.
-
Frozen beans will last about 6 months – thaw before using.
-
Add salt, herbs, oil or other seasonings after reheating blanched beans.
With practice, you’ll get the blanching time dialed in perfectly for tender yet still crisp beans. It’s an invaluable technique for shortcuts and meal prep!
Ideas for Enjoying Pre-Blanched Green Beans
Blanched green beans shine in so many dishes. Here are some easy ways to use them:
-
Quick-sauté with olive oil, garlic, and Parmesan.
-
Toss into soups, stews, pasta sauce or frittatas.
-
Mix into grain bowls and salads.
-
Sizzle in a hot pan with sesame oil and soy sauce.
-
Reheat as a simple side dish with lemon and herbs.
-
Fry into crispy seasoned green bean fries.
-
Simmer briefly in homemade or store-bought marinara sauce.
-
Combine with baby potatoes and vinaigrette for picnic-ready side.
-
Roast in the oven with olive oil, salt, and pepper.
With so many possibilities, keep your fridge stocked with pre-blanched green beans for easy sides, meal prep, entertaining, and more.
Blanching Beans in the Microwave
Don’t have time or space for a big pot of boiling water? Here’s how to quickly blanch green beans in the microwave:
-
Wash and trim green beans. Place beans in a microwave-safe dish with 2 tbsp water.
-
Cover and microwave on high for 2 minutes. Rearrange beans halfway through.
-
Drain in colander then soak beans in ice water bath for 1 minute. Drain well.
The microwave yields slightly less evenly blanched beans but still does the trick in a pinch!
Can You Freeze Blanching Liquid?
Many cooks ask if you can freeze the blanching liquid to save time. Unfortunately, this isn’t recommended for food safety and maximum flavor. Vegetable blanching water contains some dirt, enzymes, and other impurities released from the beans.
It’s best to start with fresh, clean, well-salted water each time for blanching green beans to get the best results. The extra couple minutes is worth it!
Blanching Other Veggies
While green beans are one of the most popular veggies to blanch in advance, the technique works for many other vegetables too:
-
Asparagus, broccoli, carrots, cauliflower, snap peas, kale and other hearty greens are all great candidates for blanching.
-
More delicate veggies like spinach, arugula, and herbs will overcook and lose flavor with blanching. Instead, simply wash and dry well, then refrigerate.
-
Don’t blanch starchy potatoes ahead of time. Soaking in water leads to a mealy texture.
Get creative and try blanching some of your favorite in-season produce. Having prepped veggies on hand makes pulling together healthy meals so much faster.
Final Tips for Blanching Green Beans
Pre-blanched green beans are endlessly versatile and handy for shortcuts and meal prep. Follow these final tips:
-
Allow 3-6 minutes to reheat blanched beans before serving.
-
Add any seasonings after reheating to maximize flavor.
-
Blanch only what you will use within a few days for best quality.
-
Store blanched beans in single layers, not big clumps.
-
Mix up the green bean variety! Try yellow wax and purple beans too.
-
Don’t blanch more than a day ahead of serving for maximum tenderness.
Now you can start blanching green beans in advance and discover how handy they are to have ready in your kitchen arsenal. From quick weeknight sides to easy entertaining recipes, pre-blanched beans help you put tasty, nutritious meals on the table with minimal fuss.
Common Questions about Blanching Green Beans Ahead of Time
How long will blanched green beans last in the fridge?
Blanched green beans will keep for 3 to 4 days refrigerated in an airtight container. Blanch only what you plan to use within this timeframe for best quality.
Can you freeze blanched green beans?
Yes, blanched green beans freeze very well for long-term storage. They’ll keep about 6 months in the freezer before losing flavor and texture quality.
Should you rinse green beans before blanching?
It’s important to rinse green beans even if they look clean before blanching. Washing removes any dirt and debris that could reduce blanching effectiveness.
Why soak blanched beans in ice water?
The ice water bath stops the cooking process quickly after blanching so the beans stay tender-crisp, not mushy.
Can you use frozen green beans for blanching?
It’s best to blanch fresh green beans, not frozen. Frozen beans have already been blanched and will overcook.
Blanching green beans in advance takes just a few minutes but provides a handy meal prep trick. Keep your fridge stocked with tender pre-blanched beans ready to add quick nutrition and color to all kinds of dishes!
how to blanch (par boil) green beans
- Bring a pot of salted water to a strong boil
- To clean the green beans, cut off about a quarter-inch of the ends.
- For about two minutes, boil the green beans in water. It should be about 80% cooked. You don’t want it to be fully cooked or tender.
- First, take the green beans out of the boiling water. Next, put them in a bowl of ice water to stop them from cooking.
- The cold water will stop the food from cooking and help the bright green color stay put.
- Put the green beans in the fridge until you’re ready to use them. Wrap them in a damp paper towel.
- It only takes a fraction of the time it would take to cook something from raw when you take them out. You can sauté, boil, steam, microwave, grill, or do just about anything else.
How to Blanch Green Beans
In this cooking video, I show you how to blanch (also called par boil) green beans. This is pretty much the same method I use for all of my green vegetables. It’s easy to do and helps make sure your green beans are bright green and cooked right. Blanching green beans can also save you time because you can do it ahead of time and then just cook them for 30 seconds right before you’re ready to serve. I’ll use this technique anytime, I have a lot of cooking to do at the last minute.