Get ready to gobble up some fun with this festive Thanksgiving Turkey Pinata! This easy-to-follow guide will walk you through the steps of creating your own adorable turkey pinata, perfect for adding a playful touch to your Thanksgiving celebrations
Gather Your Supplies:
- Paper Mache Essentials:
- Plastic/Paper Coffee Cup or Soda Can
- Flour
- Water
- Paper Toilet/Towel Cardboard Tube
- Copy/Printer Paper
- Piece of Cardboard Box
- Markers/Paint and Paintbrush
- Newspaper
- Tissue Paper and Food Coloring (or Party Tissue Streamers)
- String/Thread
- Clear Tape
- Vegetable Oil/Crisco
- Measuring Cups
- Tools:
- Scissors
- Plastic Spoons
- Containers
- Oven and Tin Foil (optional)
Step 1: Prepare the Paper Mache Mix
- Combine 3/4 cup of warm water and 1 cup of flour in a container.
- Stir until the mixture is smooth and free of lumps.
Step 2: Create the Turkey Mold
Body:
- Hard Way: Trace the outline of the paper towel tube near the bottom of the plastic cup and cut it out. Make the hole slightly larger than the tube for easy movement.
- Easy Way: Wrap a piece of copy paper around an empty soda can and secure it with tape. Slide the paper off and grease the can with oil/Crisco before replacing the paper.
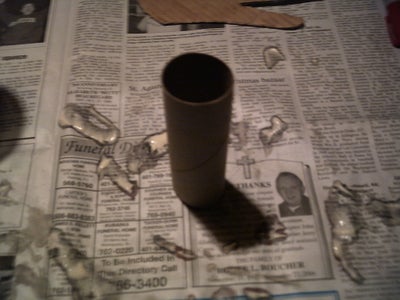
Neck/Head: Use the toilet paper tube as the base for the neck and head.
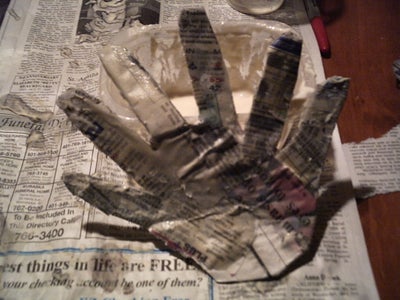
Feathers: Trace your hand onto a piece of cardboard, creating a 6-fingered hand shape. Cut out the shape, rounding the bottom, to create the feathers.
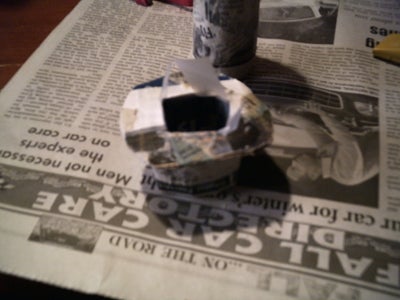
Hat: Cut a 1″ by 6″ strip of cardboard and wrap it around the top of the paper tube. Secure it with tape and cut out a cardboard circle for the brim. Attach the brim to the hat wall and cut out another circle for the top.
Step 3: Apply the Paper Mache
Body:
- Hard Way: Apply the paper mache mix to the outside of the greased plastic cup and start wrapping torn newspaper around it. Cover the entire cup, except for the open end. Repeat this process for at least three layers.
- Easy Way: Apply the paper mache mix to the copy paper-covered soda can and wrap newspaper around it, leaving the top open. Repeat this process for at least three layers.
Neck, Hat, and Feathers: Apply the paper mache mix to each piece and wrap with newspaper, leaving the ends open.
Drying: Allow all pieces to dry completely. You can either let them air dry or bake them in a preheated oven at 170°F for 5-8 minutes.
Step 4: Assemble the Turkey
- Attach the hat to the neck/head using tape and reinforce the joint with paper mache.
- Insert the neck/head tube through the hole in the body and adjust the height. Secure the joint with paper mache.
- Attach the feathers to the open end of the body using at least 3 layers of paper mache.
- Allow all joints to dry completely.
Step 5: Decorate the Turkey
Coloring the Tissue Paper:
- Without Party Streamers: Preheat the oven to 170°F. Dip tissue paper into a mixture of 1/2 cup of water and 3-4 drops of food coloring. Squeeze out excess water and dry the tissue paper in the oven for 5-8 minutes. Shred the dried tissue paper into pieces.
- With Party Streamers: Shred the party streamers into pieces.
Applying the Tissue Paper: Use your finger to spread paper mache mix on the turkey and apply the shredded tissue paper, creating your desired design. Overlap the tissue paper to create a fluffy effect. Apply at least 2 layers of tissue paper to cover the base paper.
Adding Details:
- Beak: Fold a small piece of newspaper into a triangle shape and secure it with paper mache. Color it with a red or orange marker and attach it to the face using paper mache.
- Eyes: Create eyes from copy paper and markers or draw them directly onto the face using a marker.
- Pilgrim Hat: Cut a thin strip of copy paper, dip it in paper mache mix, and wrap it around the center of the hat. Secure the ends with a small piece of yellow tissue paper and paper mache. Tape the top of the hat for easy opening.
Step 6: Fill and Hang the Pinata
Fill the pinata with candy and/or trinkets through the hat opening. Secure the top of the hat with tape or paper mache. Attach a string to the pinata for hanging.
Step 7: Let the Fun Begin!
Hang the turkey pinata and let the Thanksgiving festivities commence! Gather your friends and family, grab a bat, and take turns whacking the pinata until it bursts open, showering everyone with a sweet and festive surprise.
Tips and Tricks:
- Use a variety of colored tissue paper to create a vibrant and eye-catching turkey.
- Get creative with the decorations! Add googly eyes, feathers, or other embellishments to personalize your pinata.
- Make the pinata sturdy by using multiple layers of newspaper and paper mache.
- Fill the pinata with a variety of treats to cater to different tastes.
- Have fun and enjoy the process of creating your own Thanksgiving Turkey Pinata!
Step 4: Maiche the Neck, Hat, and Feathers…
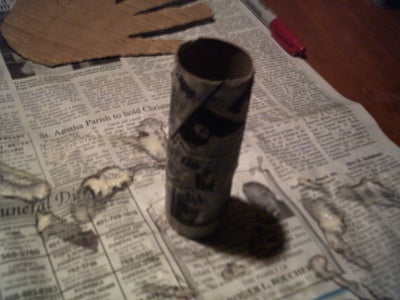
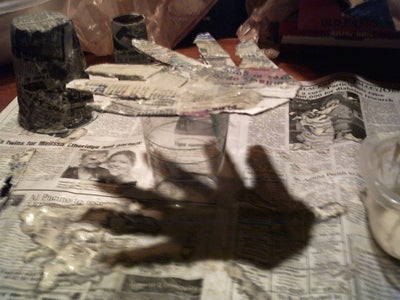
The Neck: 1. Apply maiche mixture to the toilet paper tube. 2. Wrap 1-2 layers of newspaper around the length of the tube, leaving the ends open. 3. Let dry. The Hat: 1. Apply maiche mixture to the hat “mold”. 2. Wrap 1-2 layers of newspaper around the hat (also maiche the loose top), leaving the ends open. 3. Let dry. The Feathers: 1. Apply maiche mixture to the feathers “mold”. 2. Wrap 1-2 layers of newspaper around the mold. 3. Let dry. Now that wasnt so hard. ;).
Step 3: Maiche the Body…


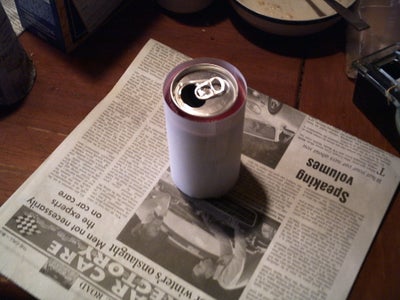


Now onto the fun stuff. Depending on how much mix you used, you can either let the pieces dry naturally or preheat the oven to 170 degrees (F) and bake them for 5 to 8 minutes. First to make the Body: The Hard way: 1. Take the plastic cup and lube the outside up with oil or Crisco. A. (optional) Take a piece of copy paper, cut it, and place it around the outside of the cup. Tape it to itself. This will make it easier to take the maiche off the mold. 2. Apply maiche mix to the cup (or copy paper) and start wrapping torn newpaper around it. Dont worry if you cover the hole that was cut out. You can cut it again using the cup as a guide. 3. After youve completely wrapped (except the open end) the cup. Do it again (at least three layers, more if you want it stronger). 4. Let it dry (you can also use the oven, but not for more then 5 minutes. Otherwise the cup will melt). 5. Cut the hole out again and slip the maiche off the cup. The Easy way: 1. Use the soda can that already has the copy paper on it from the previous step. 2. Apply maiche mixture to the paper and start wrapping newspaper around the can. 3. Wrap the can completely, leaving only the top open (where you drink from 😉 ). 4. Wrap the can in at least three layers. Add more to make it stronger. 5. Let it dry. 6. Pull up on the cans tab while holding the paper maiche in place. The can should slip out easily. 7. Use toilet paper tube to trace and cut hole out near the closed end of the body.
Turkey Piñata – DIY – How to make a turkey pinata – Bird – Guajolote – Pavo
FAQ
What do you put in a Thanksgiving piñata?