Butter beans also known as lima beans are a delicious vegetable that can be used in many recipes. However, before cooking butter beans, it’s important to blanch them first. Blanching helps enhance the texture and flavor of butter beans. So how long should you blanch butter beans? Let’s take a closer look.
What is Blanching?
Blanching is a cooking technique where vegetables are briefly immersed in boiling water or steamed, The purpose is to partially cook them, Blanching butter beans helps get rid of any enzymes that cause the beans to deteriorate It also enhances their texture and makes their skin easy to remove
Additionally blanching preserves the bright green color of the beans and kills any bacteria present on the surface. It’s an essential first step before cooking butter beans.
Benefits of Blanching Butter Beans
There are several benefits to blanching butter beans:
-
Preserves color and texture: Blanching stops the enzymes that cause loss of color and texture. It helps retain the vibrant green color of the beans.
-
Improves flavor: Blanching mellows out the flavor and reduces any bitterness, resulting in sweeter, milder tasting beans.
-
Makes skin removal easier: The skins become looser after blanching, making it easier to slip them off before using in recipes.
-
Kills surface bacteria: The hot water kills any microbes present on the surface of the beans. This helps improve safety.
-
Reduces cooking time: Since blanching partially cooks the beans, it reduces the overall cooking time later.
How Long to Blanch Butter Beans
The ideal blanching time depends on the size of your butter beans:
- Small beans – Blanch for 2 minutes
- Medium beans – Blanch for 3 minutes
- Large beans – Blanch for 4 minutes
It’s important not to over blanch. You want the beans to remain slightly crunchy in the center. Blanching for too long can make the beans mushy.
Always start timing from when the water starts boiling vigorously, not when you add the beans. And make sure the beans remain submerged in boiling water while blanching.
Step-by-Step Guide to Blanching Butter Beans
Follow this simple step-by-step guide for perfectly blanched beans:
-
Rinse the beans under running water to clean off any dirt or debris. Pick out and discard any discolored or blemished beans.
-
Fill a large pot with water and bring it to a rapid boil over high heat. Make sure the pot is big enough to allow the beans to move freely.
-
Add a teaspoon of salt to the boiling water. The salt helps maintain their green color.
-
Once the water is vigorously boiling, add the beans and immediately start the timer based on their size.
-
Occasionally stir the beans gently to ensure even exposure to the boiling water.
-
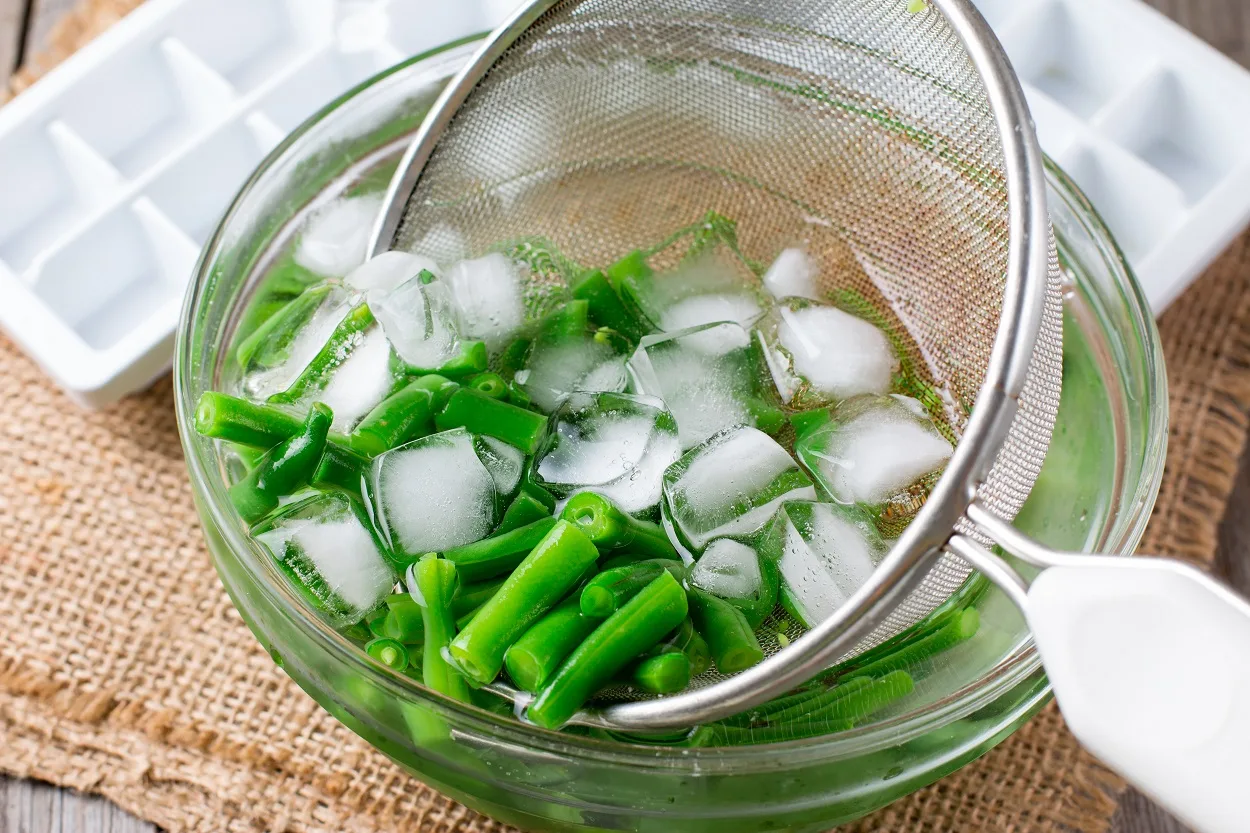
As soon as the timer goes off, drain the beans into a colander and immediately dunk them in ice cold water. This shocks them and stops the cooking process.
-
Allow the beans to cool completely in the ice bath before using in recipes. Drain well before use.
And that’s it! With this method, your beans will be perfectly blanched and ready for any dish.
Tips for Blanching Butter Beans
Follow these tips for best results when blanching butter beans:
-
Use a large pot to allow beans to move freely while blanching. Do not overcrowd.
-
Make sure water is rapidly boiling before adding beans. Timing starts immediately after.
-
Stir beans occasionally for even blanching. But be gentle to avoid damaging skins.
-
Shock in ice bath immediately after blanching to stop cooking process.
-
Use blanched beans soon after cooling for maximum flavor and texture.
-
Add aromatics like garlic, onion or herbs to blanching water for extra flavor.
-
Reuse blanching liquid for stocks or soups rather than discarding.
Can You Skip Blanching Butter Beans?
It’s not recommended to skip blanching when cooking butter beans. Blanching provides some key benefits:
-
It enhances the flavor significantly and removes any bitterness. Unblanched beans will have a starchier, rougher taste.
-
The skins are harder to remove without blanching. Trying to peel unblanched beans can be quite tedious.
-
Blanching preserves the bright green color which is lost with improper cooking methods.
-
Cooking time is longer without blanching as the beans will remain quite hard. They may also split.
So while you can cook butter beans without blanching, the texture and flavor will be inferior. It’s worth the short blanching time for delicious results!
How to Store and Reuse Blanching Liquid
Don’t discard the nutritious blanching liquid after cooling the beans! It can be saved and reused. Here are some tips:
-
Let the blanching liquid cool completely before storing it in the refrigerator in an airtight container. It will keep for 2-3 days.
-
The starchy liquid adds great flavor to soups, risottos, sauces and gravies. Use it as a base or stock.
-
For extra richness, boil the liquid to reduce and concentrate it before using in recipes.
-
If not using immediately, freeze blanching liquid in ice cube trays for longer storage.
-
Add onions, garlic, herbs and spices to the liquid for extra flavor before reuse.
Saving the liquid is an easy way to reduce waste and make the most of your ingredients!
Common Blanching Mistakes
It’s easy to mess up blanching if the right technique isn’t followed. Here are some common mistakes:
-
Underblanching – Beans will remain hard and skin won’t slip off easily.
-
Overblanching – Can lead to mushy beans with loss of texture, flavor and nutrients.
-
Not using enough water – Beans may not blanch evenly if crowded.
-
Not bringing water to a rapid boil before adding beans.
-
Not shocking beans in ice bath immediately after blanching.
-
Incorrect storage – Blanching liquid should be chilled before storing.
Avoid these mistakes for perfectly blanched, tender butter beans every time. It just takes some practice!
How to Cook Butter Beans After Blanching
Blanched butter beans are versatile and can be used in many recipes. Here are some cooking methods:
-
Sauté: Sauté blanched beans in olive oil or butter with garlic and herbs. Season to taste.
-
Simmer: Gently simmer blanched beans in vegetable or chicken broth until tender.
-
Roast: Toss blanched beans with oil, herbs and roast at 400°F until crispy.
-
Sear: Heat oil in a pan until very hot. Add blanched beans and sear briefly to char.
-
Puree: For a smooth dip or spread, puree cooked blanched beans with olive oil and seasonings.
-
Stew: Simmer blanched beans in a tomato-based vegetable stew for a warming meal.
With so many options, blanched butter beans can be enjoyed in various dishes!
How Long Do Cooked Butter Beans Last?
Like most cooked vegetables, blanched and cooked butter beans have a limited shelf life in the refrigerator:
-
Freshly cooked beans last 3-5 days when stored in an airtight container.
-
For longer storage, freeze cooked beans in an airtight freezer bag or container for 2-3 months.
-
Label packages with the date before freezing so you know how long they’ve been stored.
-
Cooked beans lose their texture and flavor quickly. Discard if they smell bad or look slimy.
To maximize freshness, freeze any extra portions soon after cooking rather than refrigerating for too long.
Blanched Butter Beans: Final Tips
With this comprehensive guide, you’re ready to blanch butter beans perfectly every time. Here are some final tips to remember:
-
Follow the size-based blanching times – 2 minutes for small, 3 for medium and 4 for large beans.
-
Blanch in rapidly boiling salted water then immediately shock in ice bath.
-
Handle beans gently and don’t overcrowd them during blanching for even cooking.
-
Save the nutrient-rich blanching liquid for soups, sauces or gravies.
-
Cook blanched beans soon after cooling for best flavor, texture and color.
Armed with the proper technique, you can now enjoy tender, sweet and vibrantly green beans. Blanching truly makes a difference to the taste and quality of butter beans. Give it a try in your kitchen!
Blanch
Enzymes are needed to break down nutrients, but they also make vegetables lose their color and flavor, even when they are frozen. To stop the enzymatic process, vegetables should be blanched.
First, add one gallon of water to a large kettle and bring it to a rapid boil. This will blanch the lima beans. Blanch no more than 1 pound of lima beans per 1 gallon of water at a time. Place them in a basket, strainer, or cheesecloth and submerge them in the boiling water. Cover the pot and boil. Cooking times vary depending on the size of the bean. Small lima beans need 2 minutes, medium beans need 3 minutes, and large beans need 4 minutes. Put the beans in a large bowl or deep pot of ice water right away to stop the cooking and cool them down.
Once the vegetables are thoroughly chilled, remove, drain, and pat dry. Keep the beans chilled in the refrigerator if you plan to use them within a couple days.
Pack and Freeze
You can put the cold vegetables in the same container that you put them in the fridge after blanching, but it’s better to freeze or dry pack the beans first. These methods can help prevent clumping and make it easier to use small amounts from containers.
Arrange the blanched and chilled lima beans on a parchment-lined baking sheet or tray in a single layer. Freeze at -20 F or as low as your freezer will allow. Once frozen, pack in freezer containers or bags leaving 1 inch of headspace.
For nine months in a regular freezer, lima beans can stay frozen in a zip-top plastic bag. For fourteen months in a deep freezer, they can stay frozen in a vacuum-packed bag.
SPECKLED BUTTER BEANS | Garden to Freezer
FAQ
How many minutes do you blanch butter beans?
Can you freeze fresh lima beans without blanching?
How long do you boil beans to blanch them?
How long do you blanch beans for canning?
How to Blanch butter beans?
Blanch the beans in the boiling water as per the instructions above. Take the blanched butter beans out of the boiling water and put them immediately into the iced water. Once the beans are cooled, drain them and leave them to dry. You can use a salad spinner to speed this up.
How do you Blanch lima beans?
Using a large saucepan, fill this with water and place it on the stovetop to boil. When blanching butter or lima beans, do them in batches with no more than 1 pound of beans to 1 gallon of water. It’s recommended that you put butter or lima beans into a steamer basket or strainer before blanching them.
Can you freeze butter beans without blanching them?
It’s actually recommended that you don’t freeze butter or lima beans without blanching them first. The reason for this is that butter beans actually have high water content, and this prevents them from freezing well. What Is The Best Way To Use Butter Beans After They’ve Been Frozen?
How do you Blanch black beans?
Avoid overcooking the beans, as they should retain some crispness. Adjust the blanching time based on the desired level of tenderness. Blanch beans in small batches to ensure even cooking. Immediately transfer blanched beans to the ice water bath to preserve color and texture.